Node Configuration and Strategies
Node strategies allow for much more detailed and granular control over your node's behavior and its interaction with the protocol, making this feature primarily suited for advanced users. These strategies enable you to effectively manage your node by configuring settings such as the threshold for ticket aggregation, the redemption process, and more. To modify or manage these strategies, you will need to implement a configuration file.
Create and apply configuration file to your node
Please select your platform:
- Docker
- Docker compose
- Dappnode
(1) Download the example file specificaly for Docker: hoprd-docker.cfg.yaml
(2) By default, the strategy settings file is pre-configured and works well as is. However, if you have a clear understanding of the settings and their implications, you can customize them to better align with your specific needs. For detailed instructions, please refer to the section: Understanding Node Strategies.
(3) Navigate to the ".hopr-id-dufour" directory on your machine and upload the newly created configuration file there. Ensure that the configuration file is named "hoprd-docker.cfg.yaml".
(4) After uploading the configuration file, stop your current node.
(5) Once your node is stopped, add the additional parameter "--configurationFilePath '/app/hoprd-db/hoprd-docker.cfg.yaml'" to link your configuration file to your current docker command.
Docker command:
docker run --pull always -d --restart on-failure -m 2g --security-opt seccomp=unconfined --platform linux/x86_64 --log-driver json-file --log-opt max-size=100M --log-opt max-file=5 -ti -v $HOME/.hoprd-db-dufour:/app/hoprd-db --name hoprd -p 9091:9091/tcp -p 9091:9091/udp -p 3001:3001 -e RUST_LOG=info europe-west3-docker.pkg.dev/hoprassociation/docker-images/hoprd:stable --network dufour --init --api --announce --identity /app/hoprd-db/.hopr-id-dufour --data /app/hoprd-db --apiHost '0.0.0.0' --apiToken '<SECRET_TOKEN>' --password 'open-sesame-iTwnsPNg0hpagP+o6T0KOwiH9RQ0' --safeAddress <SAFE_WALLET_ADDRESS> --moduleAddress <MODULE_ADDRESS> --host <YOUR_PUBLIC_IP>:9091 --provider <CUSTOM_RPC_PROVIDER> --configurationFilePath '/app/hoprd-db/hoprd-docker.cfg.yaml'
Note: If you're running multiple nodes or have changed the default ports, make the necessary port adjustments accordingly.
(7) Paste your Docker command into the terminal window and execute it.
(8) Wait for about 5 minutes, then connect to your node via the HOPR Admin UI. Navigate to the "CONFIGURATION" page to verify that the strategy settings have been updated. If the changes aren't visible, try performing a hard refresh of the HOPR Admin UI page.
Inside the "compose" folder, navigate to the "hoprd_data" folder and make the necessary edits to the "hoprd.cfg.yaml" file:
-
address:
-
port:
-
The default port for peer-to-peer communication is 9091.
-
If you’ve set a different port using the
HOPRD_P2P_PORTenvironment variable, make sure to use that one instead. -
If you plan to run HOPRd node(s) behind NAT (Network Address Translation), such as on computers or servers at home or in an office environment, you must expose port
9091to the public so that other nodes on the HOPR network can connect to your node. For instructions, see our port forwarding guide.
-
-
provider: Use your own RPC provider, more details about custom RPC provider. If you're using a local RPC endpoint, ensure the URL includes the "http://" prefix followed by the IP address or localhost.
-
safe_address: Add your Safe wallet address, more details under safe_module.
-
module_address: Add your Module address, more details under safe_module.
Note: By default, the strategy settings file is pre-configured and works well as is. However, if you have a clear understanding of the settings and their implications, you can customize them to better align with your specific needs. For detailed instructions, please refer to the section: Understanding Node Strategies.
(1) Download the example file specifically for the Dappnode: hoprd.cfg.yaml
(2) By default, the strategy settings file is pre-configured and works well as is. However, if you have a clear understanding of the settings and their implications, you can customize them to better align with your specific needs. For detailed instructions, please refer to the section: Understanding Node Strategies.
Note: Adjust the strategies section according to your needs; no other configuration is required.
(3) After adjusting the configuration file, connect to your Dappnode dashboard, locate the "HOPR" package, and navigate to the "File Manager" tab.
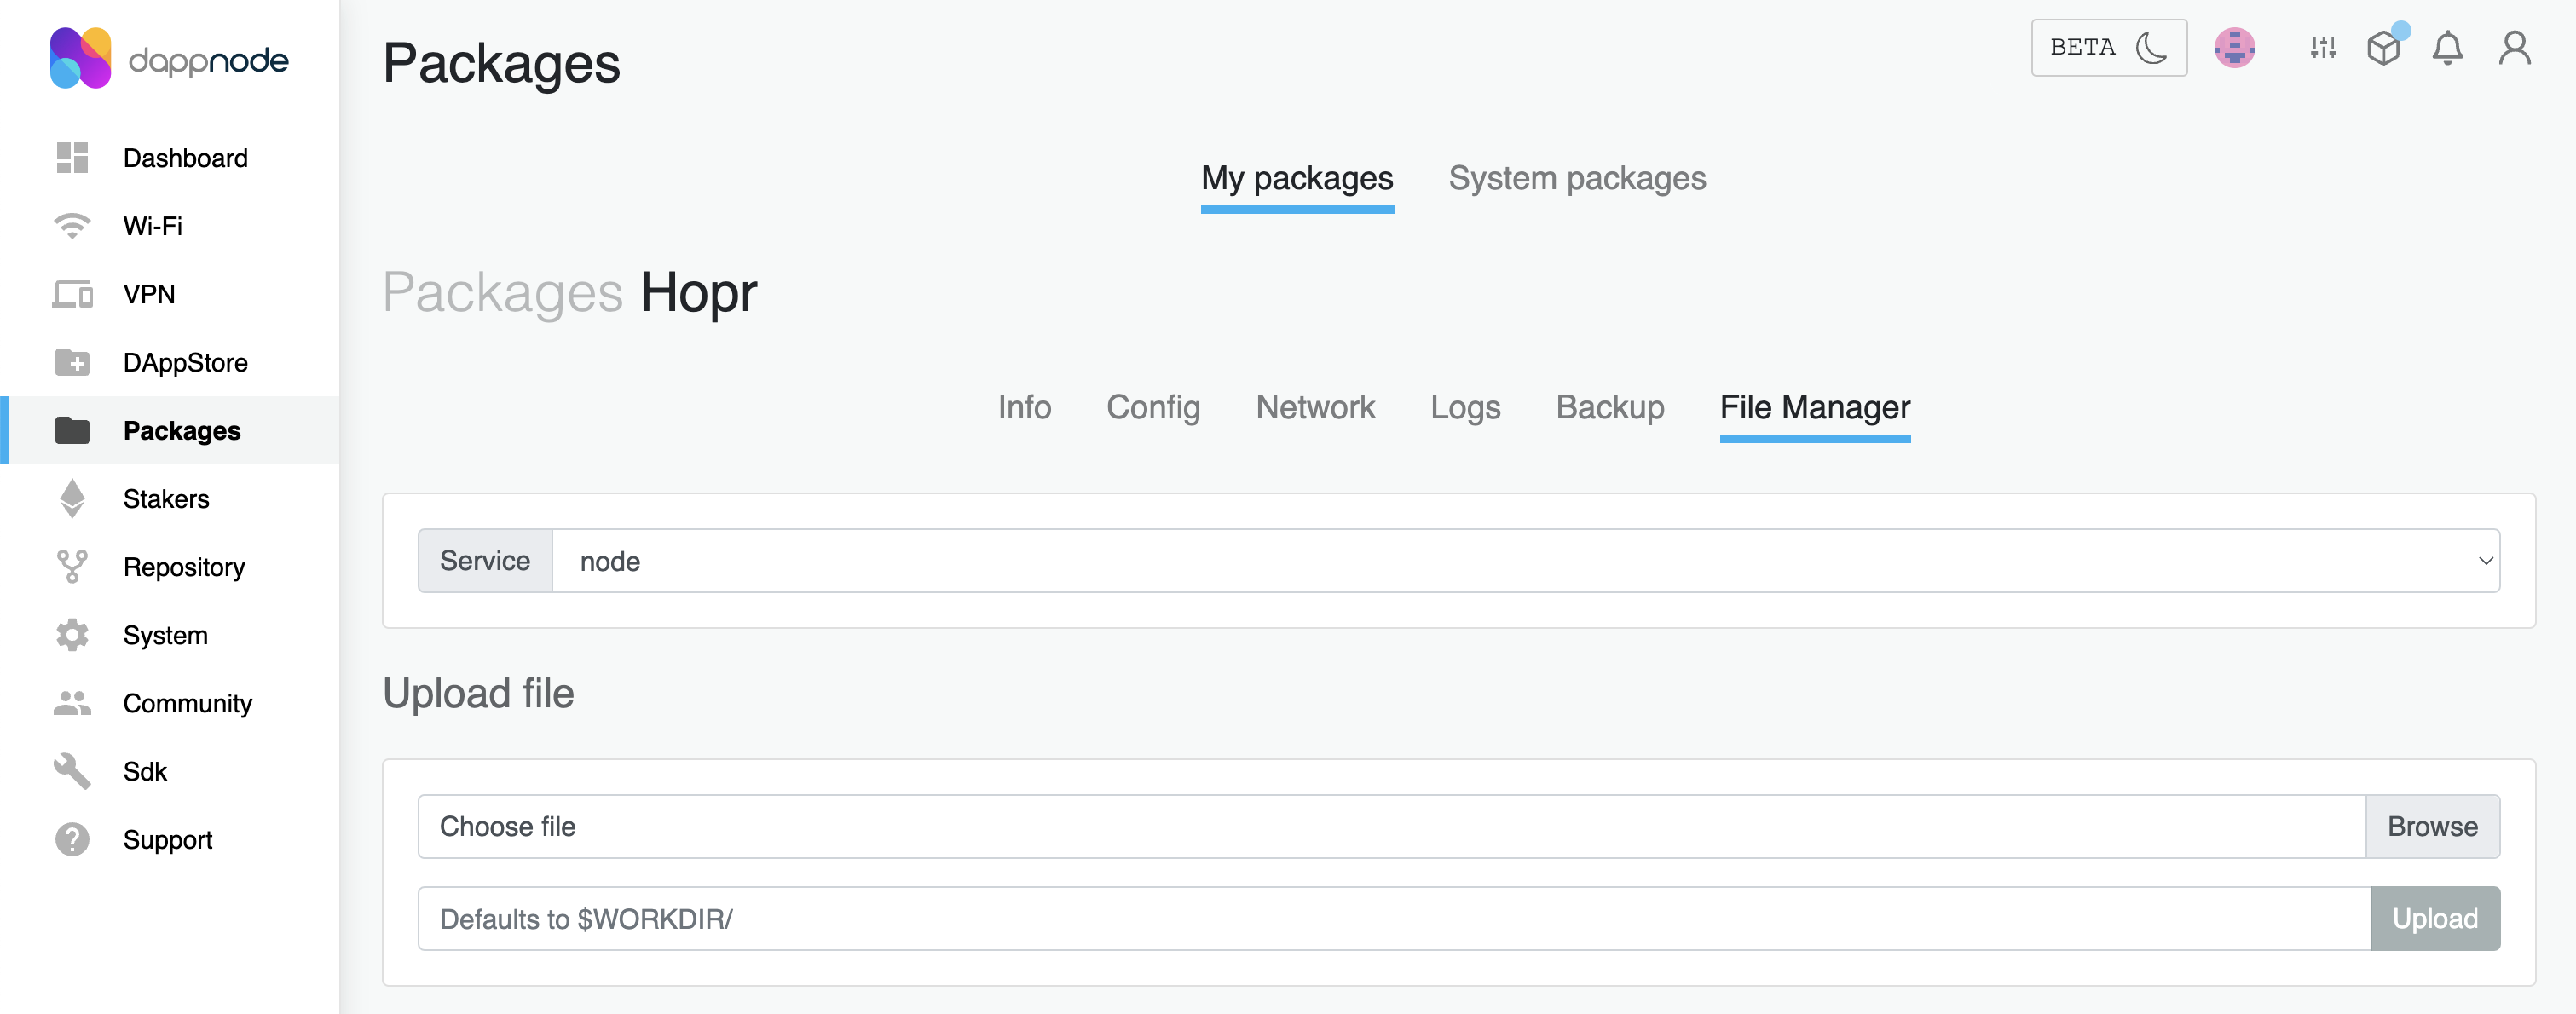
(4) In the "Upload file" section, click the "Browse" button next to the "Choose file" field, then select your newly created configuration file. Ensure that the configuration file is named "hoprd.cfg.yaml".
(5) In the text field under the "Upload file" section, enter the path /app/.
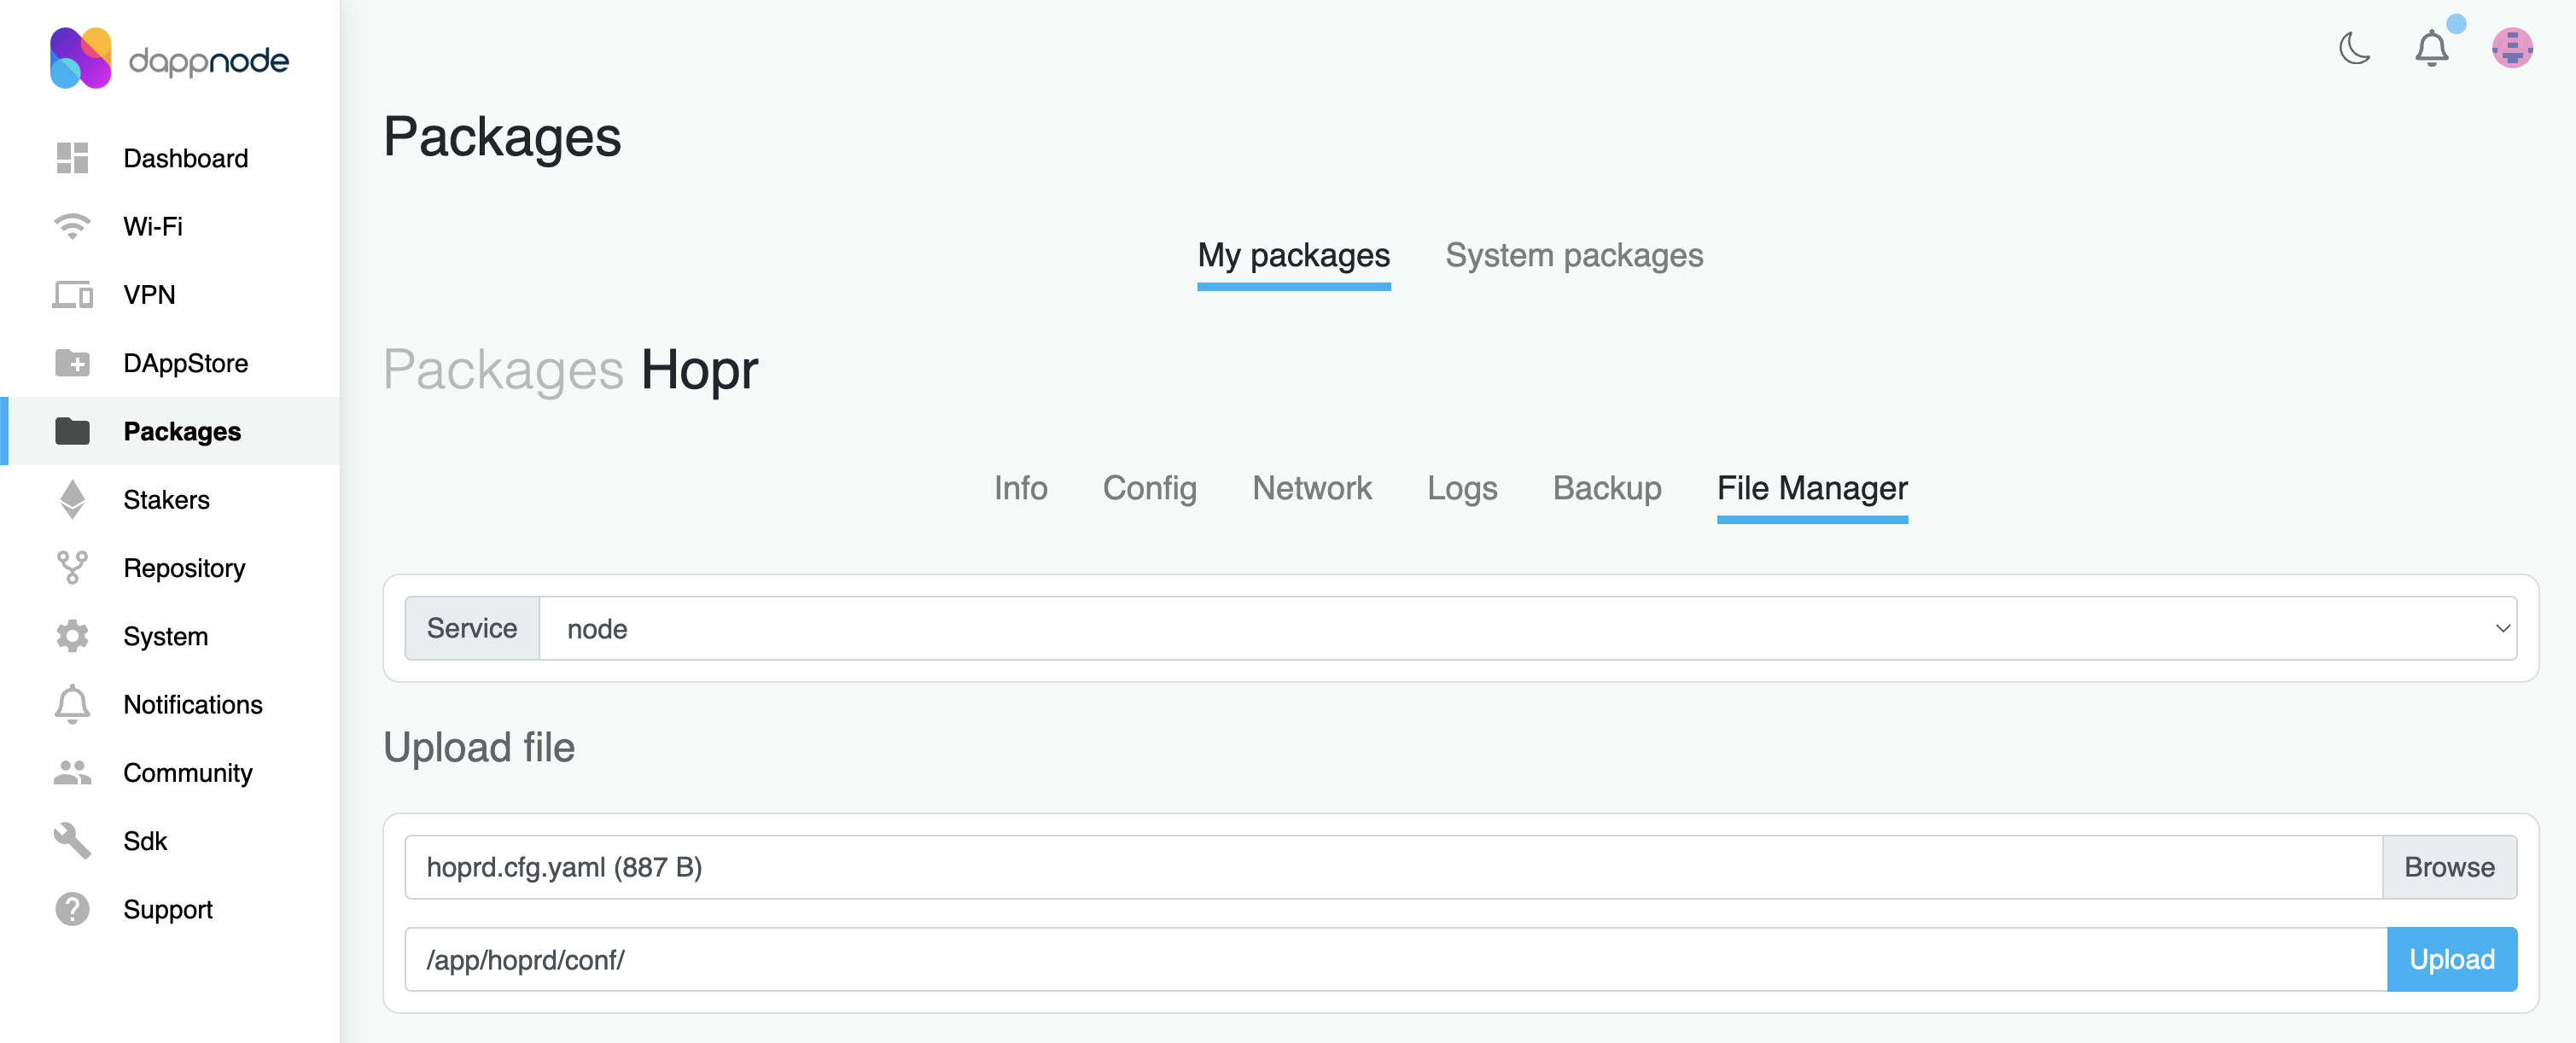
(6) Click the "Upload" button and wait for the upload to finish.
(7) Go to the "Info" page within your HOPR package, and click the "Restart" button to restart your node.
(8) Wait for about 5 minutes, then connect to your node via the HOPR Admin UI. Navigate to the "CONFIGURATION" page to verify that the strategy settings have been updated. If the changes aren't visible, try performing a hard refresh of the HOPR Admin UI page.
Understanding configuration file settings
Configuration file used by the HOPR protocol. The file is written in YAML format and contains various settings related to the operation of the HOPR node. Below is a breakdown of the example file structure and the key settings within each section:
hopr:
    host:
        address: !IPv4 1.2.3.4
        port: 9091
    db:
        data: /app/hoprd-db/db
        initialize: true
        force_initialize: false
    strategy:
        on_fail_continue: true
        allow_recursive: true
        strategies:
            - !Aggregating
            aggregation_threshold: 250
            unrealized_balance_ratio: 0.9
            aggregate_on_channel_close: true
            - !AutoRedeeming
            redeem_only_aggregated: true
            minimum_redeem_ticket_value: "2500000000000000000 HOPR"
            - !ClosureFinalizer
            max_closure_overdue: 300
    heartbeat:
        variance: 2
        interval: 60
        threshold: 40
        max_parallel_probes: 50
    network_options:
        min_delay: 1
        max_delay: 300
        quality_bad_threshold: 0.1
        quality_offline_threshold: 0.0
        quality_step: 0.1
        quality_avg_window_size: 25
        ignore_timeframe: 120
        backoff_exponent: 1.5
        backoff_min: 2.0
        backoff_max: 300.0
    protocol:
        outgoing_ticket_winning_prob: 1
        heartbeat:
            timeout: 6
    chain:
        provider: https://gnosis-rpc.publicnode.com
        announce: true
        check_unrealized_balance: true
        network: dufour
    safe_module:
        safe_transaction_service_provider: https://safe-transaction.prod.hoprtech.net
    transport:
        announce_local_addresses: false
        prefer_local_addresses: false
identity:
    file: /app/hoprd-db/.hopr-identity
    password: #For example: 'rjVFCcqnTNJSh_8Z3P94@M2bep&Dk#UHX$agWf'
api:
    enable: true
    host:
        address: !IPv4 0.0.0.0
        port: 3001
inbox:
    capacity: 512
    max_age: 900
    excluded_tags:
        - 0
Note: The latest version of the default configuration file for all supported platforms is available in the HOPR GitHub repository.
hopr.host
Specifies host to listen on for the HOPR P2P protocol.
host:
    address: !IPv4 1.2.3.4
    port: 9091
| Settings | Default value | Description |
|---|---|---|
host.address | The external IP address of the machine where the node is running. Make sure to include !IPv4 before entering the external IP address. Refer to the FAQ guide to determine if your IP address meets the requirements. | |
host.port | 9091 | Listening on TCP & UDP ports. |
hopr.db
Specifies details for the database used by the HOPR node.
db:
    data: /app/hoprd-db
    initialize: true
    force_initialize: false
| Settings | Description |
|---|---|
db.data | Specifies the path to the database directory. For Docker users, the path is "/app/hoprd-db". For Dappnode users, the path is "/app/hoprd-db/db". |
db.initialize | Defaults to "true", meaning the database will be created if it doesn't already exist. If set to "false" and the database is missing, the node will not start. |
db.force_initialize | Defaults to "false". If set to "true", any existing database in the specified directory will be overwritten and re-initialized. |
hopr.heartbeat�
Configuration of the heartbeat mechanism for probing other nodes in the HOPR network.
heartbeat:
    max_parallel_probes: 50
    interval: 60
    threshold: 40
    variance: 2
| Settings | Description |
|---|---|
heartbeat.max_parallel_probes | The maximum number of concurrent heartbeat probes. |
heartbeat.interval | Interval in which the heartbeat is triggered in seconds. |
heartbeat.threshold | The time interval for which to consider peer heartbeat renewal in seconds. |
heartbeat.variance | Round-to-round variance to complicate network sync in seconds. |
hopr.network_options
Defines how the quality of nodes in the HOPR network is evaluated.
network_options:
    min_delay: 1
    max_delay: 300
    quality_bad_threshold: 0.1
    quality_offline_threshold: 0.0
    quality_step: 0.1
    quality_avg_window_size: 25
    ignore_timeframe: 600
    backoff_exponent: 1.5
    backoff_min: 2.0
    backoff_max: 300.0
| Settings | Description |
|---|---|
network_options.min_delay | Minimum delay (seconds) will be multiplied by backoff, it will be half the actual minimum value. |
network_options.max_delay | Maximum delay in seconds. |
network_options.quality_bad_threshold | Quality threshold since a node is considered having "bad" connectivity. |
network_options.quality_offline_threshold | Quality threshold from which a node is considered available enough to be used. |
network_options.quality_step | Quality step on failed/successful ping probe. |
network_options.quality_avg_window_size | Size of the quality moving average window. |
network_options.ignore_timeframe | Indicates how long (in seconds) a node is considered "ignored". |
network_options.backoff_exponent | Backoff exponent when probing nodes. |
network_options.backoff_min | Minimum backoff (in seconds) when probing nodes. |
network_options.backoff_max | Maximum backoff (in seconds) when probing nodes. |
hopr.protocol
Configuration of various HOPR sub-protocols.
protocol:
    outgoing_ticket_winning_prob: 1
    heartbeat:
        timeout: 7
| Settings | Description |
|---|---|
protocol.outgoing_ticket_winning_prob | Outgoing ticket winning probability. Default value is 1. |
protocol.heartbeat.timeout | Heartbeat sub-protocol configuration, with the timeout specified in seconds. |
hopr.chain
Blockchain specific configuration.
chain:
    provider: https://rpc.gnosischain.com
    announce: true
    network: dufour
    check_unrealized_balance: true
| Settings | Description |
|---|---|
chain.provider | RPC provider URL to use. You should add your own provider for better performance. Additional information can be found here. If you're using a local RPC endpoint, ensure the URL includes the "http://" prefix followed by the IP address or localhost. |
chain.announce | Indicates whether the node should announce itself on-chain. |
chain.network | Which blockchain network should be used by the node. |
chain.check_unrealized_balance | Indicates whether the node should check channel unrealized balance when validating acknowledged tickets. We are strongly recommended to leave this enabled. |
hopr.safe_module
Configuration of node's Safe.
safe_module:
    safe_transaction_service_provider: https://safe-transaction.prod.hoprtech.net
    safe_address: '0x0000000000000000000000000000000000000000'
    module_address: '0x0000000000000000000000000000000000000000'
| Settings | Description |
|---|---|
safe_module.safe_transaction_service_provider | The node's safe transaction provider, such as https://safe-transaction.prod.hoprtech.net/ |
safe_module.safe_address | Node's safe address, this must be provided by the user. |
safe_module.module_address | Node's module address, this must be provided by the user. |
hopr.transport
Transport related configuration.
transport:
    announce_local_addresses: false
    prefer_local_addresses: false
| Settings | Description |
|---|---|
transport.announce_local_addresses | Determines whether local addresses should be announced on-chain. Set to true for testing purposes only. |
transport.prefer_local_addresses | Determines whether local addresses should be preferred when connecting to a peer. Set to true for testing purposes only. |
identity
The main node's identity, defining it's on-chain and off-chain keys.
identity:
    file: /app/hoprd-db/.hopr-id-dufour
    password: 'rjVFCcqnTNJSh_8Z3P94@M2bep&Dk#UHX$agWf'
    private_key: ''
| Settings | Description |
|---|---|
identity.file | The path to the identity file. If no file exists at the specified location, a new one will be created. |
identity.password | The database password used to access the identity file. For guidance on creating a secure database password, please refer to this guide. |
identity.private_key | A private key that the node can use instead of an identity file. If provided, this will override the identity file. |
api
The configuration of the REST API.
api:
    enable: true
    auth: !Token YOUR_SECURITY_TOKEN
    host:
        address: !IPv4 0.0.0.0
        port: 3001
| Settings | Description |
|---|---|
api.enable | Indicates whether the REST API should be enabled. Possible values: "true" or "false". |
api.auth | Authentication of the REST API. When using custom secret token, it is necessary to use "!Token" before secret token. Example: "!Token My#S3cur1ty#Token". For guidance on creating a secret token, please refer to this guide. |
api.host | Defines the local interface host where the API should listen. |
api.host.address | The address of the local interface to listen on. |
api.host.port | The REST API TCP lsiten port. |
inbox
HOPRd Message Inbox configuration
inbox:
    capacity: 512
    max_age: 900
    excluded_tags: [ 0 ]
| Settings | Description |
|---|---|
inbox.capacity | Capacity of messages in the Inbox, per message tag. |
inbox.max_age | The maximumm age of a message in the inbox in seconds. |
inbox.excluded_tags | Tags which are not allowed into the inbox. |
Understanding node strategies
Node strategies should be in the configuration file!
hopr.strategy
In this section, you can configure various strategies for your node, enabling you to optimize its performance and behavior to meet your specific requirements. Explore the available strategies below:
strategy:
    on_fail_continue: true
    allow_recursive: false
    strategies:

        - !Promiscuous
        max_channels: 10
        network_quality_threshold: 0.5
        new_channel_stake: "1000000000000000000 HOPR"
        minimum_node_balance: "1000000000000000000 HOPR"
        min_network_size_samples: 20
        enforce_max_channels: true
        minimum_peer_version: ">=2.1.0"

        - !AutoFunding
        funding_amount: "1000000000000000000 HOPR"
        min_stake_threshold: "1000000000000000000 HOPR"

        - !Aggregating
        aggregation_threshold: 1000
        unrealized_balance_ratio: 0.9
        aggregate_on_channel_close: true

        - !AutoRedeeming
        redeem_only_aggregated: true
        minimum_redeem_ticket_value: "2500000000000000000 HOPR"

        - !Passive

        - !ClosureFinalizer
        max_closure_overdue: 300
HOPR token amounts are measured with 18 decimal places. When setting a custom value, be sure to add 18 zeros to the integer value. For example, 1 HOPR Token should be entered as 1000000000000000000 HOPR.
strategy.on_fail_continue
When set to "true", the system will continue executing subsequent strategies even if previous ones fail.
strategy.allow_recursive
Allows nesting strategies through !MultiStrategy.
strategy.strategies
Contains a sequence of strategies to execute in the specified order. If left empty, the node will default to using only the "!Passive" strategy.
strategy.strategies: !Promiscuous
Defines a promiscuous strategy that automatically manages HOPR channels based on certain measured qualities of other HOPR nodes in the network.
| Settings | Description |
|---|---|
max_channels | The maximum number of opened channels the strategy should maintain. |
network_quality_threshold | A quality threshold between 0 and 1 used to determine whether the strategy should open a channel with the peer. Only nodes above this threshold will be chosen for channels. |
new_channel_stake | The stake of tokens that should be allocated to a channel opened by the strategy. |
minimum_node_balance | The minimum token balance of the node. When reached, the strategy will not open any new channels. |
min_network_size_samples | The minimum number of network quality samples before the strategy can start making decisions. |
enforce_max_channels | When set to "true", the strategy will forcefully close channels, even with peers that exceed the "network_quality_threshold", if the total number of opened outgoing channels (whether opened by the strategy or manually) surpasses the maximum limit. |
minimum_peer_version | Specifies minimum node version of the peer the strategy should open a channel to. Accepts semver syntax. |
strategy.strategies: !AutoFunding
Automatically funds channels with a specified amount if the stake on any channel falls below the defined threshold.
| Settings | Description |
|---|---|
funding_amount | The amount to automatically fund a channel when its stake drops below the threshold. |
min_stake_threshold | The minimum stake value at which the channel will be automatically funded. |
strategy.strategies: !Aggregating
Automatically aggregates tickets when the number of unredeemed tickets in a channel exceeds the specified threshold.
| Settings | Default value | Description |
|---|---|---|
aggregation_threshold | 100 | Number of acknowledged winning tickets in a channel that triggers the ticket aggregation in that channel when exceeded. |
unrealized_balance_ratio | 0.9 | The percentage of unredeemed ticket value in a channel that, when exceeded, triggers ticket aggregation for that channel. |
aggregation_timeout | Maximum time to wait for the ticket aggregation to complete. | |
aggregate_on_channel_close | true | When set to "true", the strategy will automatically aggregate tickets in channels that have transitioned to the "PendingToClose" state. |
strategy.strategies: !AutoRedeeming
Automatically aggregates tickets when the number of unredeemed tickets in a channel exceeds the specified threshold.
| Settings | Default value | Description |
|---|---|---|
redeem_only_aggregated | true | When set to "true", the strategy will redeem only aggregated tickets. |
minimum_redeem_ticket_value | 30000000000000000000 HOPR | The strategy will only redeem an acknowledged winning ticket if its value is at least this specified amount of HOPR. If the value is set to 0, the strategy will redeem tickets regardless of their value. |
strategy.strategies: !Passive
A strategy that does nothing. This is equivalent to leaving the strategies array empty.
strategy.strategiesc: !ClosureFinalizer
Monitors channels in the "PendingToClose" state whose channel closure grace period has elapsed, and issues a channel close transaction on these channels to finalize the closure.
| Settings | Default value | Description |
|---|---|---|
max_closure_overdue | 300 | It won't attempt to finalize the closure of channels that have been overdue for more than provided amount of seconds. |