Using an Avado Node
To set up your AVADO Node, follow the instructions that came with the box. If you have a HOPR PC Node, it will come with HOPR pre-installed. All you have to do is download the HOPR client to start interacting with your node!
Please withdraw all your funds and delete the old package before installing a new one.
Installing the HOPR Client
While connected to your AVADO's network or via a VPN, go to the following link. Just click the install button and wait until the download completes.
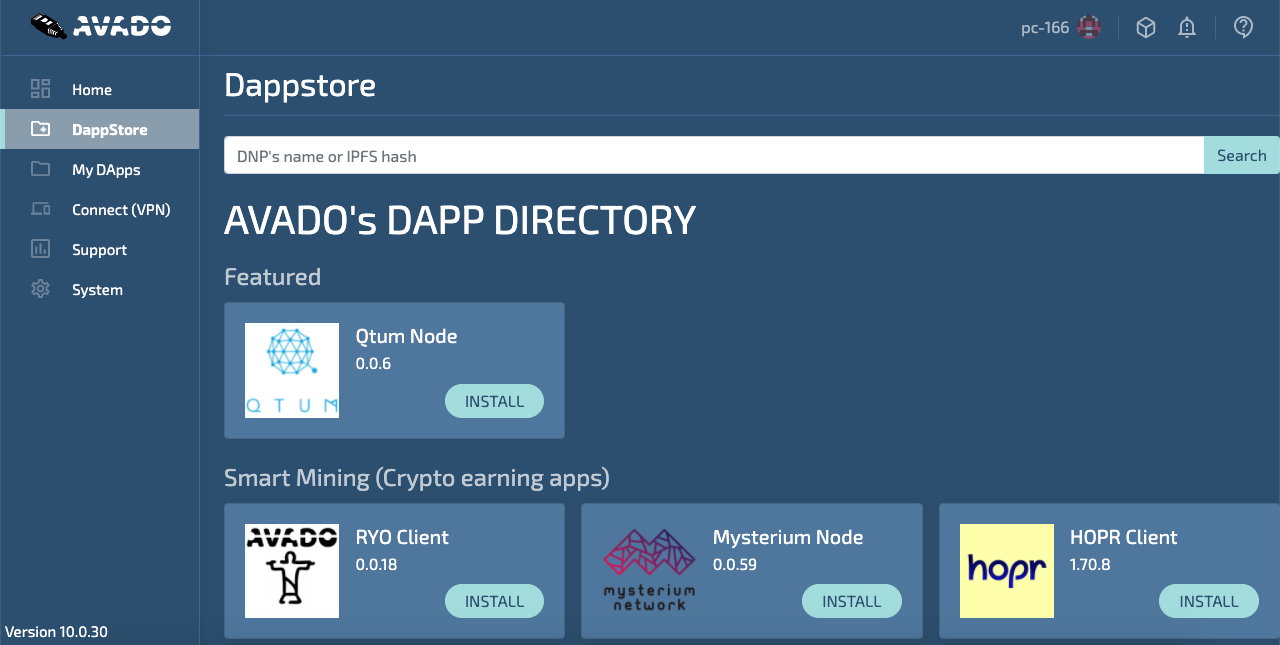
If you are unable to use the link above, search for this hash in the AVADO DappStore:
/ipfs/Qmbuw5DUdK1USoAXGxGj7rEeXQ2Qd44ZpNJcwSSDU4H8cg
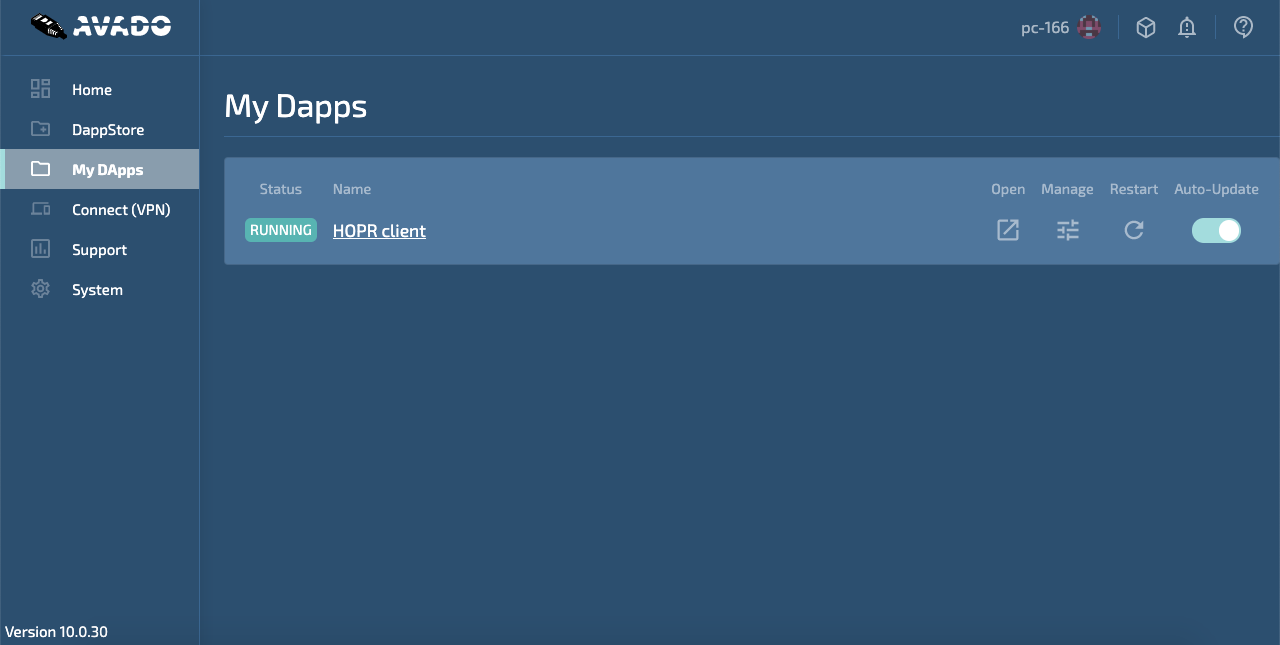
After you have installed the HOPR package, you can find the HOPR client in my DApps.
Your security token is set to !5qxc9Lp1BE7IFQ-nrtttU. You will need this to access the hopr-admin.
If you are in the process of registering your node on the network registry, please complete the process here before continuing.
Otherwise, the installation process is complete! You can proceed to our hopr-admin tutorial.
Alternative method: using your identity file
If you have previously installed a node and have the identity file downloaded, you can use it to restore your old node.
Note: The backup you downloaded will be a zipped folder. If you haven't already, you need to extract this folder to find the identity file.
(1) Locate your HOPR package and click on the manage icon. From there, scroll down to the file manager.
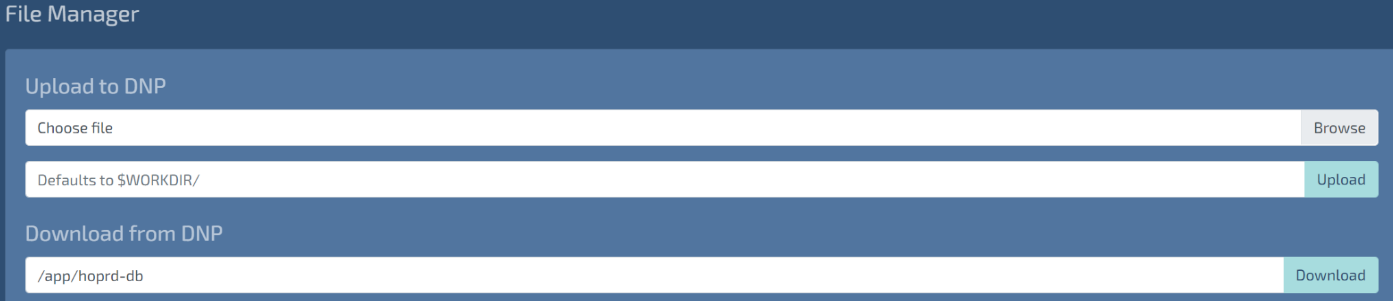
(2) Click on Browse button to the right of the first text field under Upload to DNP.
(3) Open your identity file when prompted.
(4) In the second text field, paste /app/hoprd-db, then click Upload to the right of the text field.
Collecting Logs
If your node crashes, you will want to collect the logs and pass them on to our ambassadors on telegram or create an issue on GitHub.
To collect the logs:
(1) Locate your HOPR package and click on the manage icon.

(2) Scroll to the bottom to find your logs.
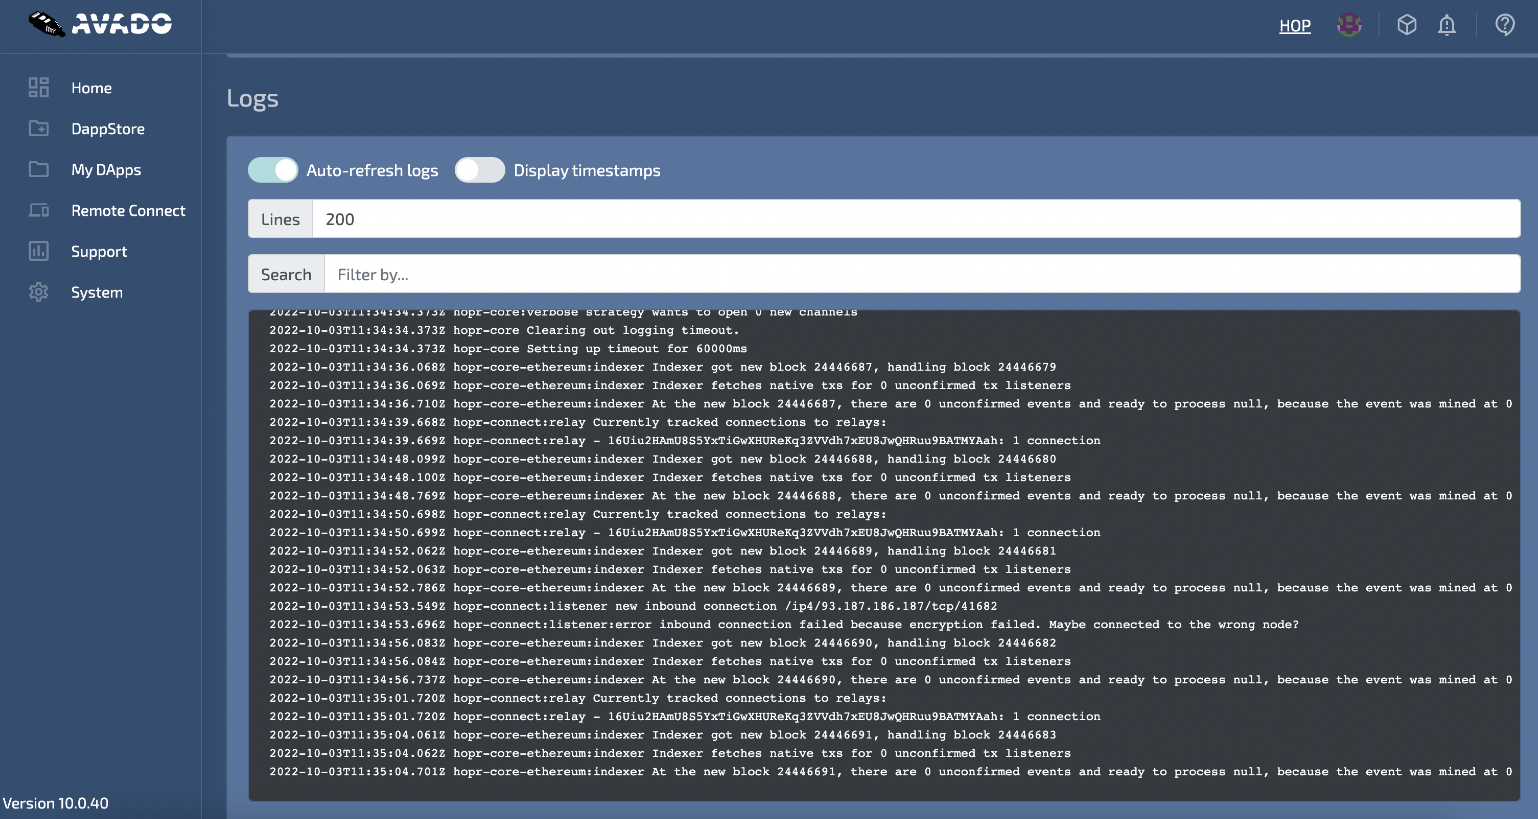
(3) Enter 1500 into the Lines text field instead of 200 and turn auto-refresh logs off. Now you should be able to copy your logs easily.
With your copied loges either:
- Save them in a .txt file and send them to an ambassador on our telegram for assistance.
- Or, create an issue using our bug template on GitHub.
Using a Custom RPC Endpoint
You can set your own RPC endpoint for HOPR to use. Ideally, you would install an ETH client (Gnosis Chain) on your Avado and use its local provider. A local provider helps increase decentralisation and is generally good practice, but you can also use any RPC provider of your choice.
Finding your local endpoint
If you have already installed an ETH client (Gnosis Chain), you can find its RPC endpoint on the client's settings page.

The image above shows the RPC for the GETH client: http://ethchain-geth.my.ava.do:8545. Your endpoint will be different depending on the client you have installed. Otherwise, you can use any non-local RPC provider such as ankr.
Changing your RPC endpoint
To change your RPC endpoint:
(1) Locate your HOPR package and click on the manage icon.
(2) Under Environment Variables, you should find the variable HOPRD_PROVIDER along with an editable text field to its right.

(3) The default endpoint is https://provider-proxy.hoprnet.workers.dev/dai_mainnet. Replace this with your own, e.g. http://ethchain-geth.my.ava.do:8545 in my case.
(4) Click 'Update environment variables' and wait for your node to restart.
All done! Your Avado node will now use your specified RPC endpoint.