Using Dappnode
Do not start installing a HOPR node without a HOPR Safe. To create a HOPR Safe and run a node please follow the onboarding process here.
1. Install the HOPR Package
While connected to your Dappnode's network or via a VPN:
(1) Open the DAppStore using the sidebar to the left.
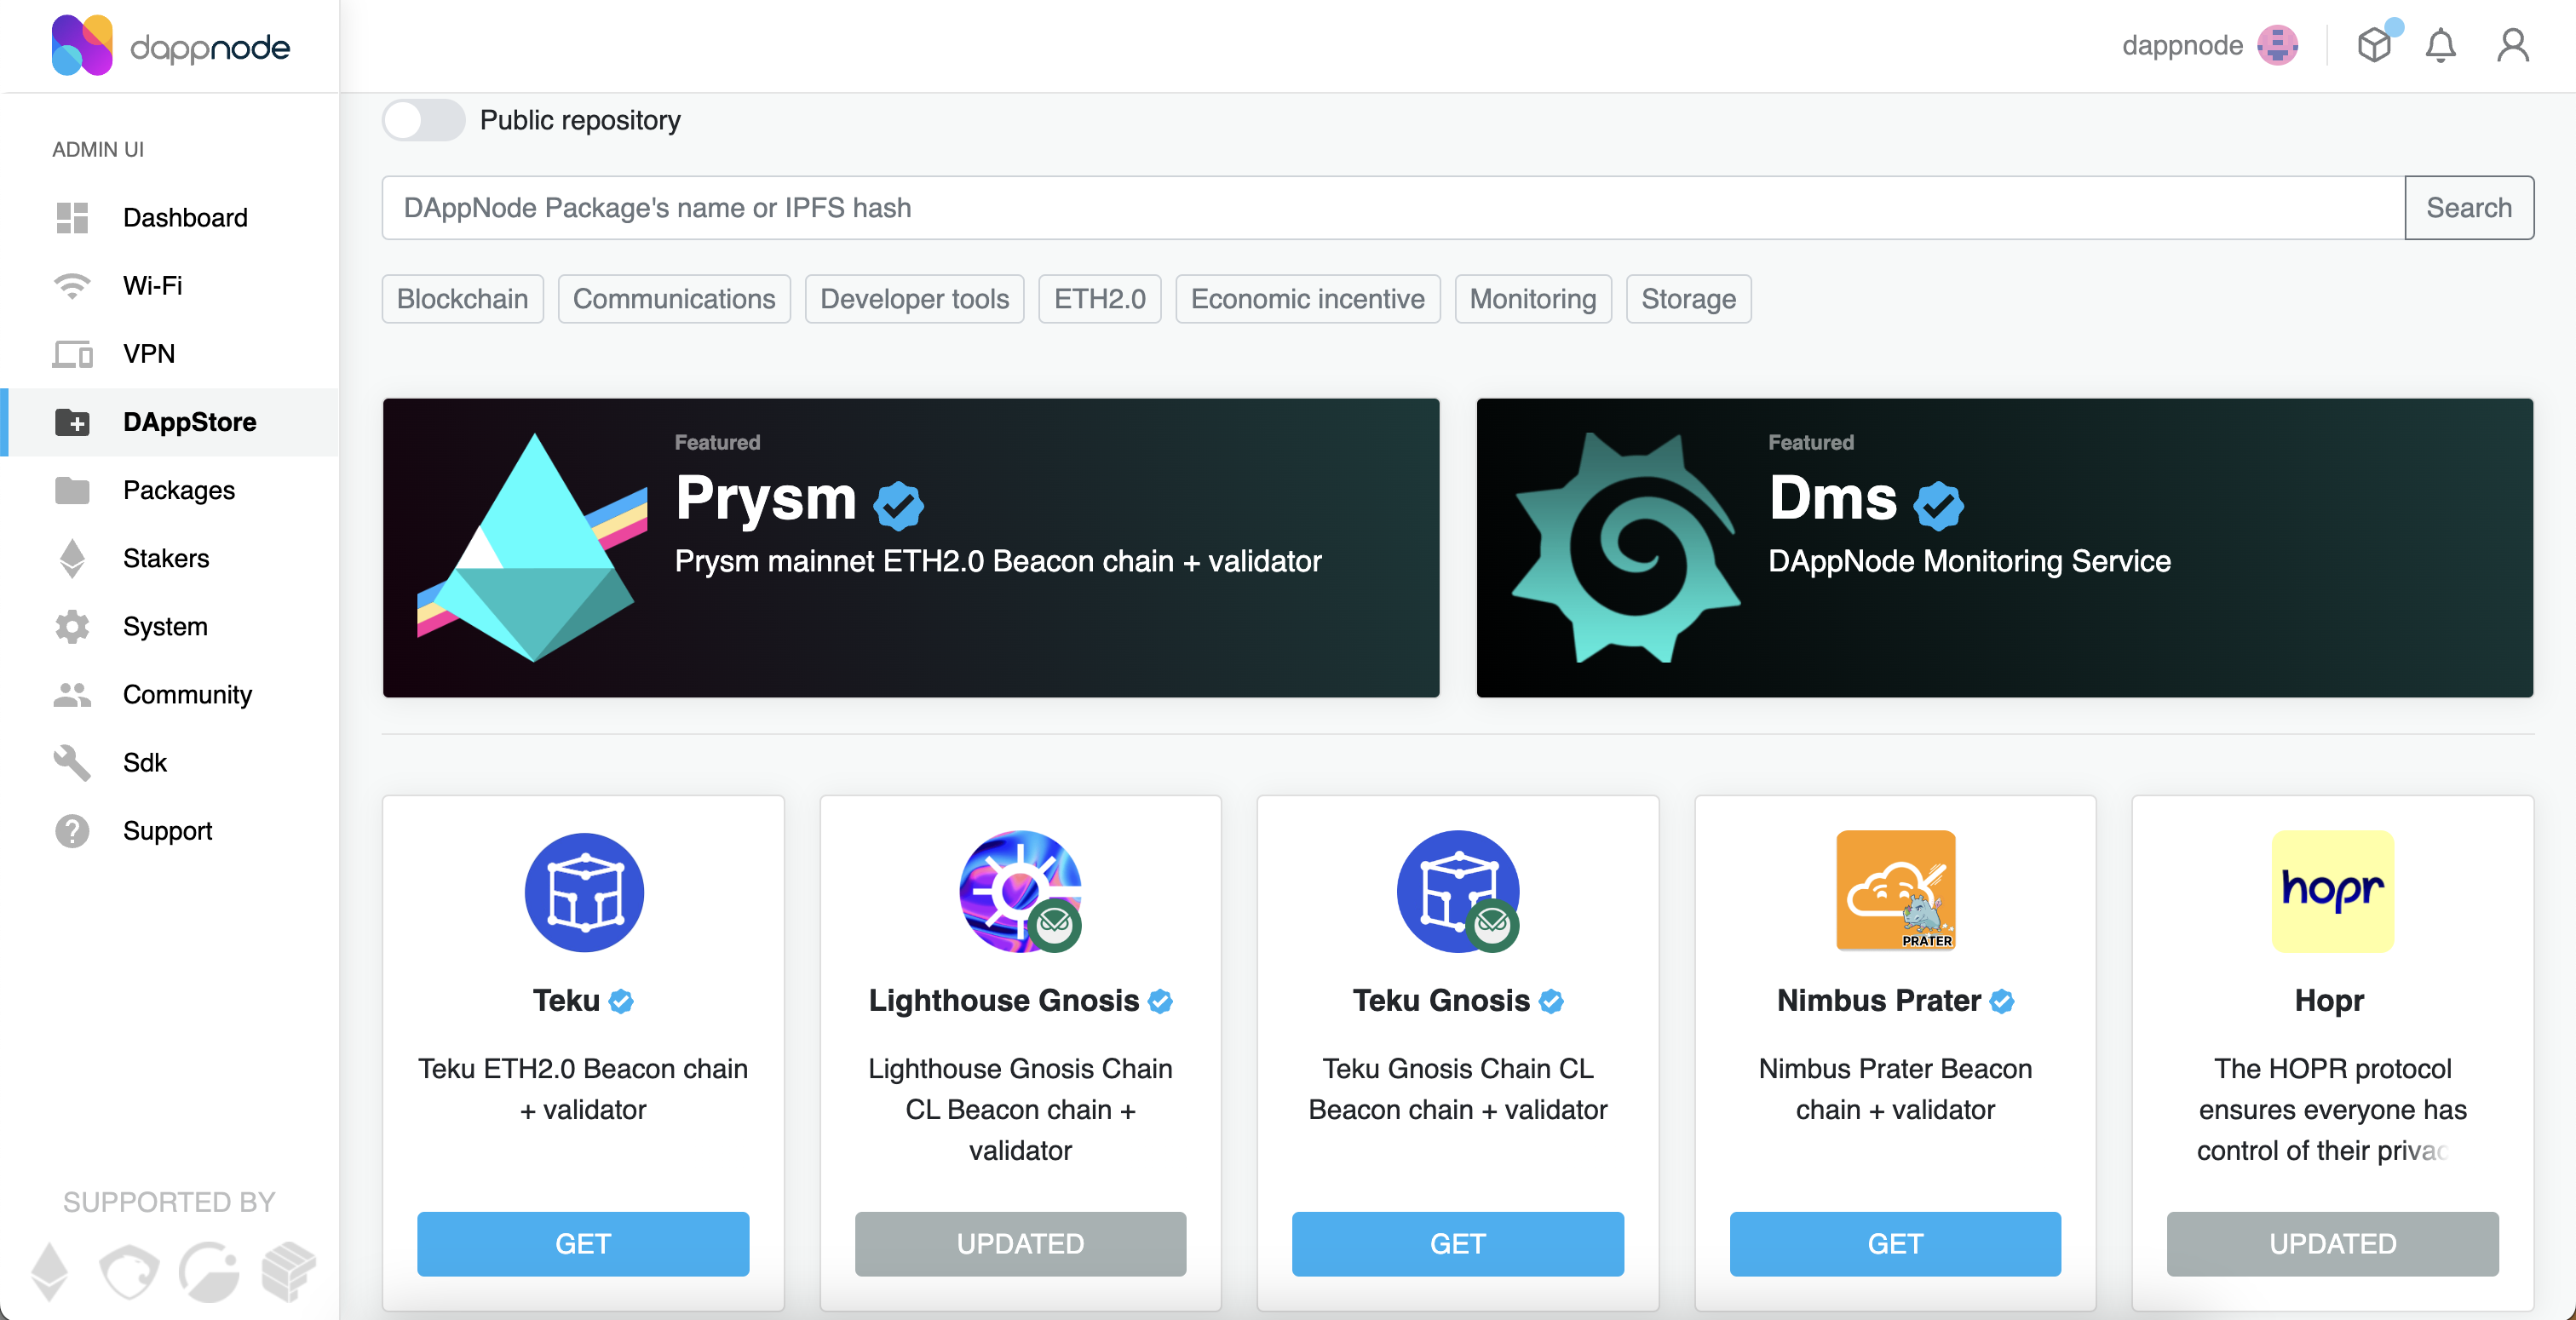
(2) Use the hash below and search in the DAppStore search bar. Alternatively, you can follow this link to go directly to the HOPR package.
/ipfs/Qma7gtjFXACFQVHfGh34sRXavZ4i3HHRqhwewQy9zCzj9A
(3) You should see the latest version of the HOPR client in the listed dApps. Click the Get button under the HOPR package, this should take you to a new interface.
(4) Then, toggle the Bypass only signed safe restriction on the left, and click install; this will open the setup wizard.
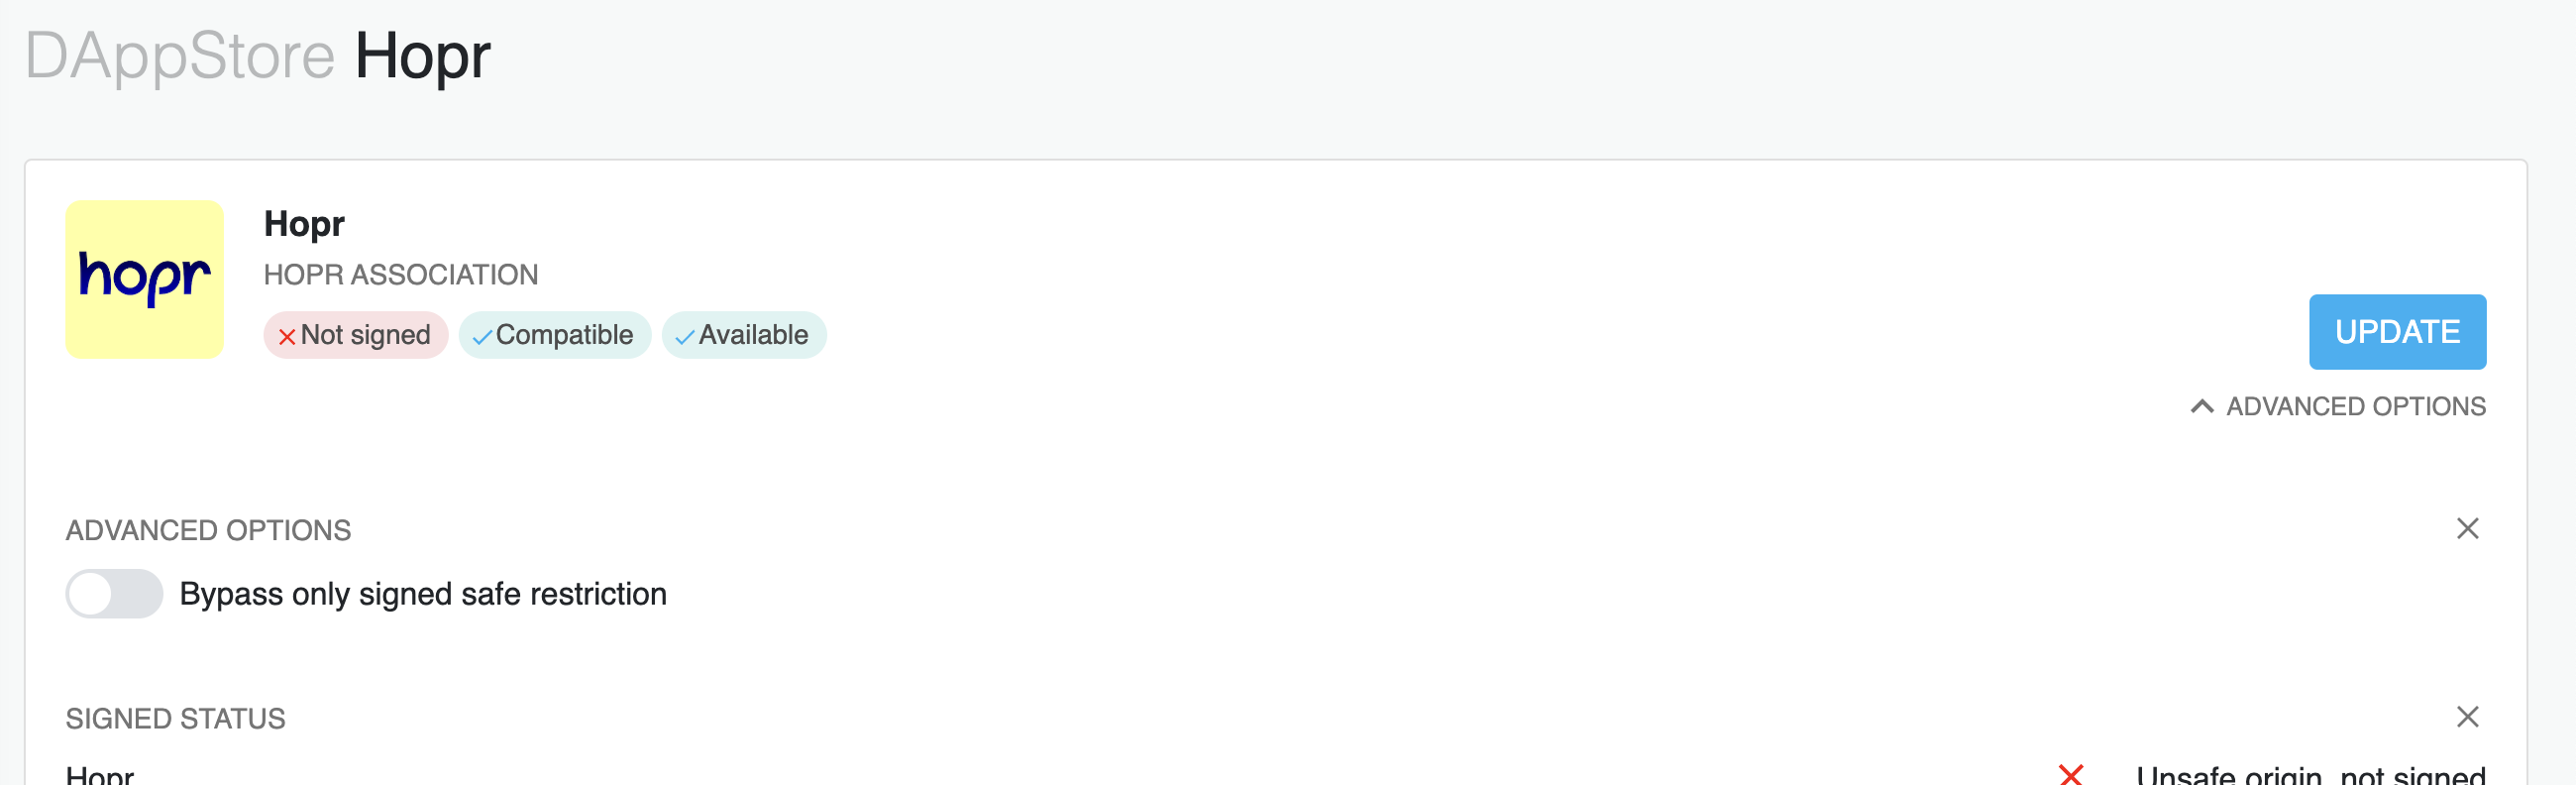
Note: Alternatively, click update if you have already installed the HOPR client.
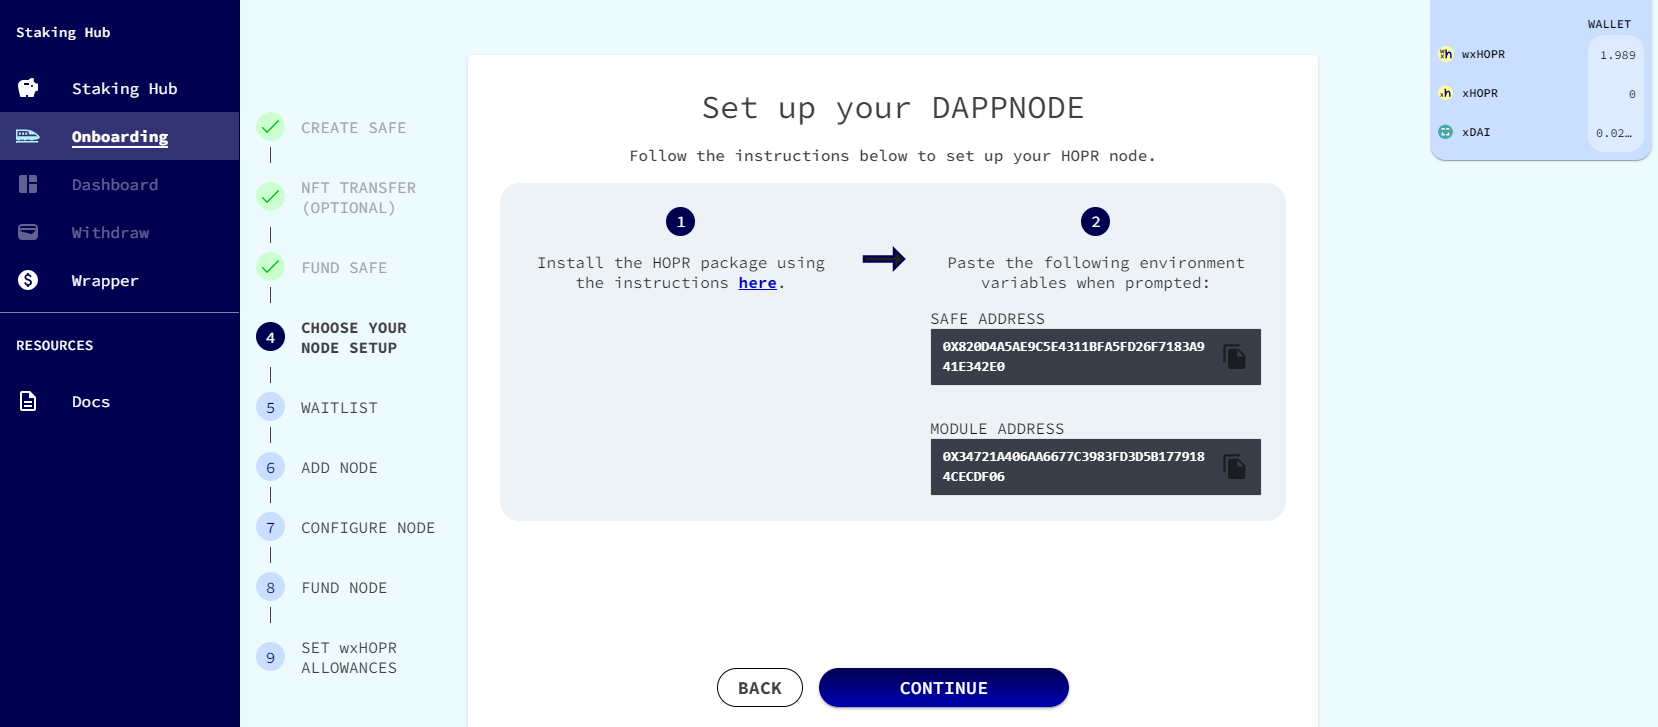
(5) Copy your Safe address and Module address from your Staking Hub onboarding process.
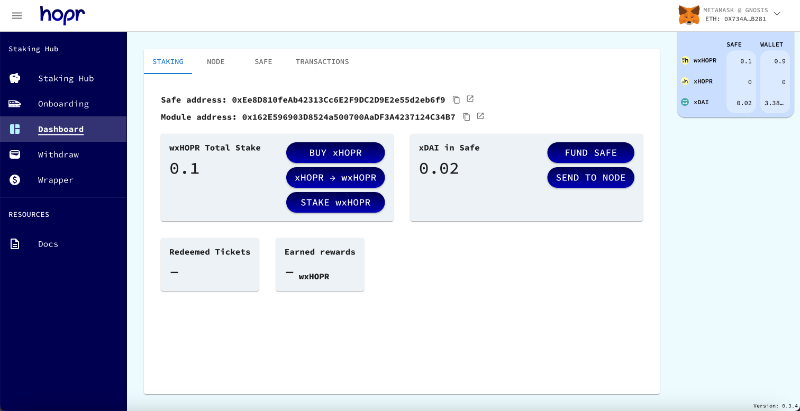
Note: If you are re-installing an existing node and not onboarding, you can find the addresses within the dashboard.
With the setup wizard open, in parallel, go to the Staking Hub Dashboard.
From the dashboard, note your:
- Safe address
- Module address
(6) Find your home network's public IP address, you will need it. If you don't know how to find your IP address, follow the instructions here.
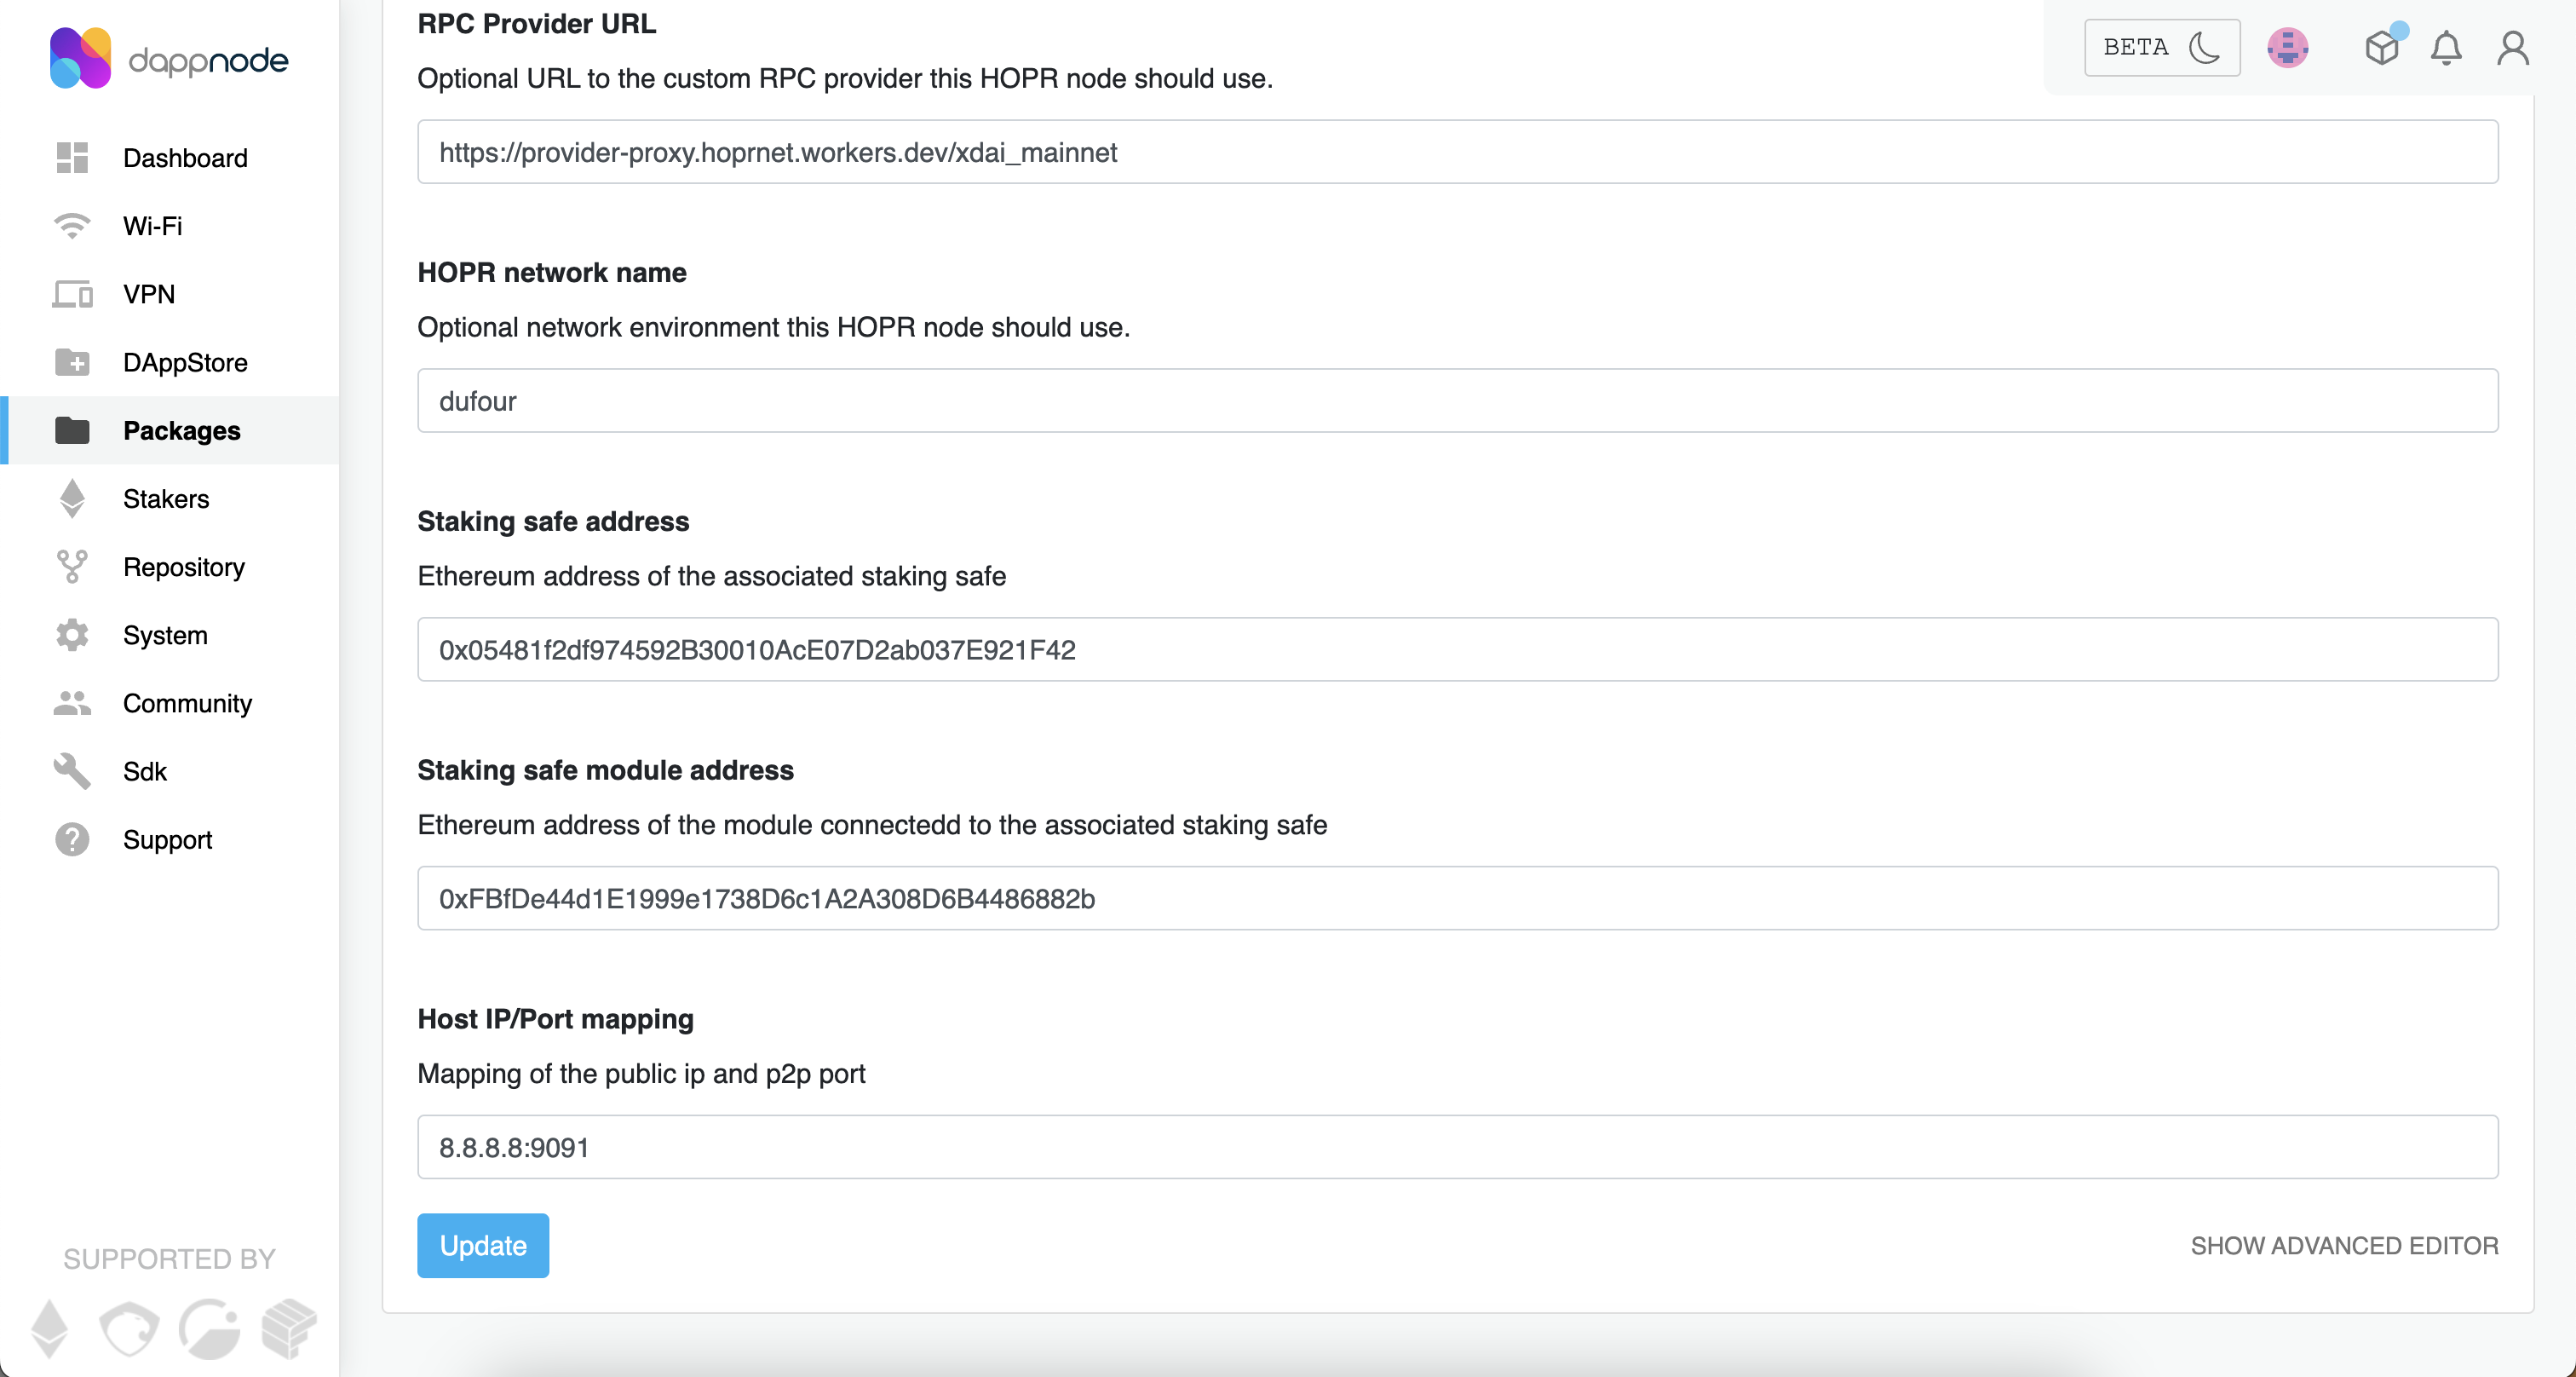
(7) Return to the setup wizard and fill out the Safe address, Module address, Public IP and RPC provider fields accordingly (the bottom three).
- Add your Safe address under the field:
Staking safe address - Add your Module address under the field:
Staking safe module address - Add your Public IP suffixed with the port
:9091under the field:Host IP/Port mapping - Add custom RPC provider under the field:
RPC Provider URL(to obtain the RPC provider URL, you can find guidelines here)
Note: Make sure to add the port suffix :9091 at the end of your IP address as shown in the image below.
Note: For version 2.00 and newer (Dufour), you must install a new node, so you cannot restore an old one.
(8) Now accept the disclaimer, and your HOPR package should start installing immediately. We recommend you enable auto-updates when prompted.
(9) Once installed, go to Packages and click on HOPR. Once inside the HOPR package, click on UI to enter the HOPR Admin UI.
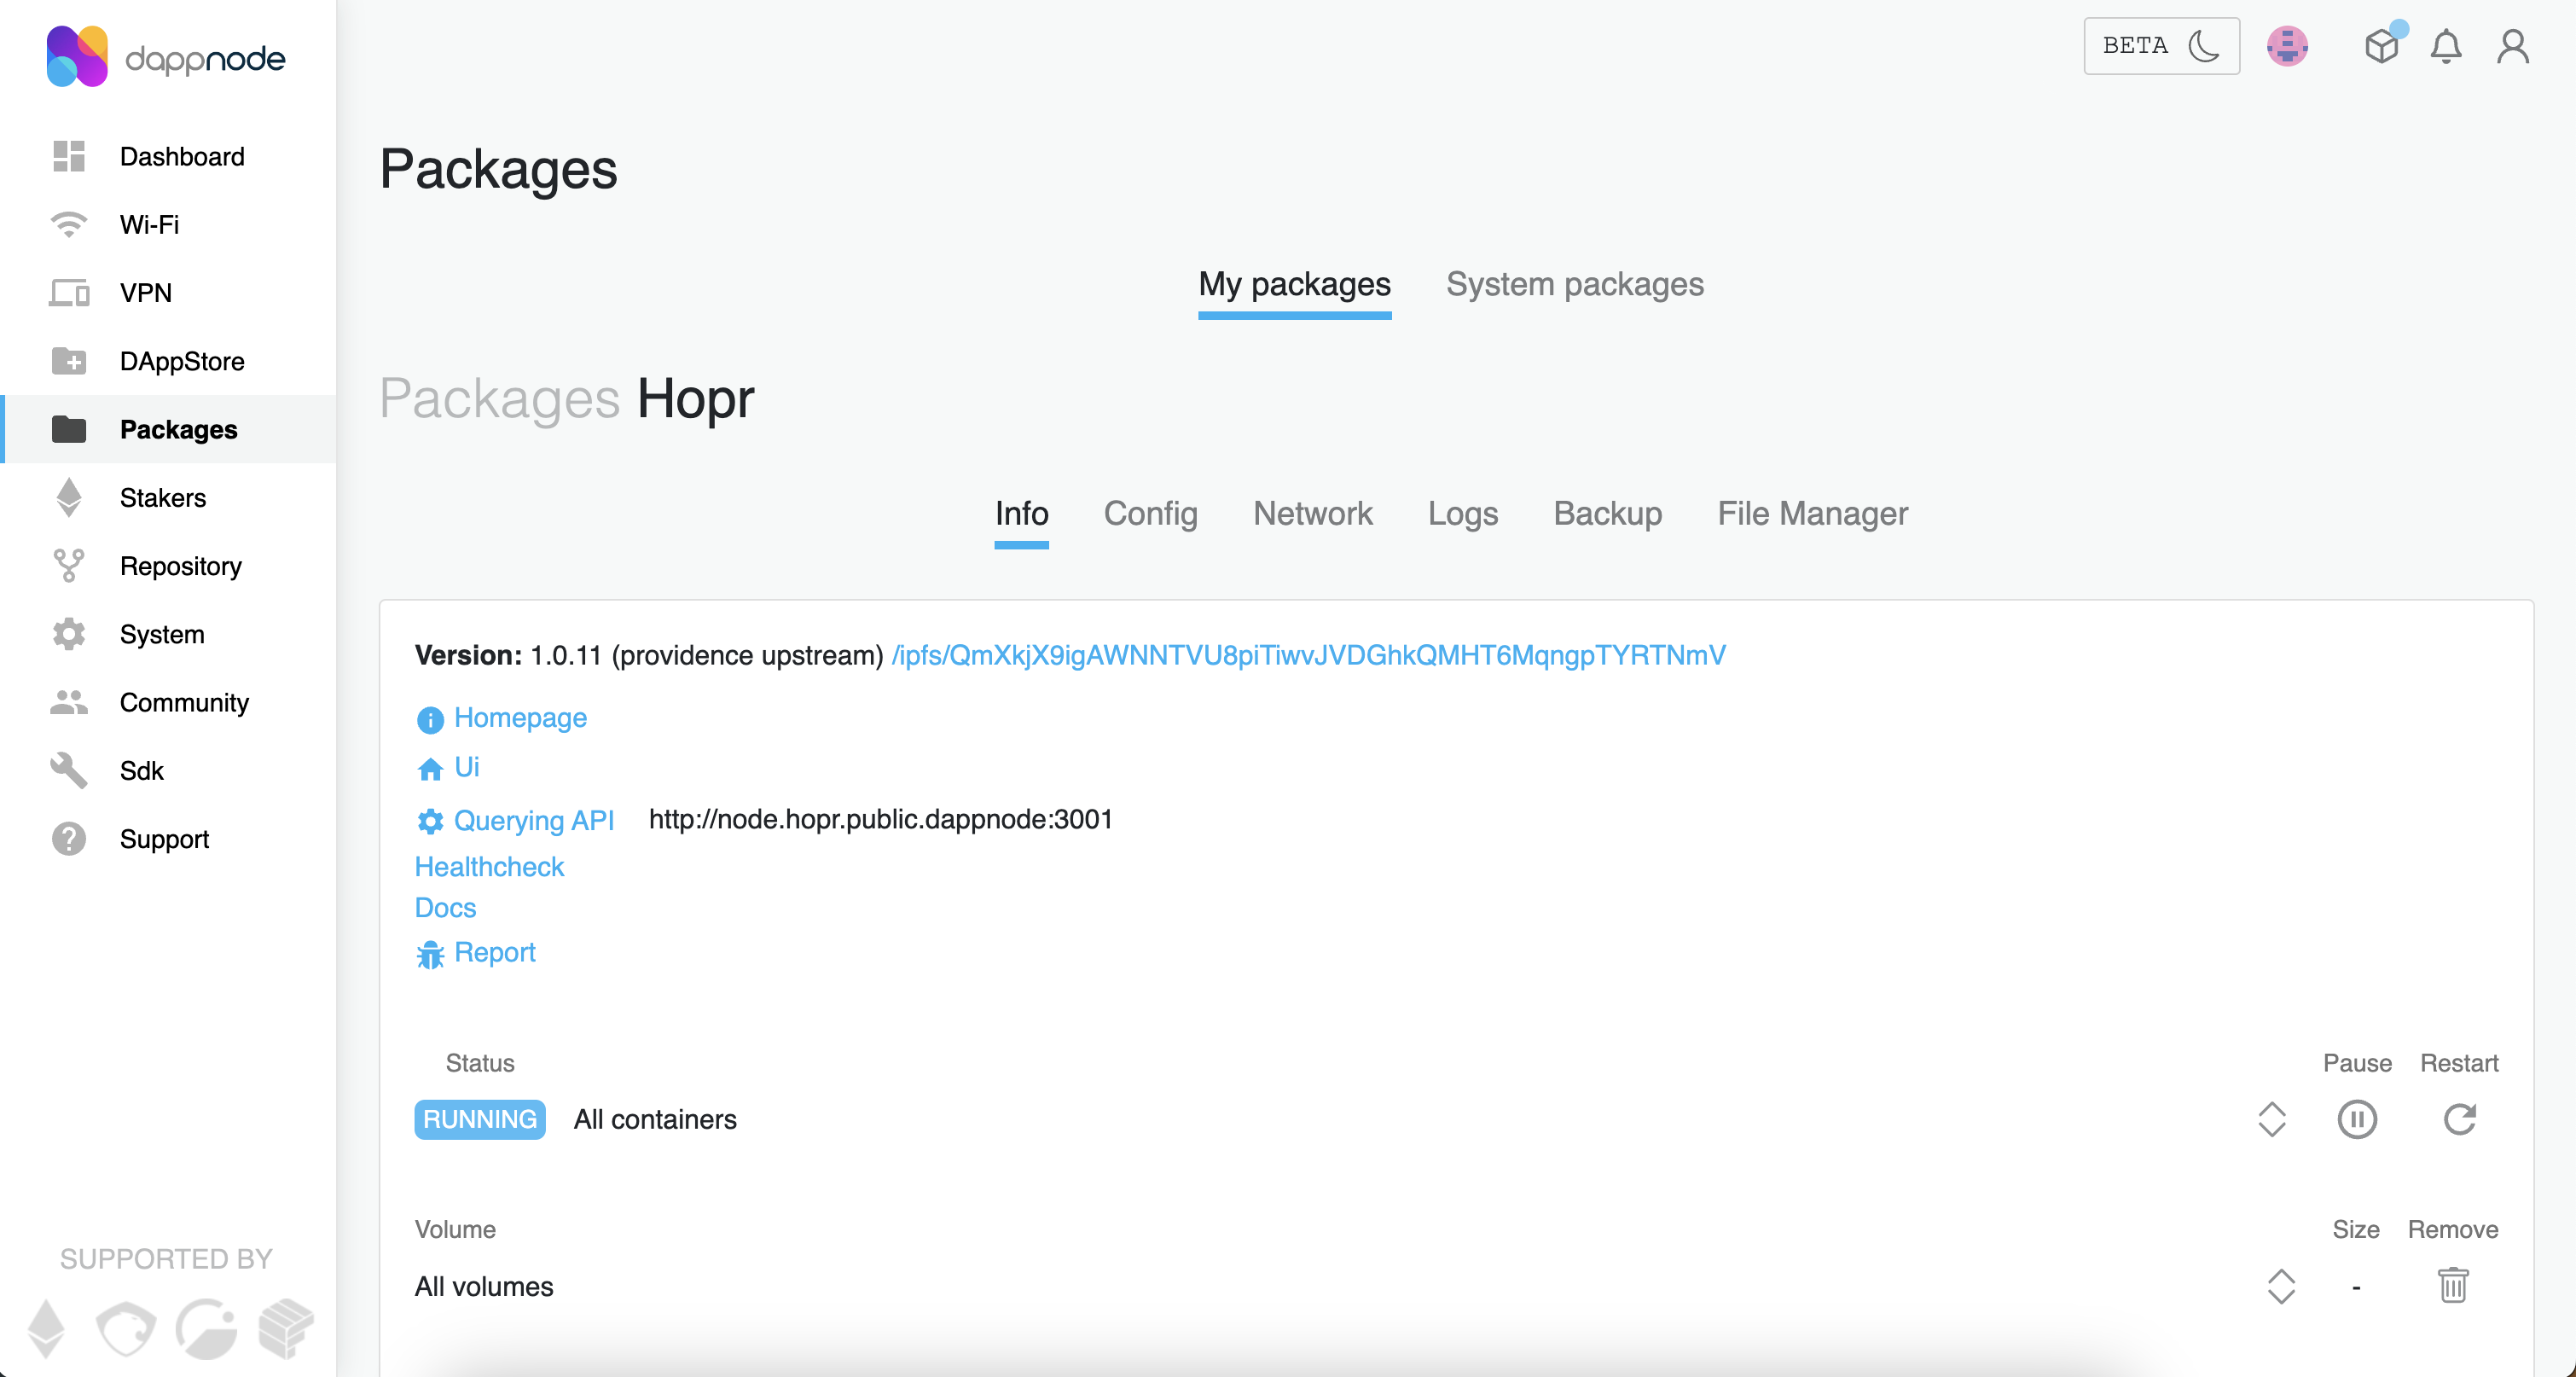
(10) Click on the top right corner "Connect to node" and enter these details:
- API endpoint - http://node.hopr.public.dappnode:3001
- API token - If you haven't changed the security token during the installation process, the security token will be the default one:
!5qxc9Lp1BE7IFQ-nrtttU.
After filling API endpoint & API token fields click on "Connect to the node".
(11) It will display an error message, indicating that you need to fund your node. Copy the Node address and return to Staking Hub to register on the waitlist.
Do not fund your node by sending funds from your wallet. Wait to complete the rest of the onboarding flow. You will be able to do this through the Staking Hub. Trying to fund the node directly may cause problems.
2. Link Your Node to Your Safe
Only do this if you have been approved to join the network. If you are still on the waitlist, please wait until you have been approved to join the network.
While connected to your Dappnode's network or via a VPN:
(1) Login to your Dappnode and go to Packages.
(2) Click on HOPR. Once inside the HOPR package, click on UI to enter the HOPR Admin UI.
(3) Scroll down until you see the section Addresses. Copy the Node address and return to the Staking Hub to complete the onboarding process.