Set Up & Use Dappnode
Do not start installing a HOPR node without a HOPR Safe. To create a HOPR Safe and run a node, please follow the onboarding process here.
When using multiple DAppNode devices on the same network, please ensure that each HOPR package has a different internal container port and external port for libp2p (9091, 9092, etc.).
There are two installation methods for Dappnode users:
For most users we recommend the default node setup method. For advanced users we recommend to run node with configuration file, which provides the flexibility to customize your node's behavior and fine-tune settings such as:
- Configuring strategies to define node behavior
- Managing tickets aggregation and redemption processes
- Handling payment channels
1. Install the HOPR Package
While connected to your Dappnode's network or via a VPN:
(1) Open the DAppStore using the sidebar to the left.
(2) Search for HOPR using the DAppStore search bar.
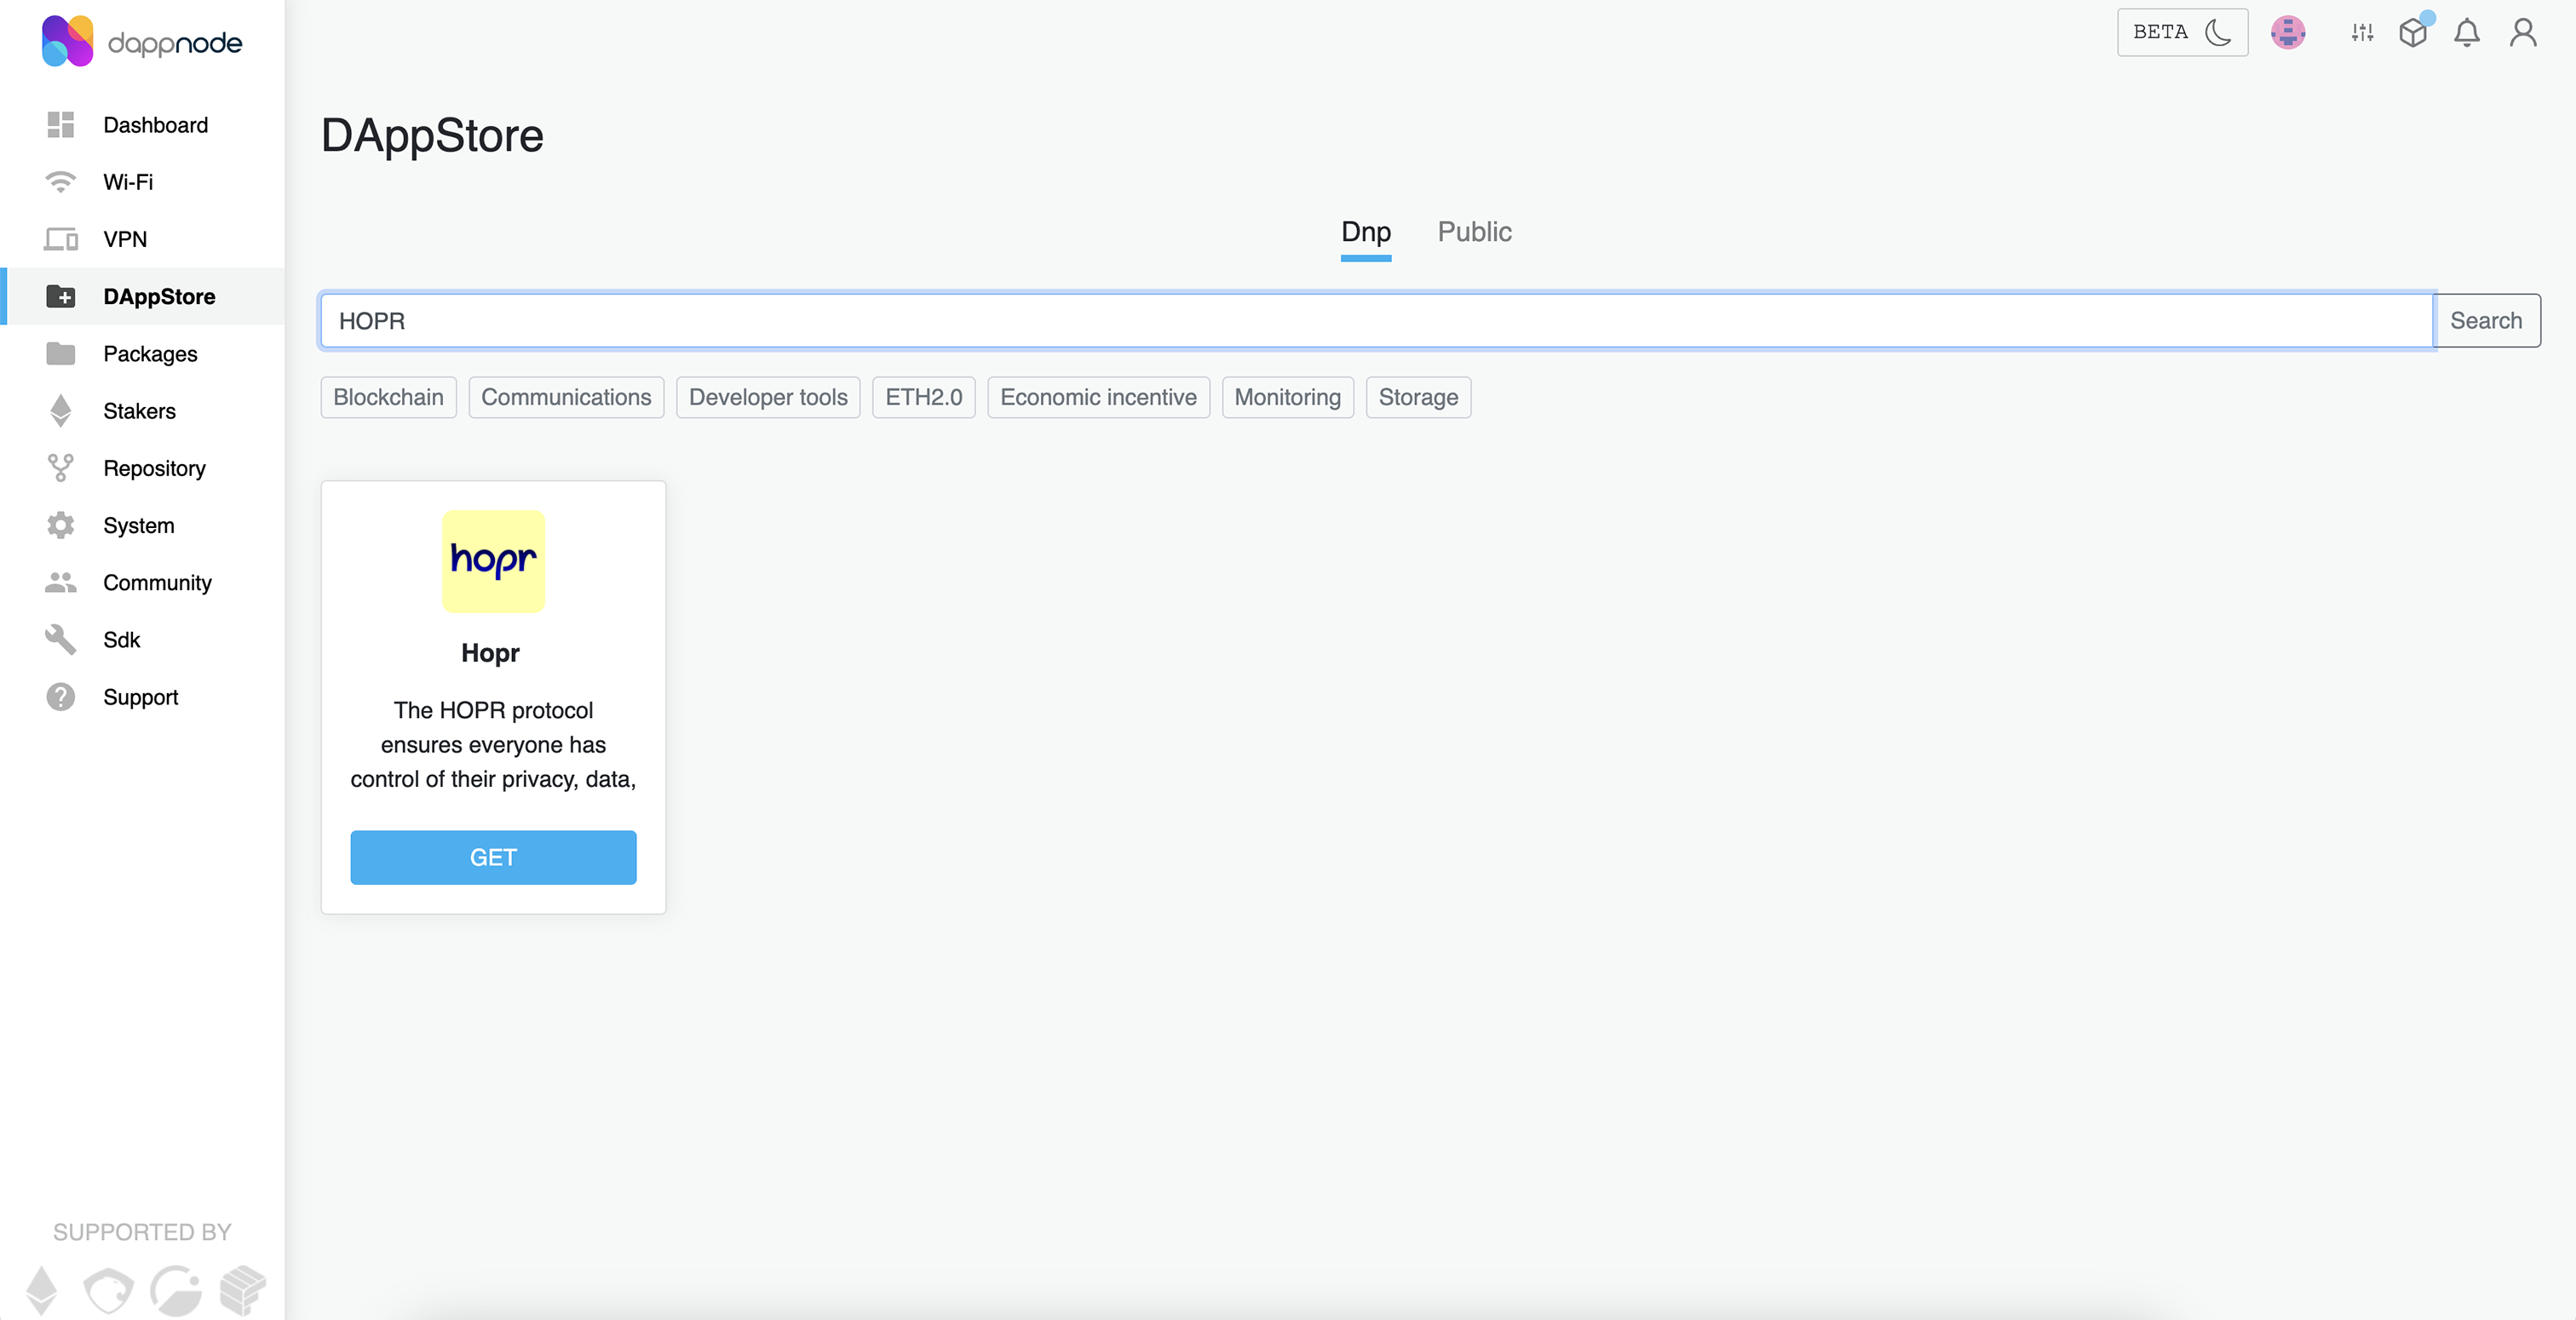
(3) You should see the latest version of the HOPR client in the listed dApps. Click the Get button under the HOPR package, this should take you to a new interface.
(4) Press install; this will open the setup wizard.
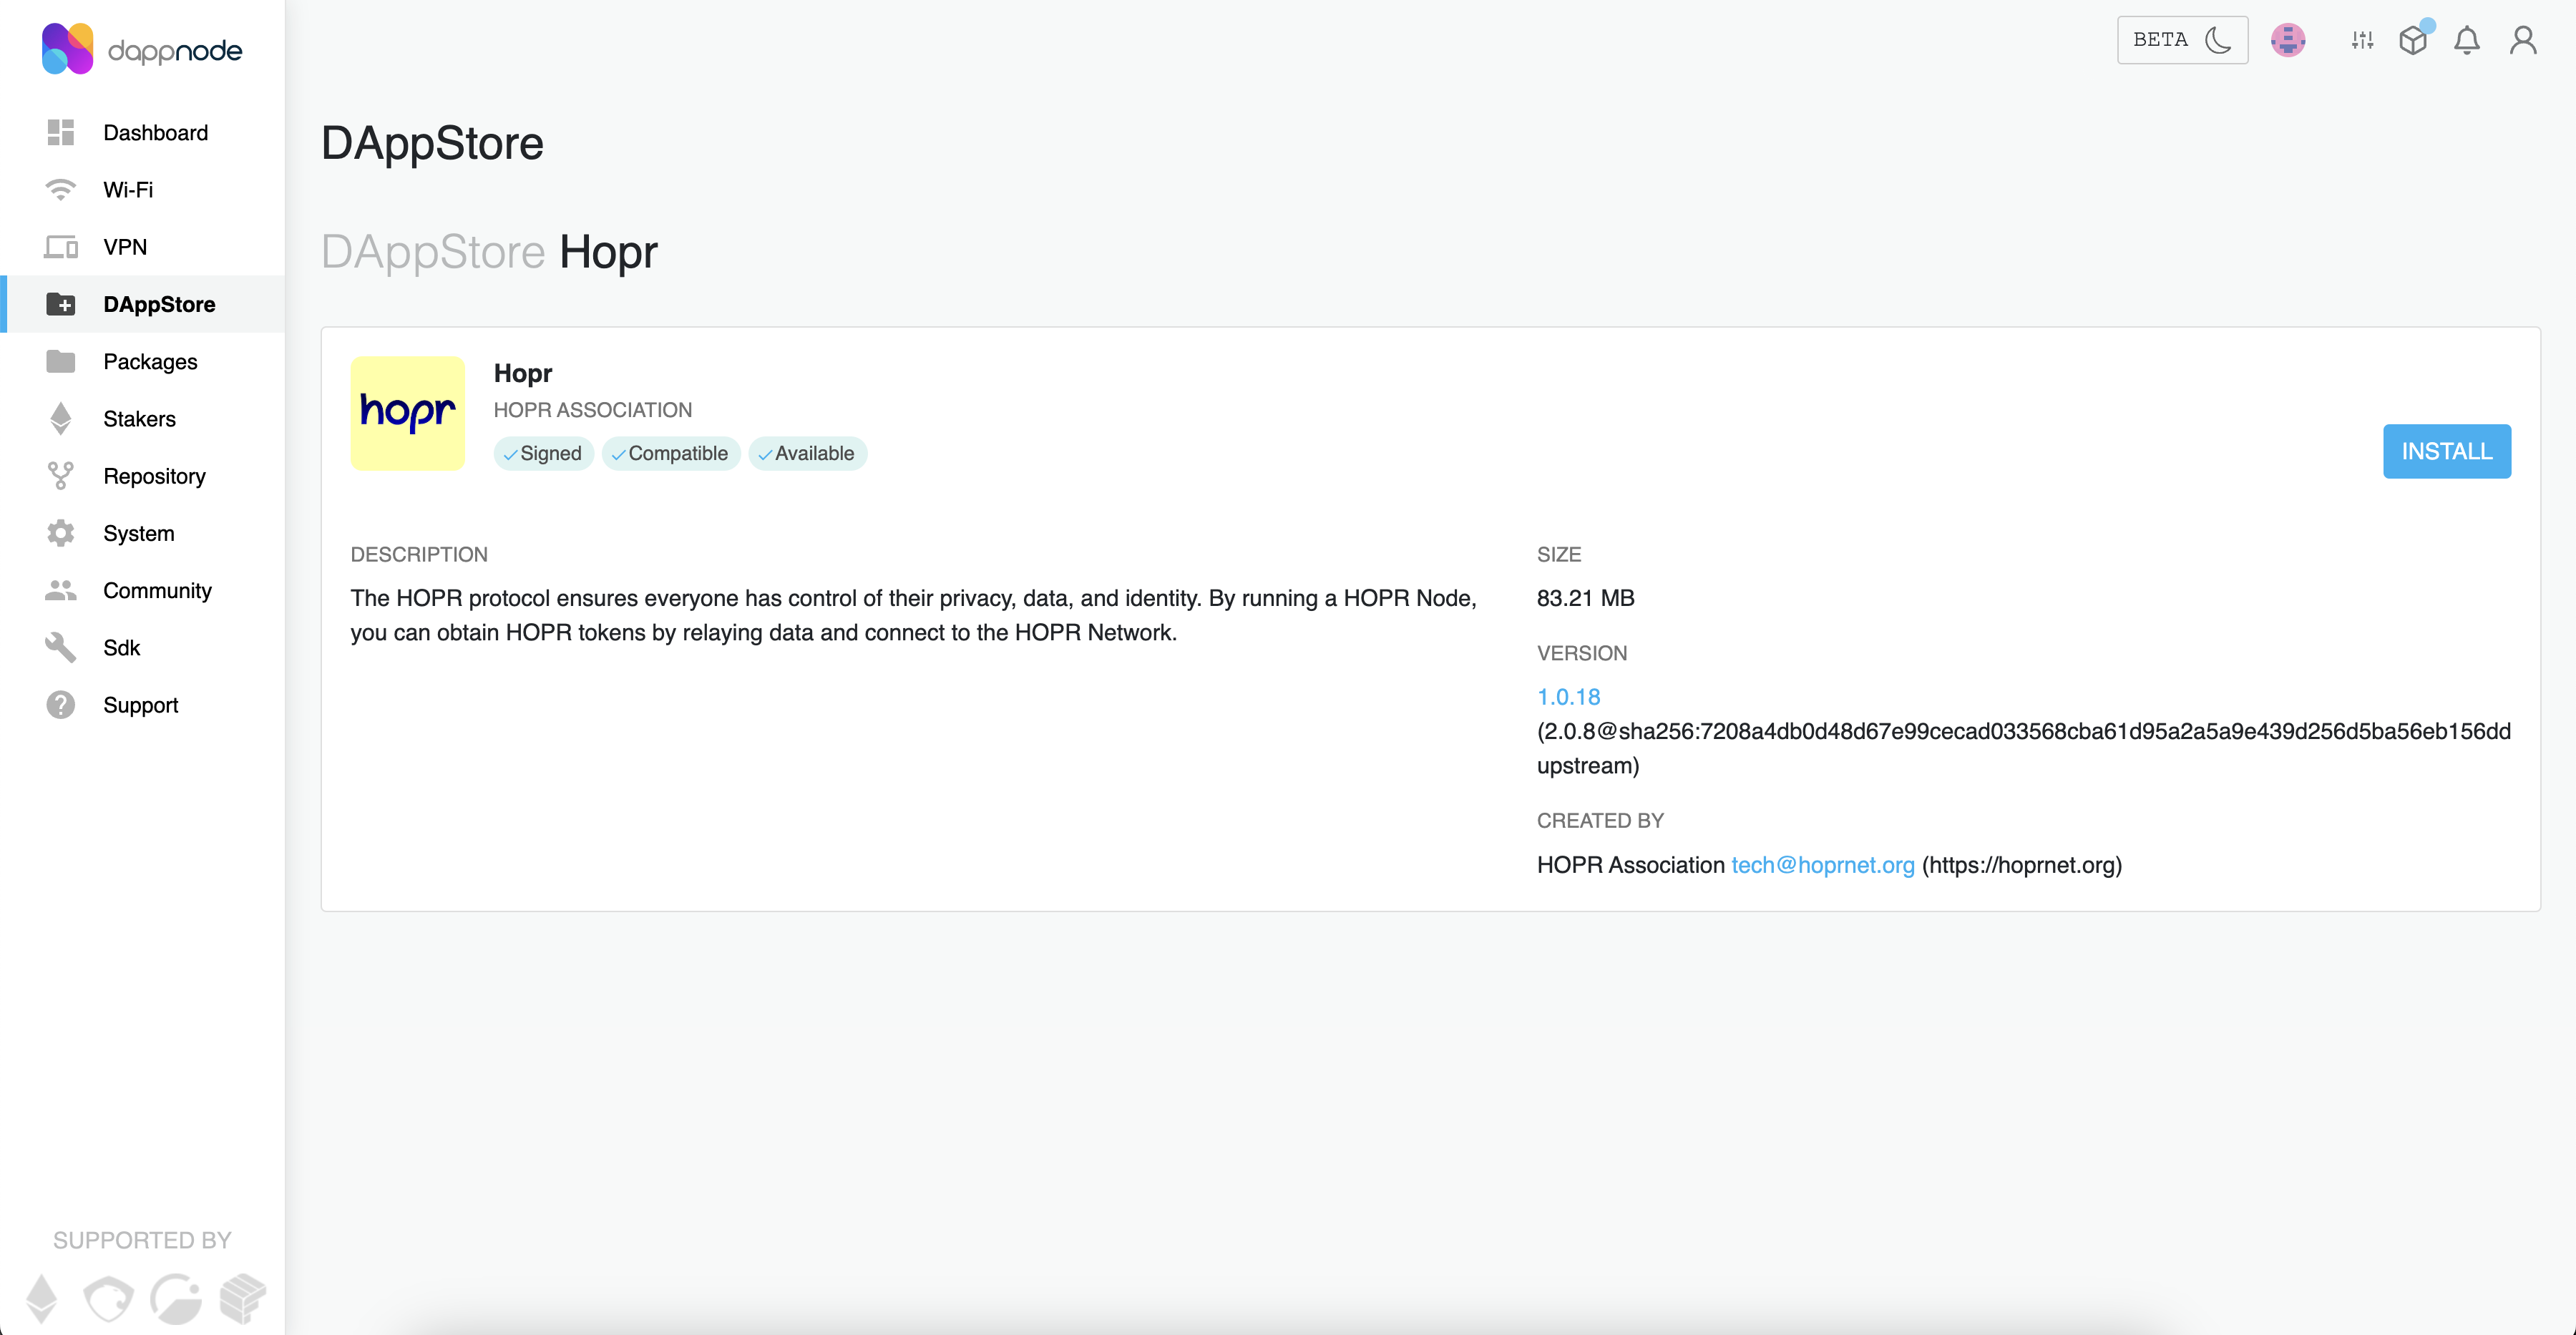
Note: Alternatively, click update if you have already installed the HOPR client.
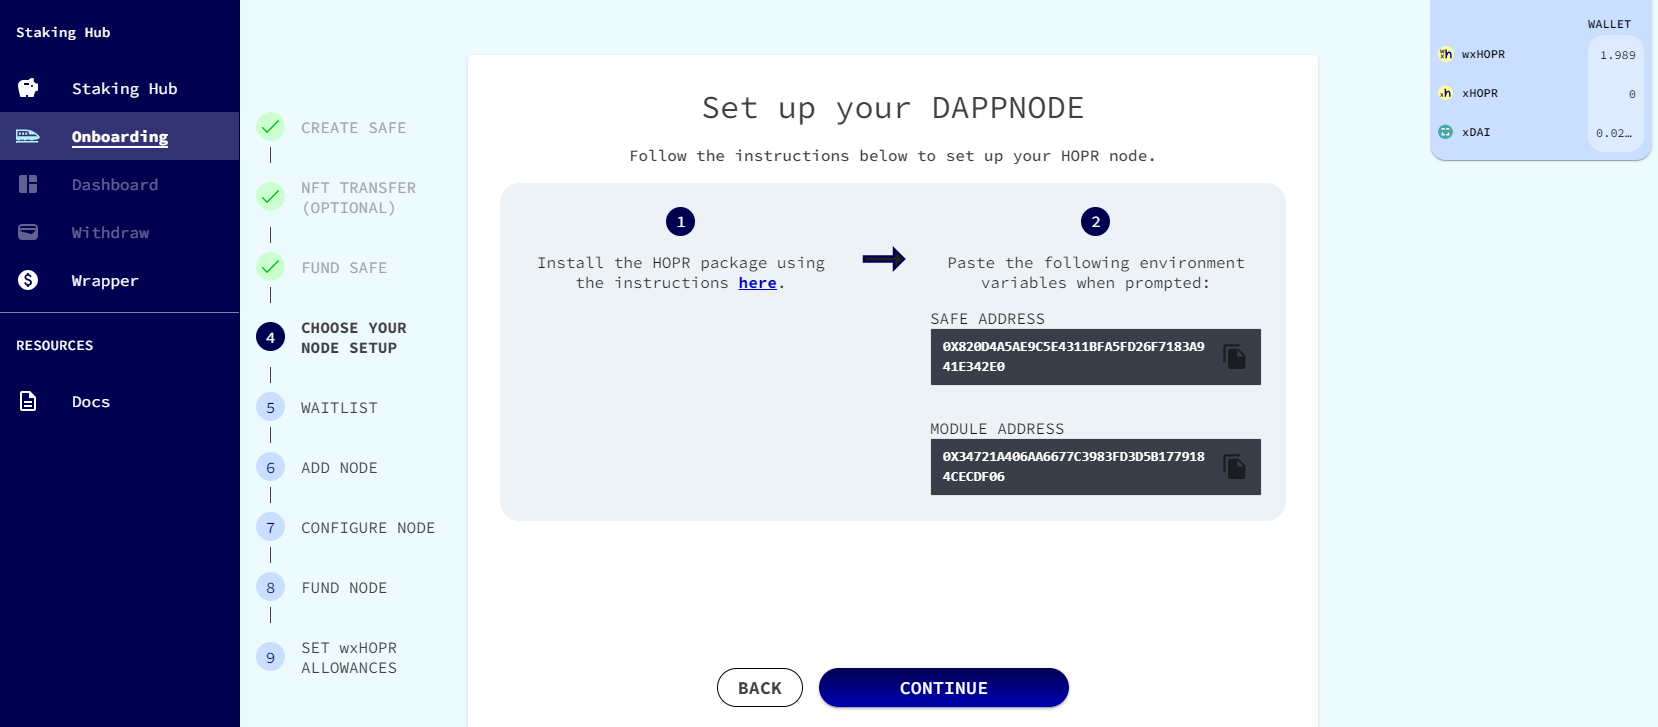
(5) Copy your Safe address and Module address from your Staking Hub onboarding process.
Note: If you are re-installing an existing node and not onboarding, you can find the addresses within the dashboard.
With the setup wizard open, in parallel, go to the Staking Hub dashboard.
From the dashboard, note your:
- Safe address
- Module address

(6) Find your home network's public IP address, you will need it. If you don't know how to find your IP address, follow the instructions here.
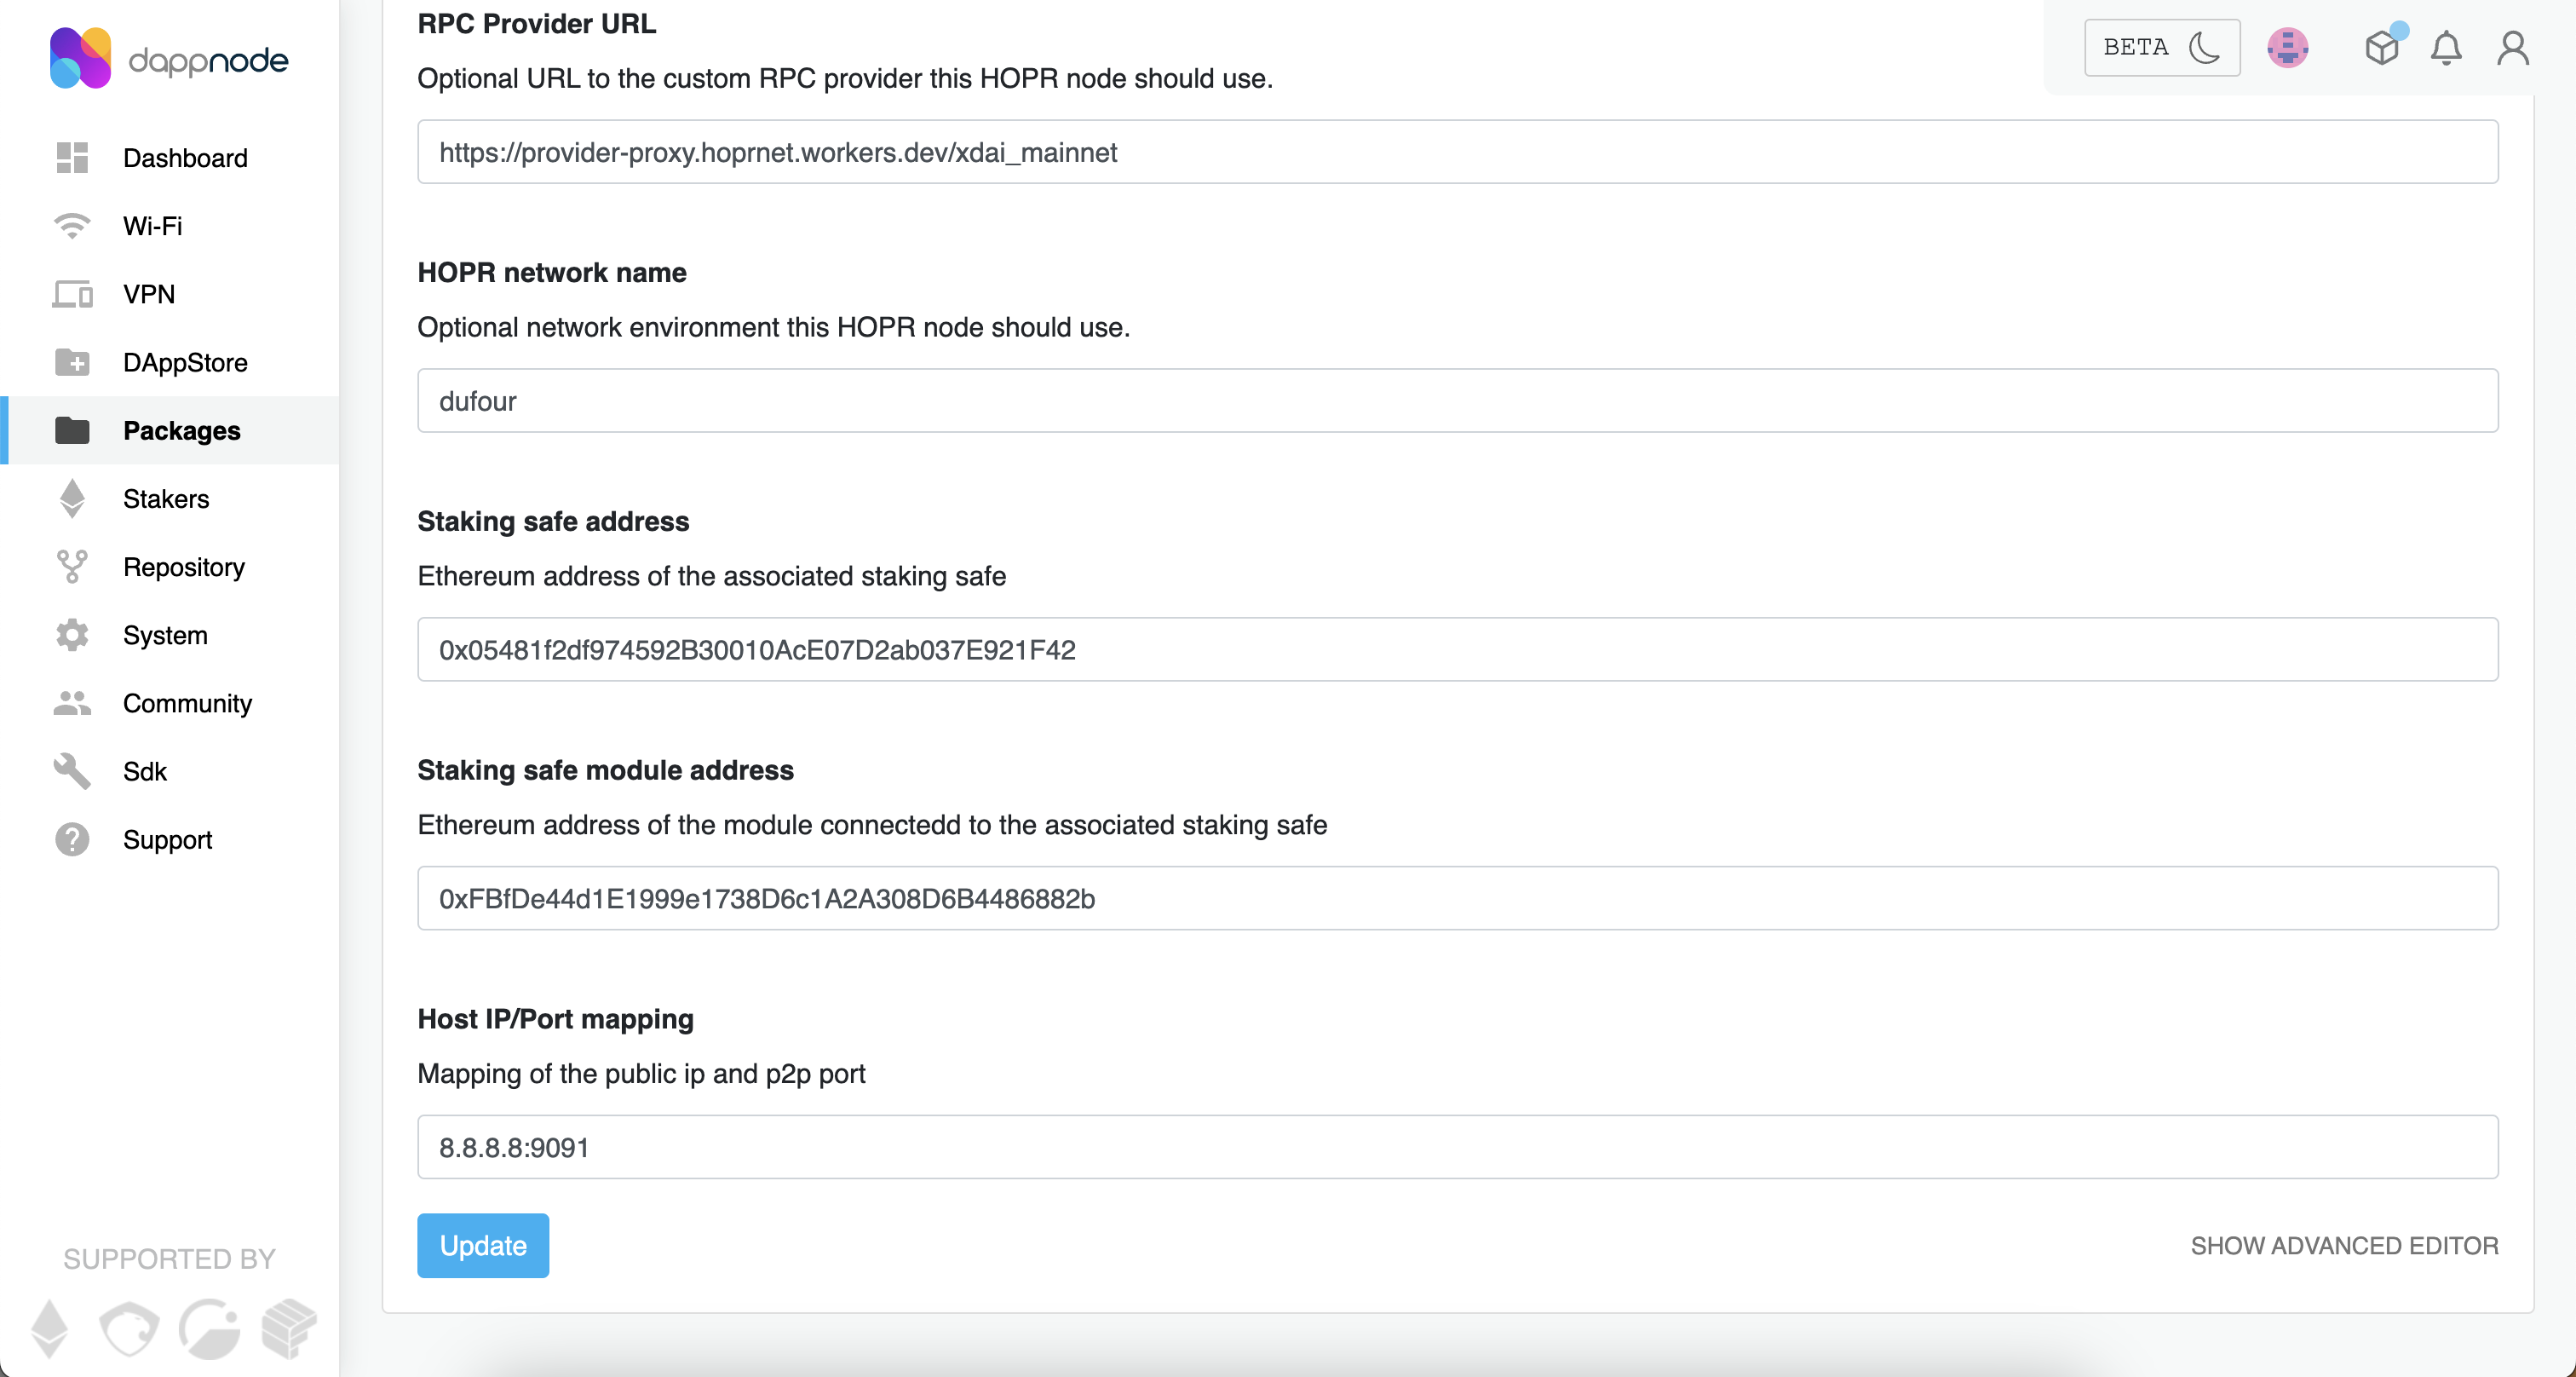
(7) Return to the setup wizard and fill out the Safe address, Module address, Public IP and RPC provider fields accordingly (the bottom three).
- Add your Safe address under the field:
Staking safe address - Add your Module address under the field:
Staking safe module address - Add your Public IP suffixed with the port
:9091under the field:Host IP/Port mapping - Add custom RPC provider under the field:
RPC Provider URL(to obtain the RPC provider URL, you can find guidelines here)
Note: Make sure to add the port suffix :9091 at the end of your IP address as shown in the image below.
Dynamic IP addresses will not work as once your IP address changes, your node will become unreachable. If you have a dynamic IP address, use a DDNS in place of your public IP address and enter it under the field Host IP/Port mapping, with the suffix :9091. You can view how to do this here.
(8) Now accept the disclaimer, and your HOPR package should start installing immediately. We recommend you enable auto-updates when prompted.
(9) Once installed, go to Packages and click on HOPR. Once inside the HOPR package, click on UI to enter the HOPR Admin UI.
(10) Click in the top right corner "Connect to node" and enter these details:
- API endpoint - http://node.hopr.public.dappnode:3001
- API token - If you haven't changed the security token during the installation process, the security token will be the default one:
!5qxc9Lp1BE7IFQ-nrtttU.
After filling API endpoint & API token fields click on "Connect to the node".
(11) It will display an error message, indicating that you need to fund your node. Copy the Node address and return to Staking Hub to register on the waitlist.
Do not fund your node by sending funds from your wallet. Wait to complete the rest of the onboarding flow. You will be able to do this through the Staking Hub. Trying to fund the node directly may cause problems.
2. Link Your Node to Your Safe
Only do this if you have been approved to join the network. If you are still on the waitlist, please wait until you have been approved to join the network.
While connected to your Dappnode's network or via a VPN:
(1) Login to your Dappnode and go to Packages.
(2) Click on HOPR. Once inside the HOPR package, click on UI to enter the HOPR Admin UI.
(3) Scroll down until you see the section Addresses. Copy the Node address and return to the Staking Hub to complete the onboarding process.
3. Back up Your Identity File
Make sure to back up your identity file incase. This will help you restore your node in the future if ever needed.
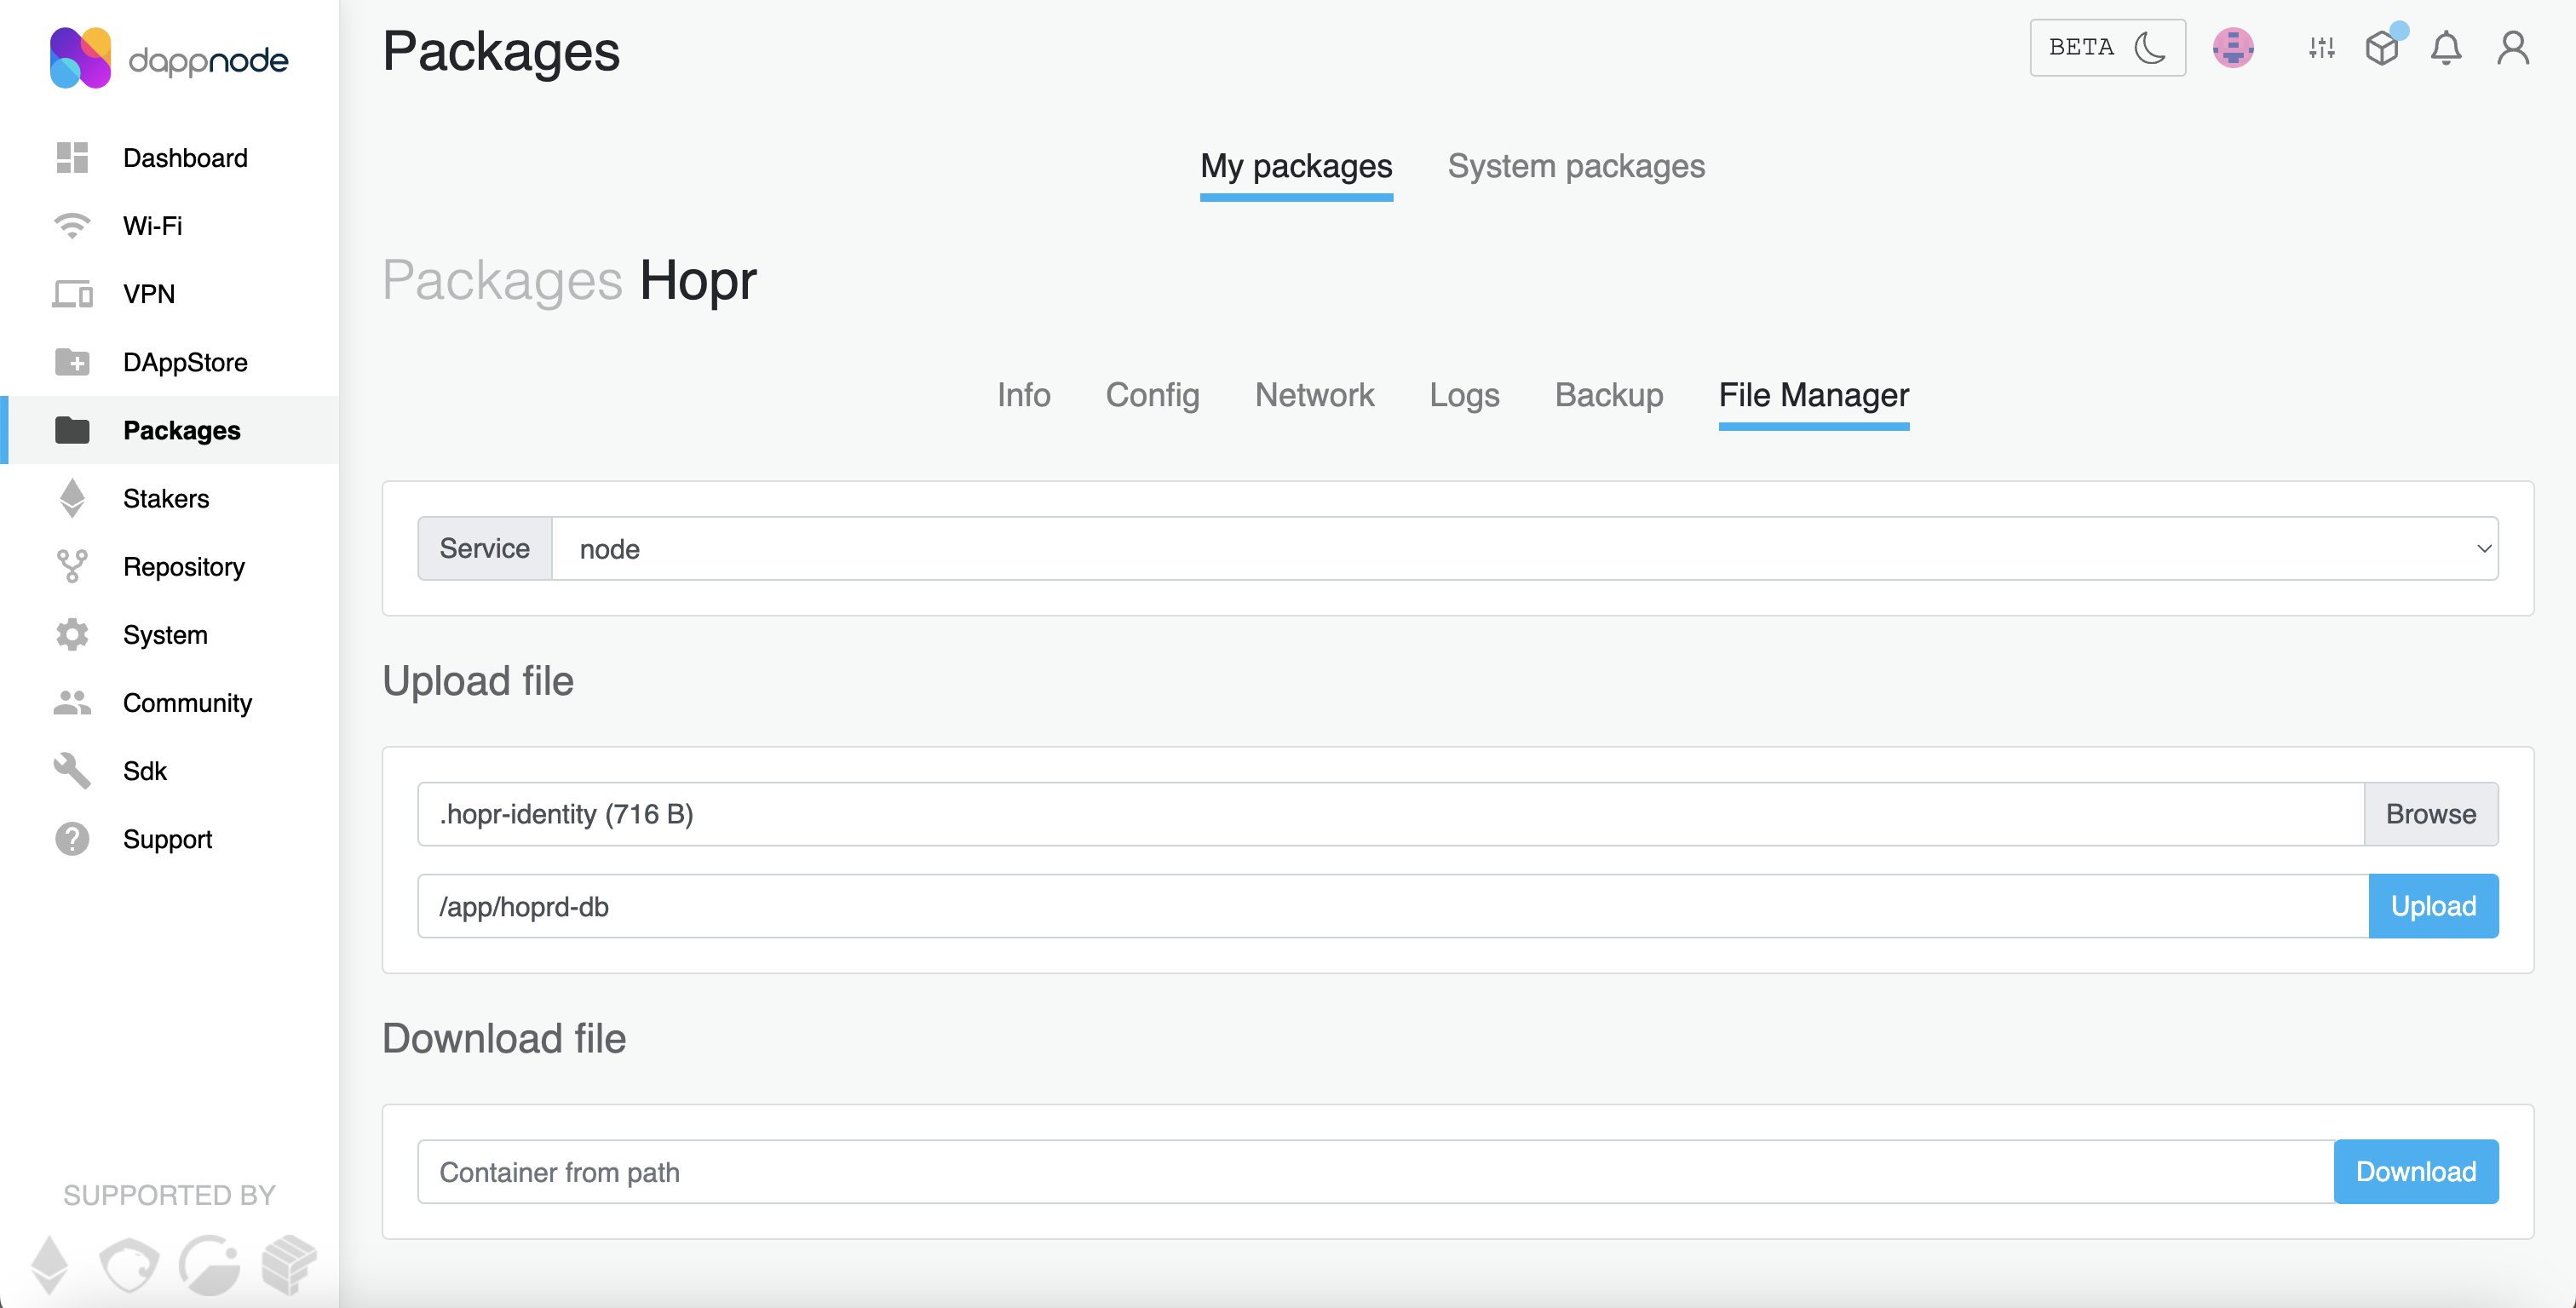
(1) Go to http://my.dappnode/packages/my/hopr.public.dappnode.eth/file-manager
(2) Under the Download file section, enter /app/hoprd-db/.hopr-identity and click Download.
(3) Unarchive the hopr-identity.tar file to see the .hopr-identity file.
Note: Make sure you can see hidden files. Adjust the settings on your device; otherwise, the identity file will not be visible.
(4) Copy this file and save it somewhere safe.
4. Next Steps
Once you've completed the above steps, you should have a working HOPR node. You will then want to access the HOPR admin panel to interact with your node. You can read how to access and set up HOPR admin here.
Update the HOPR node
Before updating your HOPR node, please make sure to write down the following information, which you will need during the update process: Database password, safe & module address, host.
Please note that significant changes have been introduced between versions 2.0.8 and 2.1.0. During the upgrading process, there are additional steps you'll need to take:
(1) Backup your identity file. Please follow the instructions here.
(2) Navigate to the Dappstore and locate the HOPR package. Click on the "Update" button to proceed.
(3) Complete all required fields:
-
Identity file password: Please use the previously used database password. If you haven't changed it, the default database password is:
"open-sesame-iTwnsPNg0hpagP+o6T0KOwiH9RQ0". -
REST API token: This is your API token to connect with your node via the HOPR admin UI. You can write down the one you like.
-
RPC Provider URL: Fill in your custom RPC provider. Don't forget to set up your own RPC endpoint for your node. You can find more information here.
-
HOPR network name: "dufour" is the current environment on which the HOPRd node is running. Leave it as is.
-
Custom HOPR node configuration file: We recommend skipping this section to ensure the upgrading process is successful. After your node is synced, you can implement the configuration file at any time. More details here.
-
Staking safe address: Enter your staking safe address.
-
Staking safe module address: Enter your staking module address.
-
Public host IP and port: Enter your node's public IP with the provided libp2p port. For example:
123.123.123.123:9091.
(3) At the right bottom click on "SHOW ADVANCED EDITOR". Check the values for "HOPRD_HEARTBEAT_INTERVAL" and ensure it is set to the default value of "20". Similarly, confirm that "HOPRD_HEARTBEAT_THRESHOLD" is also set to its default value of "60".
(4) Click on "Submit" to complete the HOPRd node updating process.
These additional steps will help ensure a smooth transition and optimal performance after the upgrade. If you have any questions or encounter any issues, feel free to reach out for assistance.
Set Up Portforwarding
To run a HOPR node on the HOPR network, you need to set up port forwarding. You can read up on why this is necessary and how to do it here.
Restore an Old Node
You will need to use the file manager to restore an old node.
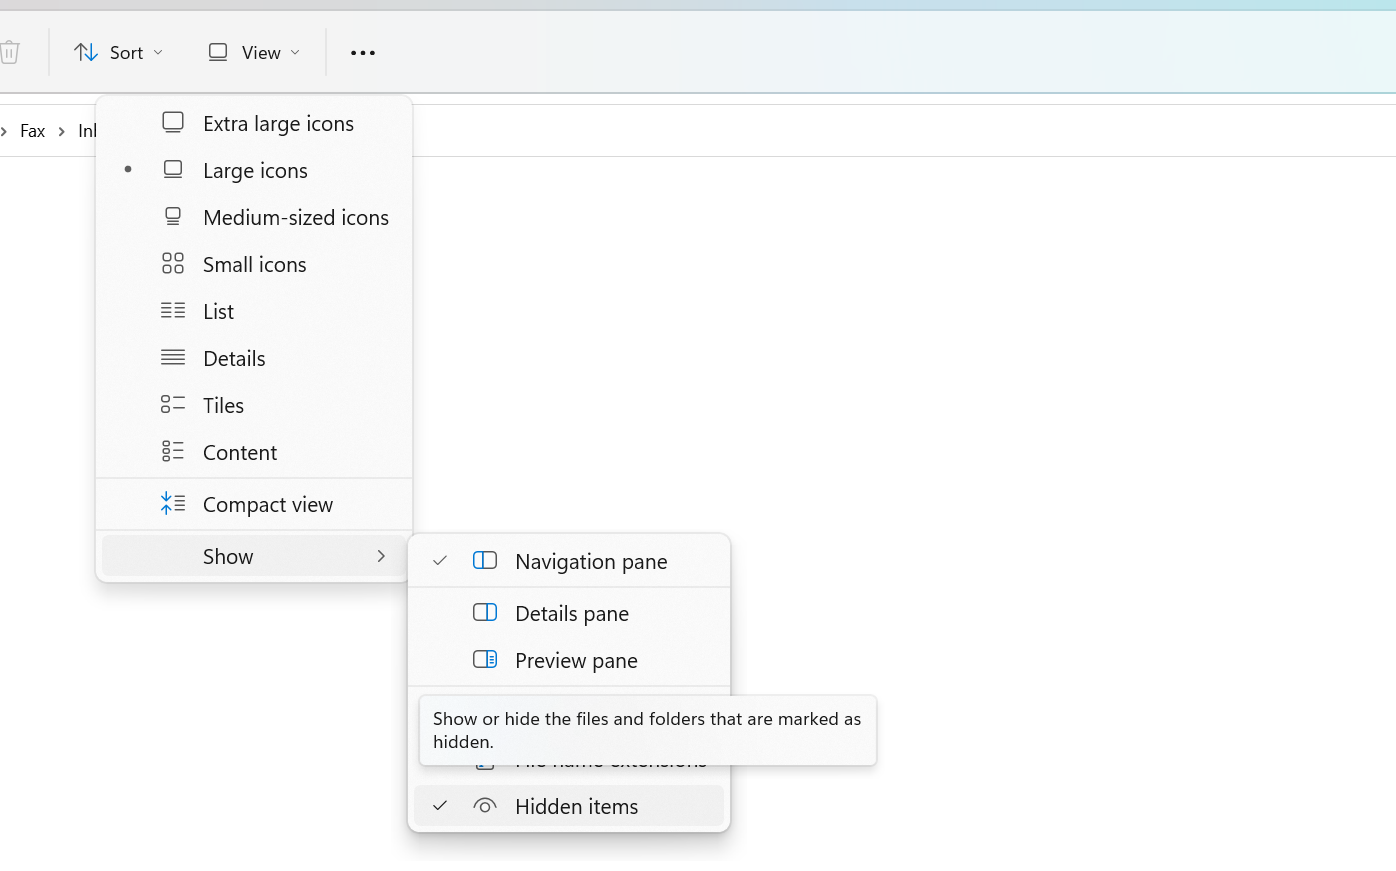
(1) Make sure you can view hidden files.
For Windows: Go to your File Manager app, and under View -> Show, make sure hidden files is ticked on.
For Mac: With the Finder app open, simultaneously press the key combination: Command + Shift + . (Dot). You will need to do this during Step 2 and Step 7 on Mac.
(2) Ensure you have the correct identity file for recovery. The identity file backup process is explained here. After backing up the identity file, you should have downloaded an archived file named hopr-identity.tar. Please unarchive it to access the identity file: .hopr-identity.
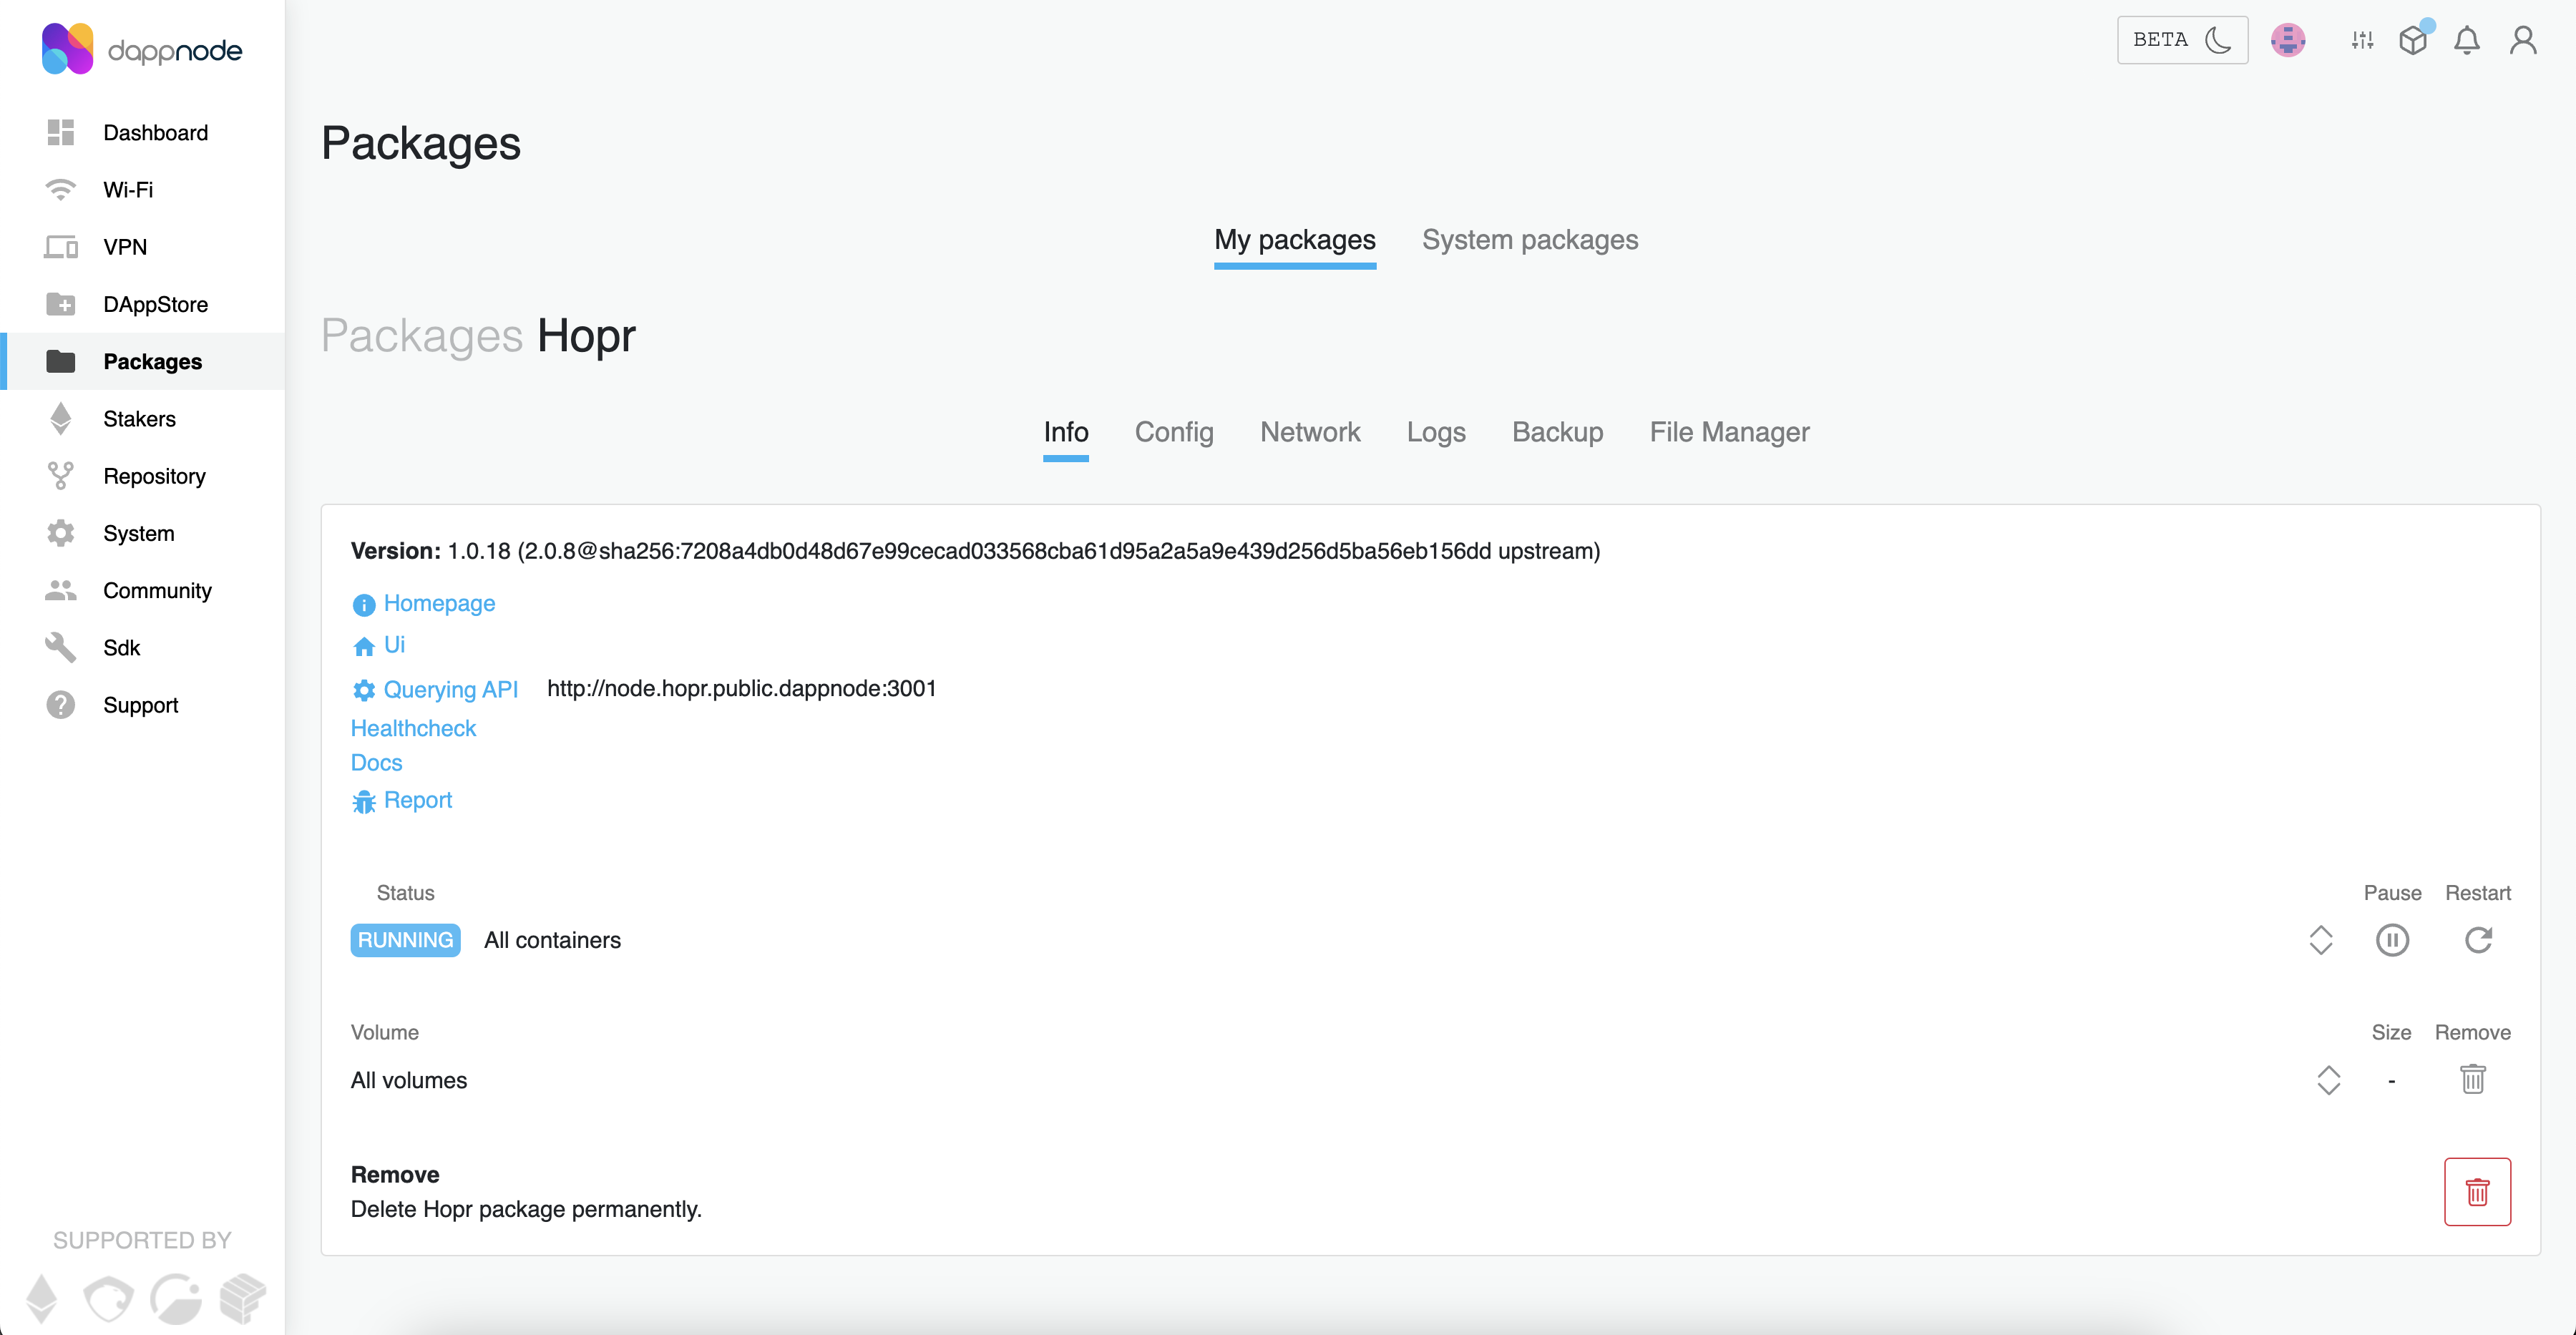
(3) On the Dappnode dashboard, locate HOPR in your packages and go to the Info tab. Click on the "Pause" icon to stop the HOPR package.
(4) On the same Info tab, locate the "Volumes" section and click on the trash can icon to remove the volumes.
(5) Navigate to the File Manager tab.
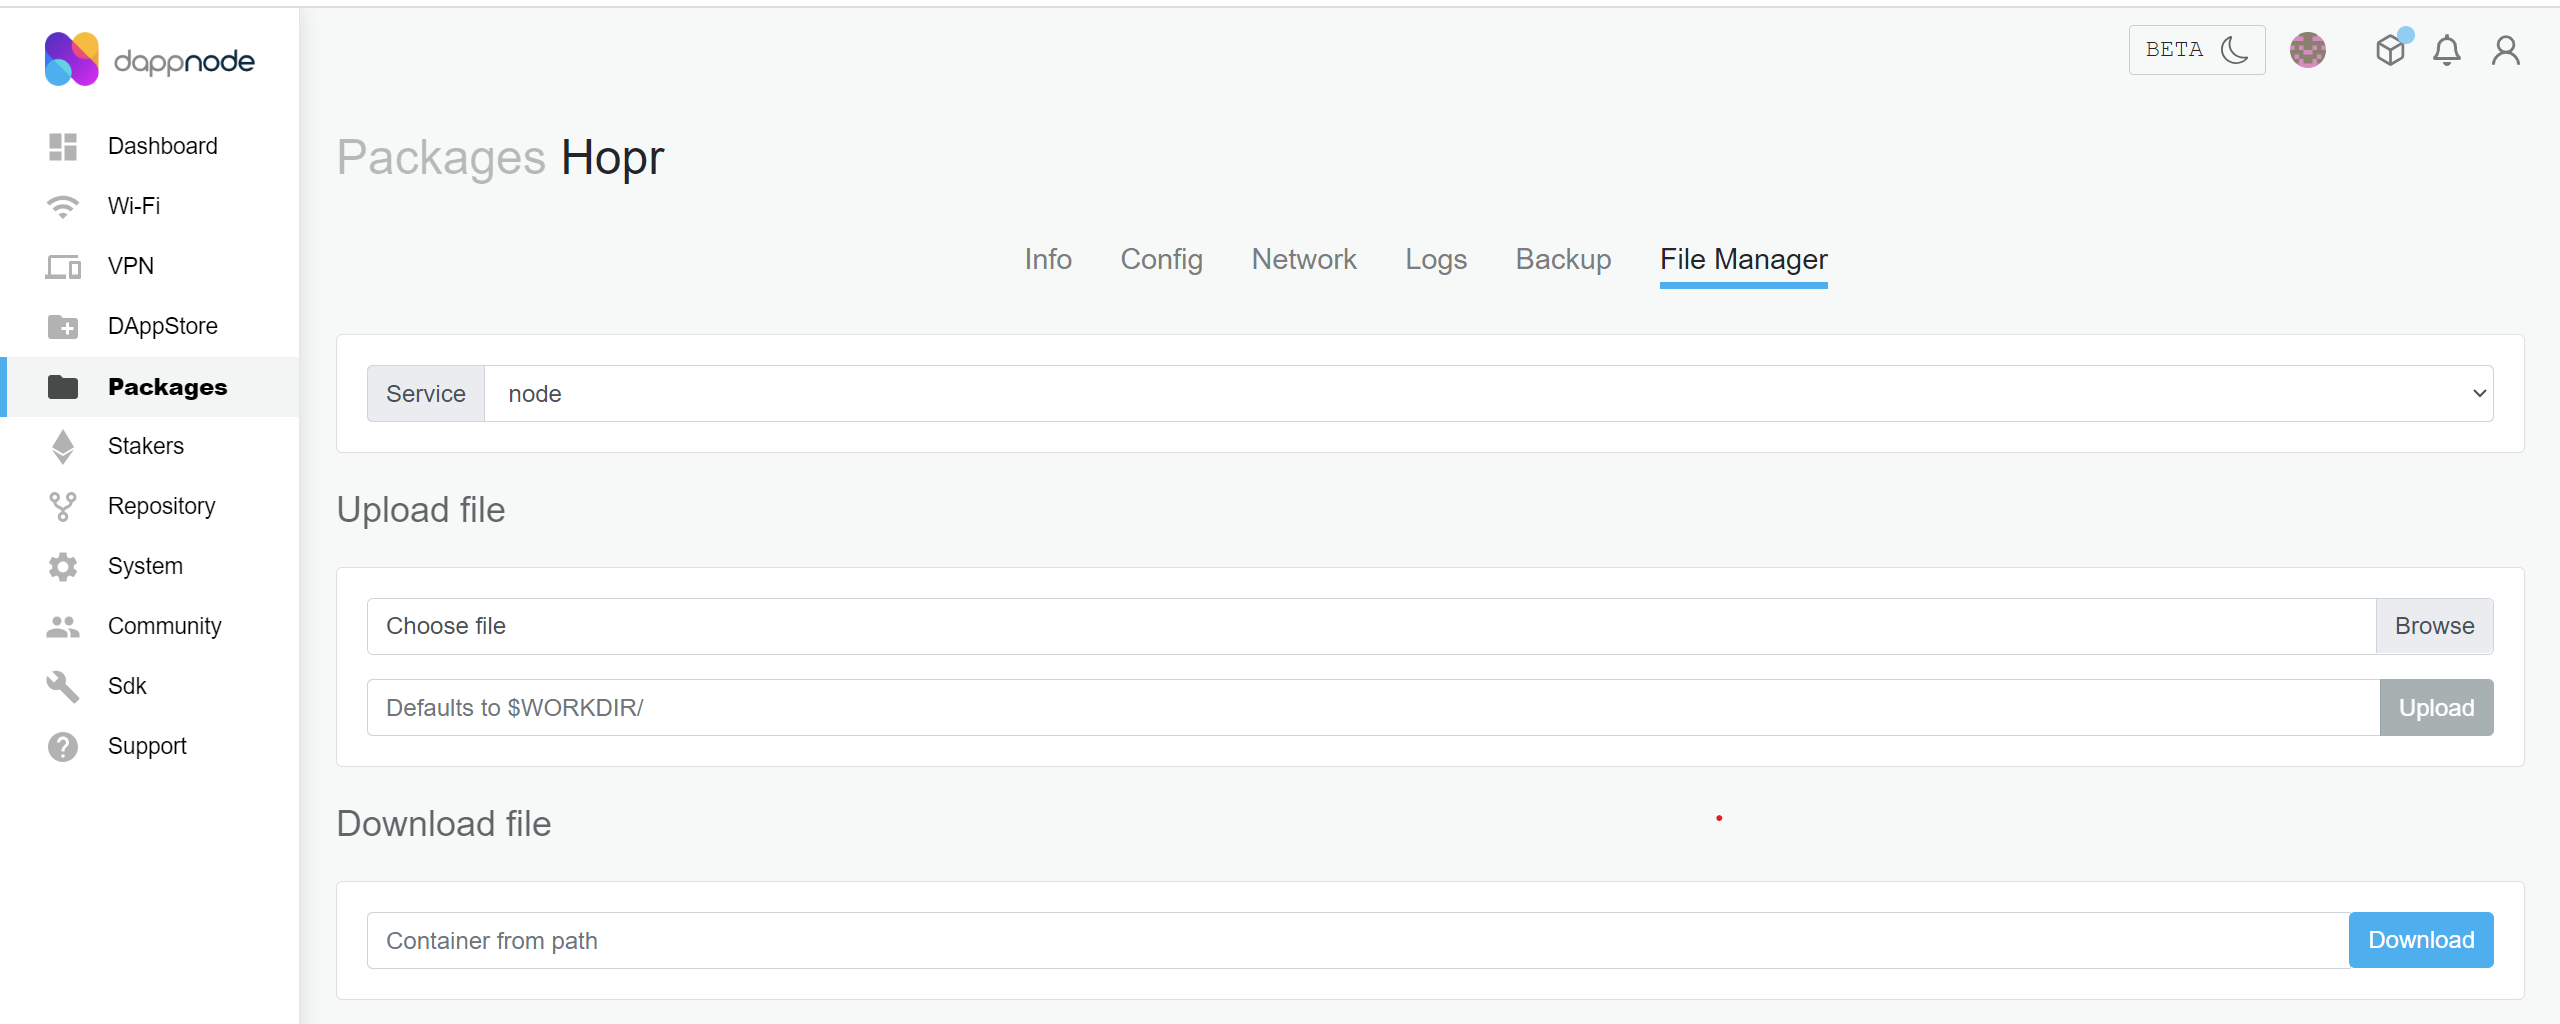
(6) In the text field under Upload file enter the path /app/hoprd-db.
(7) Then click the Browse button next to the Choose file field. And select your downloaded identity file.
Note: If the file does not appear after the first selection, try selecting it again. Ensure the file name replaces the Choose File placeholder text in the field.
(8) Press the Upload button and wait for the upload to complete.
(9) Finally, go back to the Info tab and restart the HOPR package.
All done, you should now have restored your old node!
Restart Your Node
(1) Go to your HOPR package. You can access your packages using the sidebar on the left.
(2) Under the info tab, locate the section Status. It should show all containers running.
(3) On the right, press the Restart icon and wait for the package to restart.
Set Up Node Using Configuration File
(1) First, set up your own custom configuration file. You can find instructions on how to do that here.
Note: For Dappnode, the configuration file does not need to include your Safe address, Module address, Public IP, RPC provider and API Token.
(2) During the Dappnode installation process, fill out the Safe address, Module address, Public IP, and RPC provider fields as you normally would.
- Add your Safe address under the field:
Staking safe address - Add your Module address under the field:
Staking safe module address - Add your Public IP suffixed with the port
:9091under the field:Host IP/Port mapping - Add custom RPC provider under the field:
RPC Provider URL(to obtain the RPC provider URL, you can find guidelines here)
Note: Make sure to add the port suffix :9091 at the end of your IP address, as shown in the image below.
Dynamic IP addresses will not work as once your IP address changes, your node will become unreachable. If you have a dynamic IP address, use a DDNS in place of your public IP address and enter it under the field Host IP/Port mapping, with the suffix :9091. You can view how to do this here.
(3) Now, under the field Configuration File, click Browse and upload your configuration file.
(4) Complete the remainder of the installation as you normally would.
Adding Configuration File After Installation
If you have already installed your HOPR package, then you can still edit your node's configuration by uploading a configuration file through the file manager.
(1) Find HOPR in your packages and navigate to the File Manager tab.
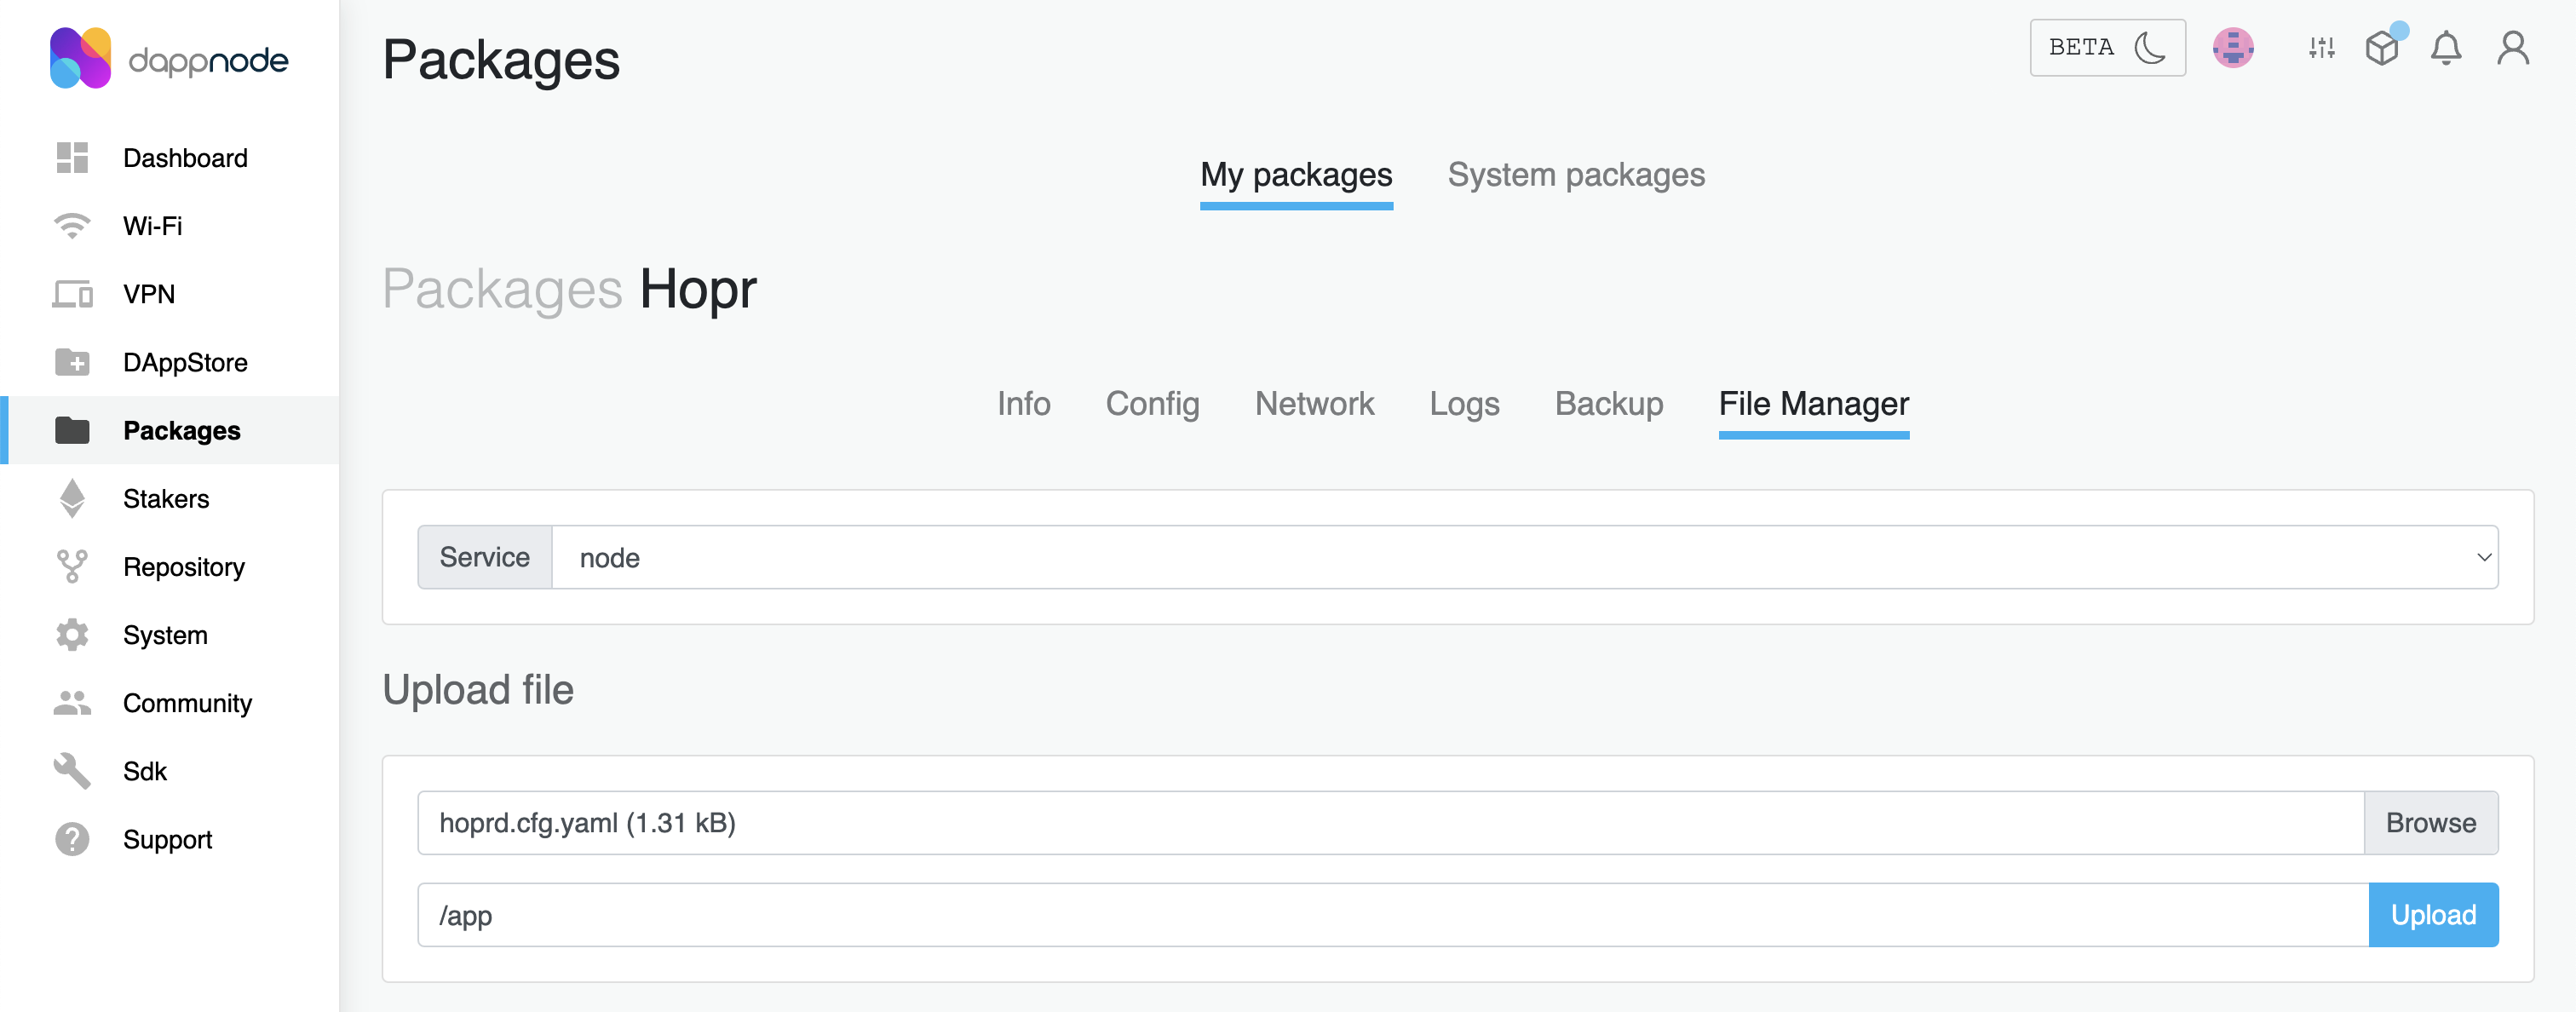
(2) In the text field under Upload file enter the path /app.
(3) Then click the Browse button next to the Choose file field. And select your configuration file.
Note: Make sure the configuration file name is hoprd.cfg.yaml. You might need to re-select the file until the correct name appears in the "Choose file" field.
(4) Finally, press the Upload button and wait for the upload to complete.
(5) Under the tab Config in your HOPR package, check that the field HOPRD_CONFIGURATION_FILE_PATH points to your new configuration file.
(6) Restart HOPR package.
If it is empty or shows your old configuration file, update the variable to show your configuration file.