Using HOPR Admin
The HOPR Admin provides a graphical interface you can use to interact with your node as well as diagnose any potential issues. HOPR Admin is provided with the Dappnode HOPR package by default, so no seperate action is needed, but for Docker users you will need to run an extra command to install HOPR Admin before you can access it.
Installing HOPR Admin UI (For Docker Users Only)
If you have installed HOPR through the Dappnode setup, you do not need to install HOPR Admin seperately and can skip to accessing HOPR Admin.
Open your terminal and paste the following Docker command to start HOPR Admin:
docker run -d -p 4677:80 --pull always --name hopr-admin-for-2.1 --platform linux/amd64 europe-west3-docker.pkg.dev/hoprassociation/docker-images/hopr-admin:stable
That's all! You should have HOPR Admin started by now and can access it through your browser.
Accessing HOPR Admin
For Dappnode Users
HOPR Admin already comes with the HOPR package on Dappnode so you can access it through Packages.
(1) Go to Packages and click on HOPR.
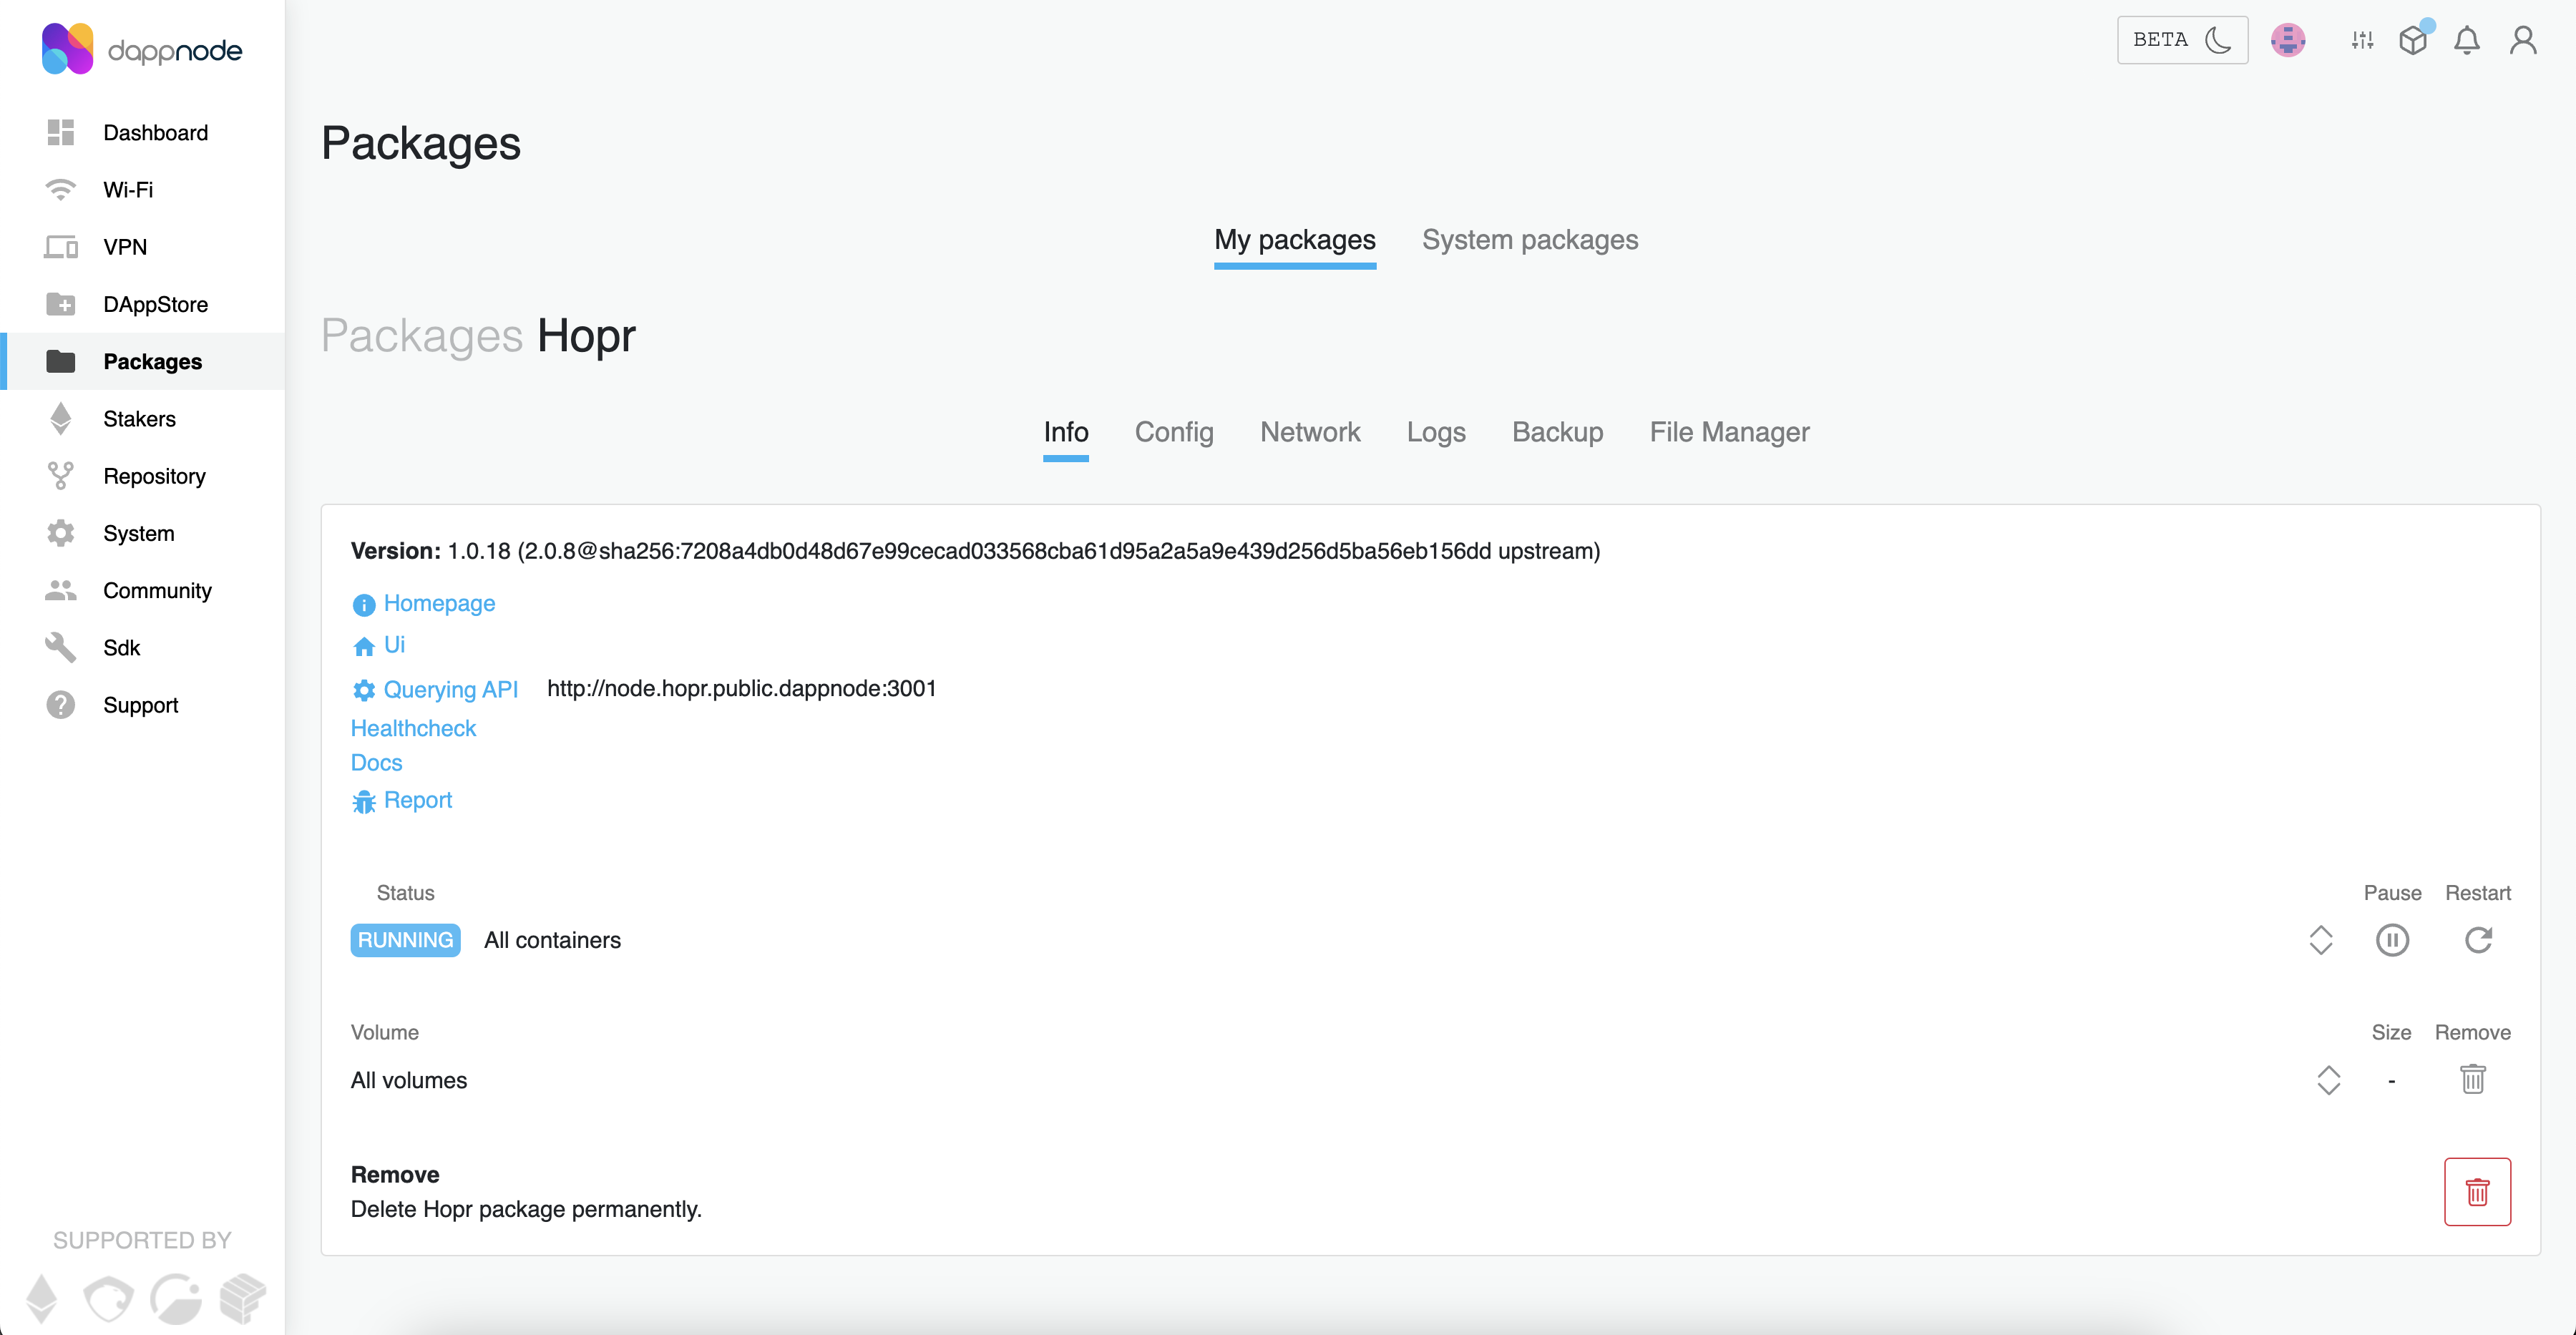
(2) Once inside, click on UI to open the HOPR Admin.
(3) Then connect your node as suggested here.
For Docker Users
Assuming you used the default port numbers, you should be able to access the HOPR Admin at http://localhost:4677 (replace localhost with your server IP address if you are using a VPS, for example http://142.93.5.175:4677).
This is assuming you stuck to the default port numbers when setting up your node.
Connecting Your Node
With no API token, you will need to entr a space in the API token field when connecting your node to the HOPR Admin UI. The "Connect to node" button will remain disabled until something is entered, so please use a space when you have no API token set.
For Dappnode, if you are not using an API token, please do not enable port forwarding for port 3001 or any port provided to access the API endpoint, as this could compromise access to your HOPR Admin UI.
To use HOPR Admin UI, you first need to connect to your HOPR node.
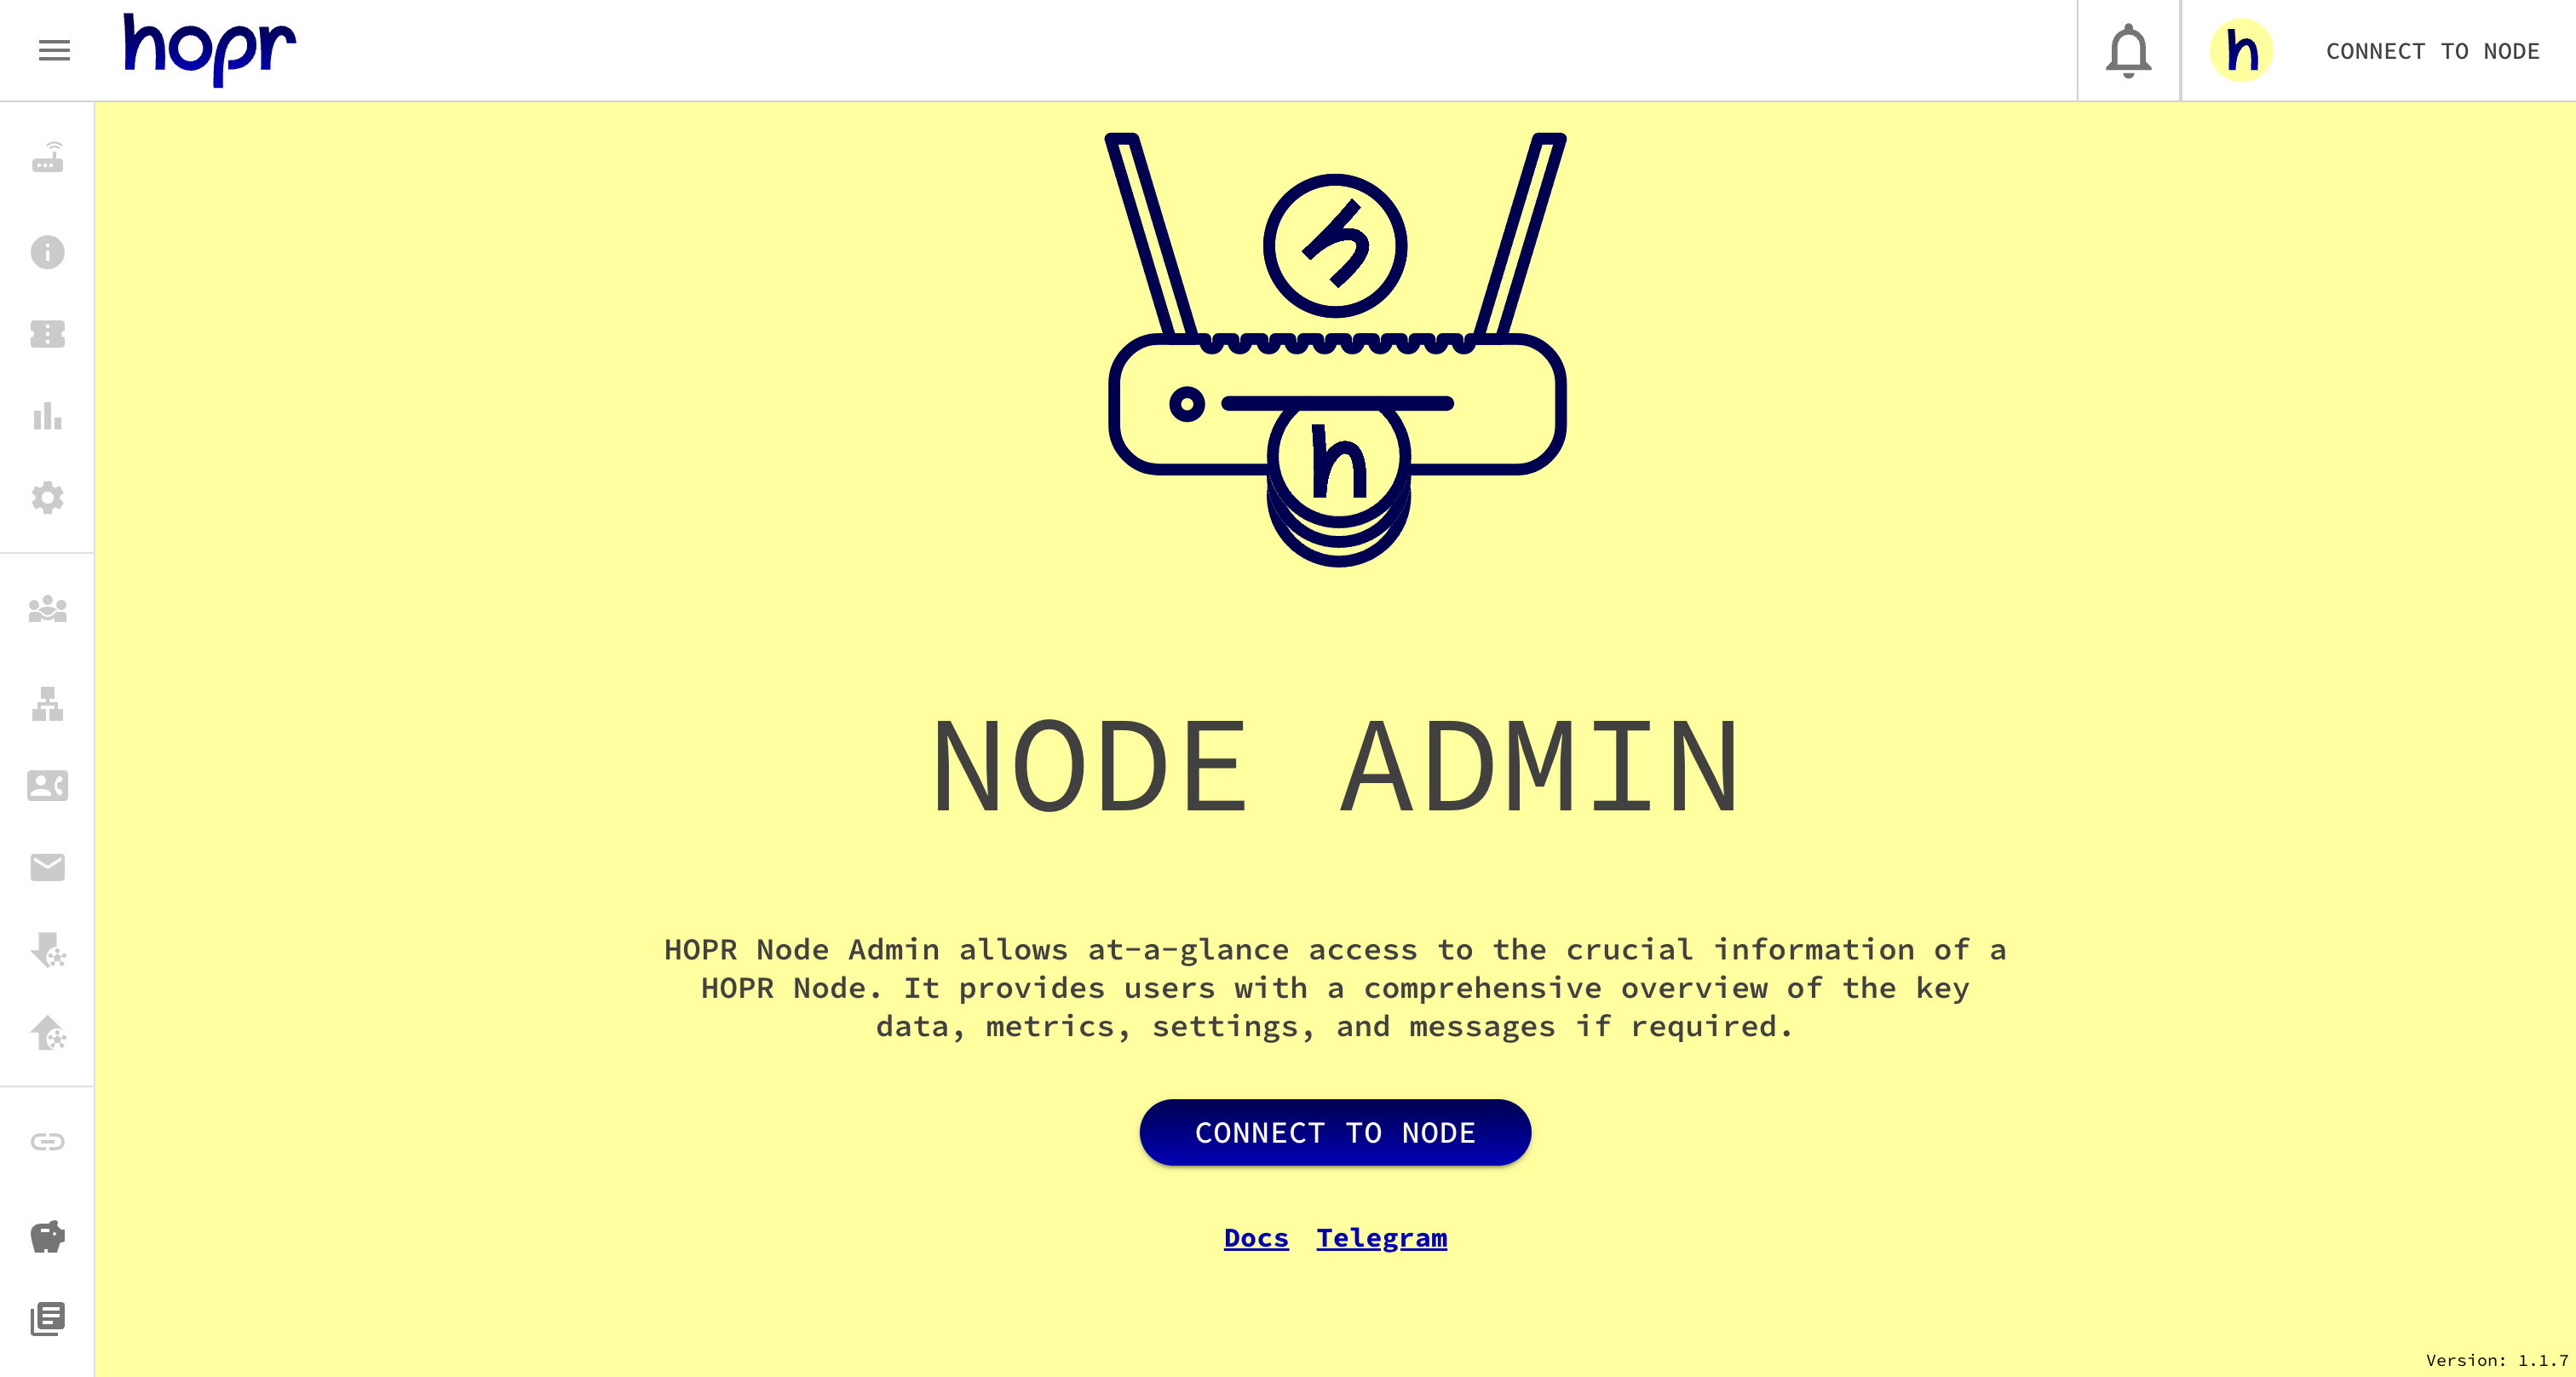
(1) On the top right corner of the initial HOPR Admin screen, click on CONNECT TO NODE.

(2) Under "Node credentials:" do the following:
- Under the
Local namefield, give this node a nickname. This is optional but may be useful if you are running multiple nodes. - Under the
API endpointfield, by default api endpoint should be set tohttp://localhost:3001, but you may need to replacelocalhostwith your server IP address if you used a VPS and change the port if you adjusted the mapping on installation. For dappnode users this should be set tohttp://node.hopr.public.dappnode:3001by default. - Under the
API tokenfield, if you are using Docker, enter the custom security token you created. If you are using dappnode, by default it is set to:!5qxc9Lp1BE7IFQ-nrtttU.
Note: If you want to save your node credentials to login easier in the future, tick Save API token locally (unsafe) and click Save.
By clicking on the button Connect to the node you should connect to your node. If your connection was unsuccessful please refer to the Troubleshooting Issues section.
Using HOPR Admin
INFO
After you have connected your node, you will be redirected to the node info section of the HOPR Admin. This is a great page to get all the high-level information about your node and its performance.
Network
Under Network, it shows your node's eligibility to participate in the HOPR network along with your node's connectivity status.
Eligible - True or false, tells you whether or not you are registered on the Network.
Sync process - During the initial syncing process, it displays the syncing progress with the network.
Blockchain Network - The HOPR node operates on a blockchain network for its on-chain actions.
Connectivity Status - Unknown, Red, Orange, Yellow or Green. Depending on the health of your connection to the network.
unknown: Initial value when the node is started. It means the connectivity could not be assessed.Red: No connection to any nodes at all.Orange: Low-quality (<= 0.5) connection to at least one public node.Yellow: High-quality connection to at least one public node.Green: High-quality connection to at least one public node and at least one non-public node.
The connection, in this case, means a node's ability to complete a ping/pong regardless of whether they are sending or receiving the ping.
And connection quality is measured from 0 to 1 based on the ratio of successful pings to the total number of pings. E.g. a node that responds to half of all pings it receives from node A will have a connection quality of 0.5 to node A.
Low-quality connection: <= 0.5
High-quality connection: > 0.5
Announced address - This is the IP address and port of the HOPRd node, which it announces on the network, allowing other nodes to establish connections with it.
Listening address address - This is the IP address and port to which the HOPRd node is listening.
Balances
There are 2 token types:
xDAI (native)tokens: This will show the native tokens used to pay gas fees, currently xDAI.wxHOPR (hopr)tokens: These HOPR tokens fund payment channels/pay nodes to relay data.
xDAI: Node - the native token in the HOPRd wallet is used to pay gas fees for any on-chain actions on the node. For example, opening and closing payment channels, and redeeming tickets would require on-chain transactions paid for in xDAI.
xDAI: Safe - the native token in the HOPR Safe wallet.
wxHOPR Safe - HOPR token in the HOPR Safe wallet.
wxHOPR Channels OUT - The amount of HOPR tokens in the channels opened by your node.
wxHOPR Allowance - The amount of HOPR tokens allowed to be spent from the HOPR Safe by the HOPRd node.
wxHOPR: Total Staked - The total amount of HOPR tokens is the sum of the tokens in the HOPR Safe and those in the payment channels opened by your node.
Addresses
All the relevant addresses for operating your node.
- Node PeerID - what other nodes on the network will use to interact with your node—an address for them to ping or send data.
- Node Address - Your node's Ethereum address used to store native tokens.
- Safe Address - Safe address which is linked to your node.
- Hopr Token Address - The wxHOPR token smart contract.
- Hopr management module address - The HOPR management module smart contract address which is linked to your node.
- Hopr Channels Address - The HOPR channels smart contract, used for payment channel related on-chain activity, such as the openning an closing of payment channels, redeeming tickets etc.
Node
- Version - Your node's current HOPRd version.
- Environment - The environment in which HOPRd is running.
- Start date - The date of the last start of the HOPRd node.
- Uptime - The duration since the last start of the HOPRd node.
Channels
Shows the number of opened incoming & outgoing payment channels to and from this node.
Nodes on the network
- Announced - The number of total announced nodes on the HOPR network which are visible to your node.
- Connected - The number of visible nodes which have a connection to your node.
Aliases
The number of aliases you have assigned.
TICKETS
Ticket statistics displays information about your redeemed and unredeemed tickets value. Tickets are earned by relaying data and can be redeemed for HOPR tokens.
METRICS
- Total ping time - Displays the total time a single ping takes to complete (seconds).
- Start-up time - Displays the start-up time for your node (seconds).
- Time to reach high-level connection - Displays the time it takes your node to reach a GREEN connection status (seconds).
- Received message latencies - Displays the latencies of received messages (seconds).
- Peers by quality - Displays your visible peers categorized by their connection quality.
CONFIGURATION
- Include Reciepient - If you want the receiver of your messafe to know who sent it, ensure that you’ve set it to true. Because by default all messages are anonymous. Setting this to true will attach your PeeerID to your message.
- Strategy - By default, your node runs in passive mode, this means that your node will not attempt to open or close any channels automatically. When you set your strategy to promiscuous mode, your node will attempt to open channels to a randomly selected group of nodes which you have a healthy connection to. At the same time, your node will also attempt to close channels that are running low on balance or are unhealthy.
PEERS
This will show a list of nodes that are visible to your node. Next to each peerID, there are buttons allowing you to interact with the nodes directly through the interface:
- Ping node - To send the selected node a ping and measure the latency.
- Add new alias - iTo assign a nickname/alias to the node.
- Open outgoing channel - To create a payment channel from your node to the selected node.
- send message - To send a message to the selected node either directly or via a randomized route. You can choose the number of intermediaries or
hops(maximum 3).
If you haven't found a node on the list and you want to ping it, you'll find the Ping Node button at the top. This button allows you to ping any node, even if it's not on your node list.
You also have the ability to export the entire list of peers to a CSV file.
ALIASES
You can use the alias command to give an address a more memorable name. Also you can import / export a list of all current aliases.
MESSAGES
You can see a list of received messages and interact with them. Also you can send a message to any recipient on a HOPR network. By clicking on the button send message, this will prompt a message form window to open with the following fields:
-
Receiver (Peer Id) - To send the message, you will need to provide recipient's peerID.
-
Message - Type the message you would like to send.
-
Send mode - you can send in 3 modes:
- direct message - this mode will use 0-hops, sending a direct message means it is free of charge, because it is not mixed or private.
- automatic path - When sending a message using the automatic path, it will automatically find 3 nodes through which it will relay the message. This is the most secure mode.
- number of hops - You need to specify the number of hops through which it will relay the message, and it will try to find a route automatically.
- path - you can also specify a specific path of nodes through which you want to relay the message.
CHANNELS: IN
This will display a list of open payment channels from other nodes to your node. Next to the peerID, you can ping, add an alias, open/close a payment channel, or send a message from your end.
Unredeemed - This indicates the number of unredeemed tickets on the specific payment channel. Please note that if the node is restarted, this count will be reset. This is because the HOPRd node does not store this information for every payment channel in order to improve node performance.
CHANNELS: OUT
This will display a list of open payment channels from your node to other nodes on the HOPR network. Next to the peerID, you can either ping the selected node or close your payment channel to them.
- closing channel - To close a payment channel, you'll need to perform two actions. First, when you click
Close the channel, it will initiate the closure. After 5 minutes, if you haven't configured your node to automatically finalize the payment channel closure, you'll need to click a second time manually. - open outgoing channel - By specifying the node address (0x...) and HOPR amount, you can open a payment channel to the specified node.
- open multiple outgoing channels - You can prepate a csv file to open multiple payment channels in bulk.
- fund outgoing channel - By specifying the node address (0x...) and HOPR amount, you can fund an outgoing payment channel with additional wxHOPR.
- export outgoing channels as a CSV - You can export the entire list of outgoing payment channels as a CSV file.
Troubleshooting HOPR Admin Issues
Here is a list of the most common known issues and how to resolve them.
UNAUTHORIZED/Authenticaltion Failed
If you provided incorrect security token, you will receive an error similar to the following:
ERROR
Unable to connect.
Error fetching: {"status":"UNAUTHORIZED","error":"authentication failed"}
Network Request Failed
If HOPR Admin can't connect to your node, please check if the provided API endpoint is correct, or if your node is working. If either is a problem, You will receive an error similar to the following:
ERROR
Unable to connect.
Unknown error: "Network request failed"
Balance Too Low
When your node has just been created, it will not be funded. You can't connect and unfunded node and should return after having completed the entire onboarding process.
ERROR
Unable to connect.
Your xDai balance seems to low to operate the node.
Please top up your node.
Address: 0xa6512ad...657730b0313
Is My Node Working Correctly?
Your node is considered as working normally if:
(1) On the network dashboard (https://network.hoprnet.org/dashboard), your node's 24-hour availability is higher than 90%. If you have recently started a new node, please wait 24 hours so the metrics can be calculated accurately.
(2) Your number of unredeemed & redeemed tickets is increasing.
Note: Your unredeemed ticket count should increase daily as CT nodes relay data via available nodes on the network several times a day. When your unredeemed ticket count reaches 300 per channel, then it will auto-aggregate the 300 tickets into a single ticket and redeem it.
(3) There are zero rejected tickets. If your node has rejected tickets, especially if the number is increasing day by day, this could mean your node hasn't synced properly with the HOPR network. You can resolve this issue by following the instructions here.
(4) Your node's peer count is higher than 150. Login to your HOPR Admin UI and check if your node has a peer count of at least 150.
(5) You are able to ping one of the following Cover Traffic nodes:
12D3KooWL16nW1Z2dLvyZWzr9ZZwoLTeuSfaKSeX2BjucHwSoEwJ12D3KooWH9rfYNKMkNncYJxS7BH41ThPZUYe3FNkbfmJAa4n5r3x12D3KooWNYi2kG5cdeEUBvjemZRUkPVmAeXsSGVrX9QHnEiMfh8w12D3KooWGyY39vD8J2VGEDjTCD3eEyvV4YrnKM9NCQa6SYJKczrR12D3KooWB1bPdu9Q5w2nzKkaCoE9gq9j8bgd3c8iVu81ypSu5WqB
Troubleshooting Rejected Tickets
For Dappnode users
(1) Go to the Dappnode file manager
(2) Under the Download file section, enter: /app/hoprd-db/.hopr-identity and then click Download.
(3) Unarchive the hopr-identity.tar file, ensuring your view of hidden files is turned on to see the hopr-identity file.
(4) Go to the Config page.
(5) Under RPC Provider URL, replace https://provider-proxy.hoprnet.workers.dev/xdai_mainnet with https://rpc.ankr.com/gnosis and click Update.
(6) Go to http://my.dappnode/packages/my/hopr.public.dappnode.eth/info. Next to All containers, click on the Pause icon to stop the HOPRd node.
(7) Next to All volumes, click on the trash can icon to remove all volumes.
(8) Restore your node using your identity file:
- Go to http://my.dappnode/packages/my/hopr.public.dappnode.eth/file-manager
- Find the section titled
Upload Fileand enter the path/app/hoprd-dbinto the text field. - Click the
Choose Filebutton and select the identity file you had previously unarchived.hopr-identity. Try selecting the file several times until you see the file name instead of the placeholder textChoose filein the field title. - Paste the previously copied path into the second field and click Upload.
(9) Go to http://my.dappnode/packages/my/hopr.public.dappnode.eth/info and next to All containers click on the play icon to start your node.
Wait for up to 1 - 1.5 hours until your node syncs with the network!
For VPS / Mac / PC users:
(1) Stop the Docker container:
- Paste the command
docker psinto your terminal. Next to the container image nameeurope-west3-docker.pkg.dev/hoprassociation/docker-images/hoprd:stablemake note of the container ID. - Paste the command
docker rm -f CONTAINER_IDinto your terminal.
Note: Replace CONTAINER_ID with the one you noted earlier.
(2) Find the .hoprd-db-dufour folder and delete only the DB folder and the tbf file inside it.
(3) Start a node using the latest docker command with a custom RPC provider added to the command. Read more on adding a custom RPC provider here
Wait for up to 1 - 1.5 hours until it syncs with the network!