HOPR Staking Hub
The HOPR Staking Hub is a platform for onboarding HOPR node operators. It enables you to create a HOPR Safe for securely depositing and managing your stake. Through the Hub, you can easily add and manage multiple nodes, handle transactions, monitor your nodes with essential performance metrics, use the token wrapper to wrap or unwrap HOPR tokens, and more.
Connect to the HOPR Staking Hub
-
Visit the HOPR Staking Hub.
-
Before connecting your wallet, ensure that you are on the Gnosis Chain network. In the top right corner, click Connect Wallet, and in the popup, select your wallet type to connect to the Staking Hub.
Manage and monitor your node(s) performance
-
Connect to the HOPR Staking Hub.
-
On the left-hand side, click Dashboard, then select the NODES tab. On this page, you will see all the nodes associated with your current HOPR Safe account. Each node is accompanied by key metrics and action buttons:
Item Description Node Address The unique address of your node. You can copy the address or view its on-chain activity on https://gnosisscan.io. Onboarding Displays four onboarding indicators that show the current status of your node's onboarding process. Hover over each indicator for detailed information. Version Displays the currently installed version of the HOPRd node. Last Seen The last date and time your node was detected by the Network Dashboard bots. 30-Day Availability Indicates your node’s uptime percentage over the past 30 days. Balance Displays the node’s native token (xDai) balance, used for on-chain activities. Actions Train: The Train icon becomes active when a newly added node requires a quick onboarding process to complete setup.
Wallet: Allows you to fund your node with xDai. It's important to regularly check and maintain your node's balance to ensure it can redeem tickets or perform other on-chain actions.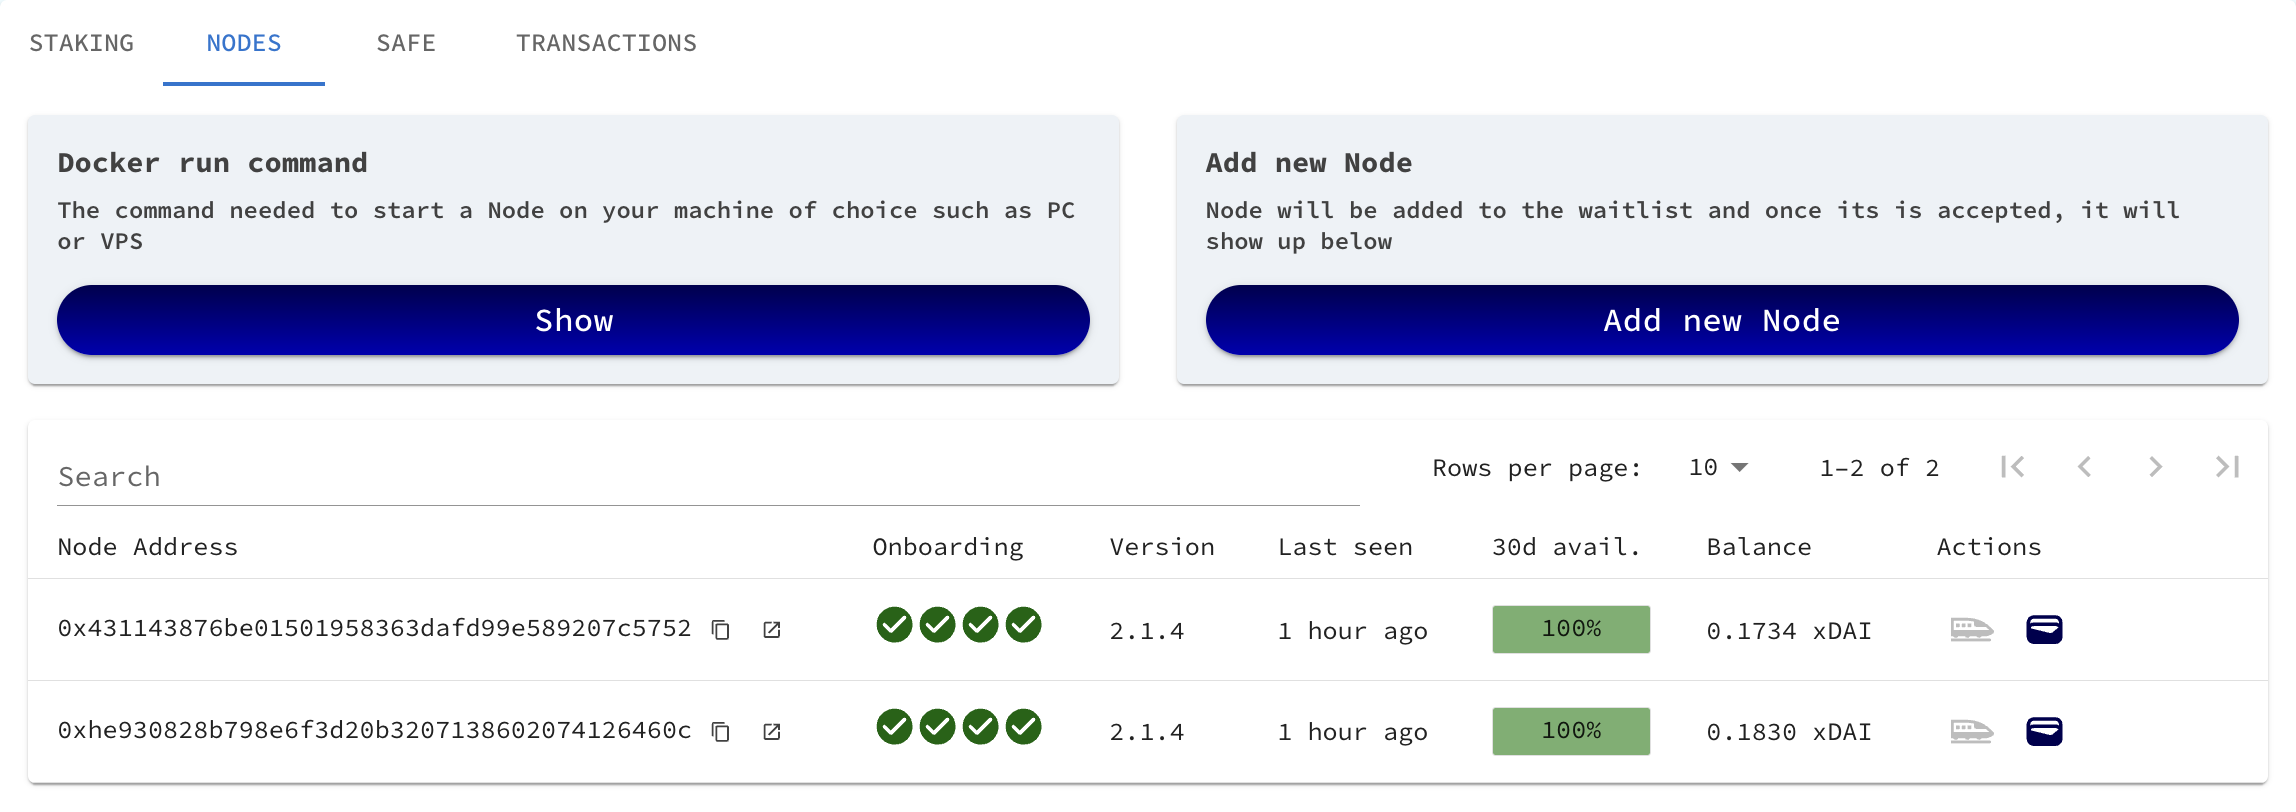
Add additional node
Before adding an additional node, ensure you have allocated enough stake per node. For more information, refer to the HOPR Network participation requirements.
-
Start your additional node. You can find detailed instructions here.
-
Connect to the HOPR Staking Hub.
-
On the left-hand side, click Dashboard, then navigate to the NODES tab. Click Add New Node, which will redirect you to the waitlist form. Complete the required information for your newly started node. To find out when your node will be granted access to the network and what steps to take next, refer to the FAQ section for further guidance.
Remove a node from your HOPR Safe account
-
Connect to the HOPR Staking Hub.
-
On the left-hand side, click Dashboard, locate the Module address, and click the second icon to be redirected to the Gnosis Scan website, where you can interact directly with your Safe Module smart contract.
-
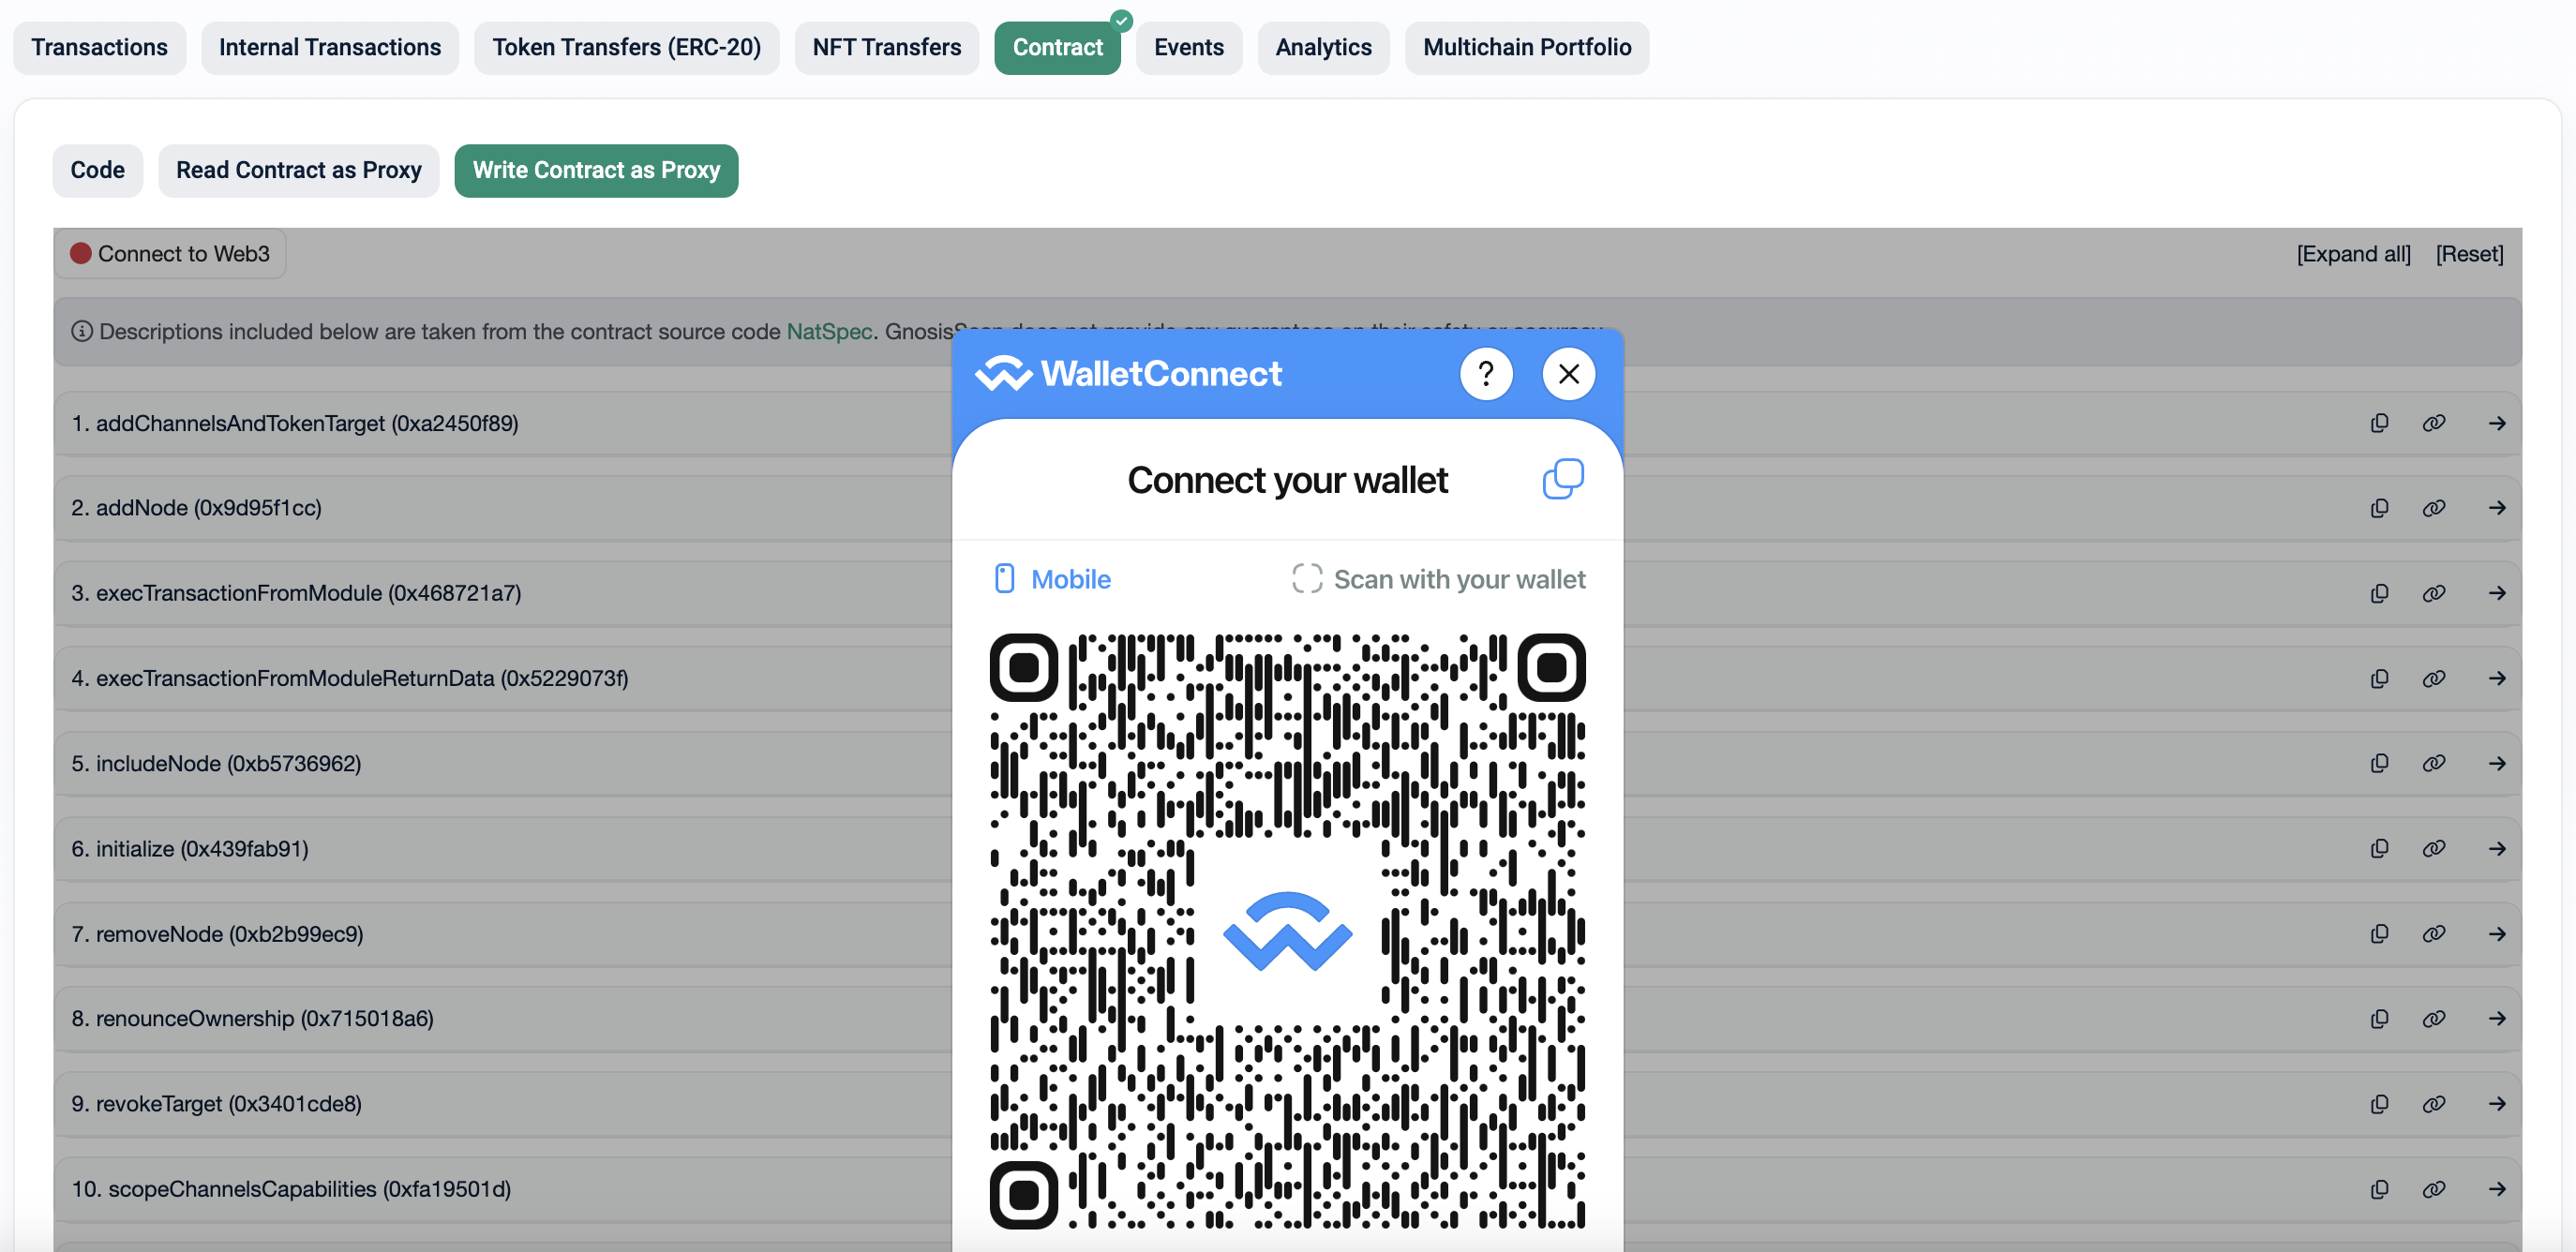
In the middle of the page, click the Contract tab, then select Write Contract as Proxy.

-
Find and click Connect to Web3, approve the disclaimer by clicking OK, and in the wallet connection popup, select WalletConnect. Next to Connect your wallet, click the Copy icon.
-
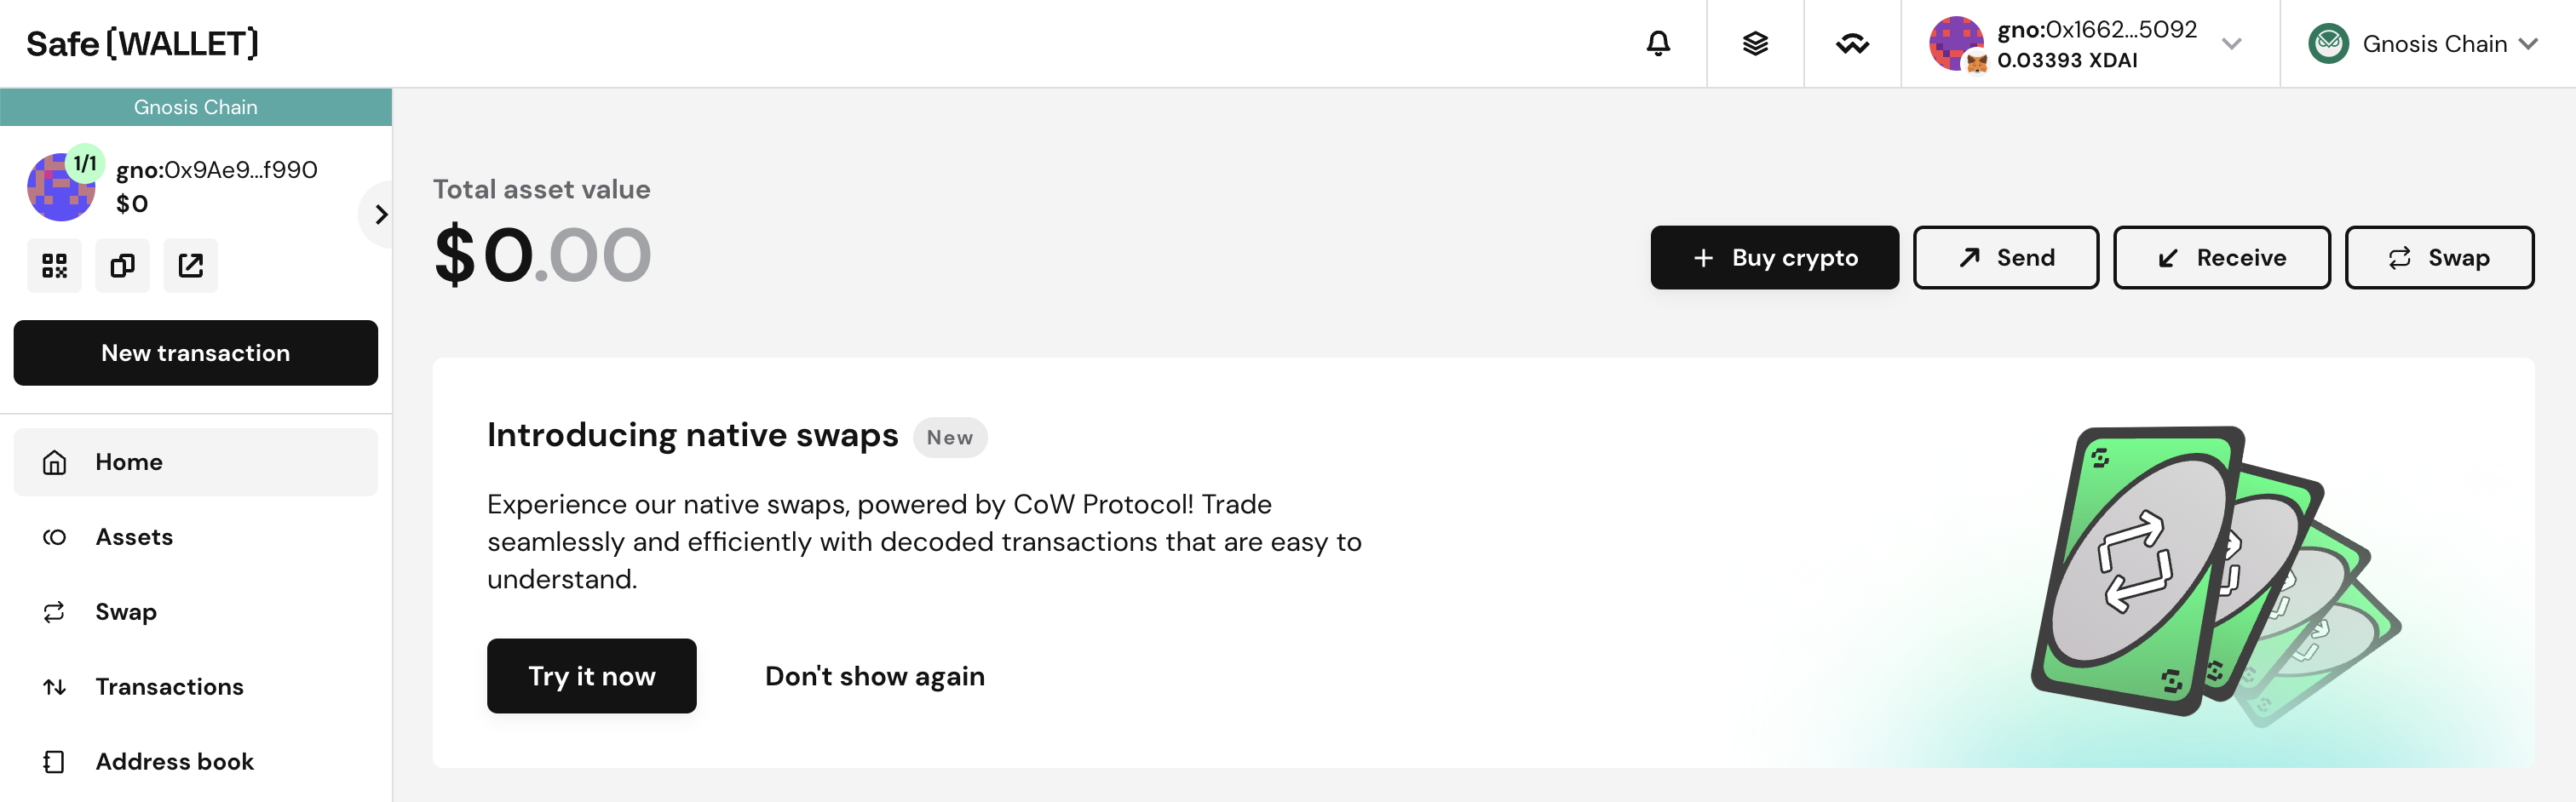
Return to the HOPR Staking Hub, and on the left-hand side, click Dashboard, then select the SAFE tab. At the bottom of the page, click the safe.global button, which will redirect you and automatically connect to your Safe wallet.
noteIf you see a Connect button in the top right corner and don't see your Safe owner wallet address, click Connect and connect with your wallet that owns the Safe.
-
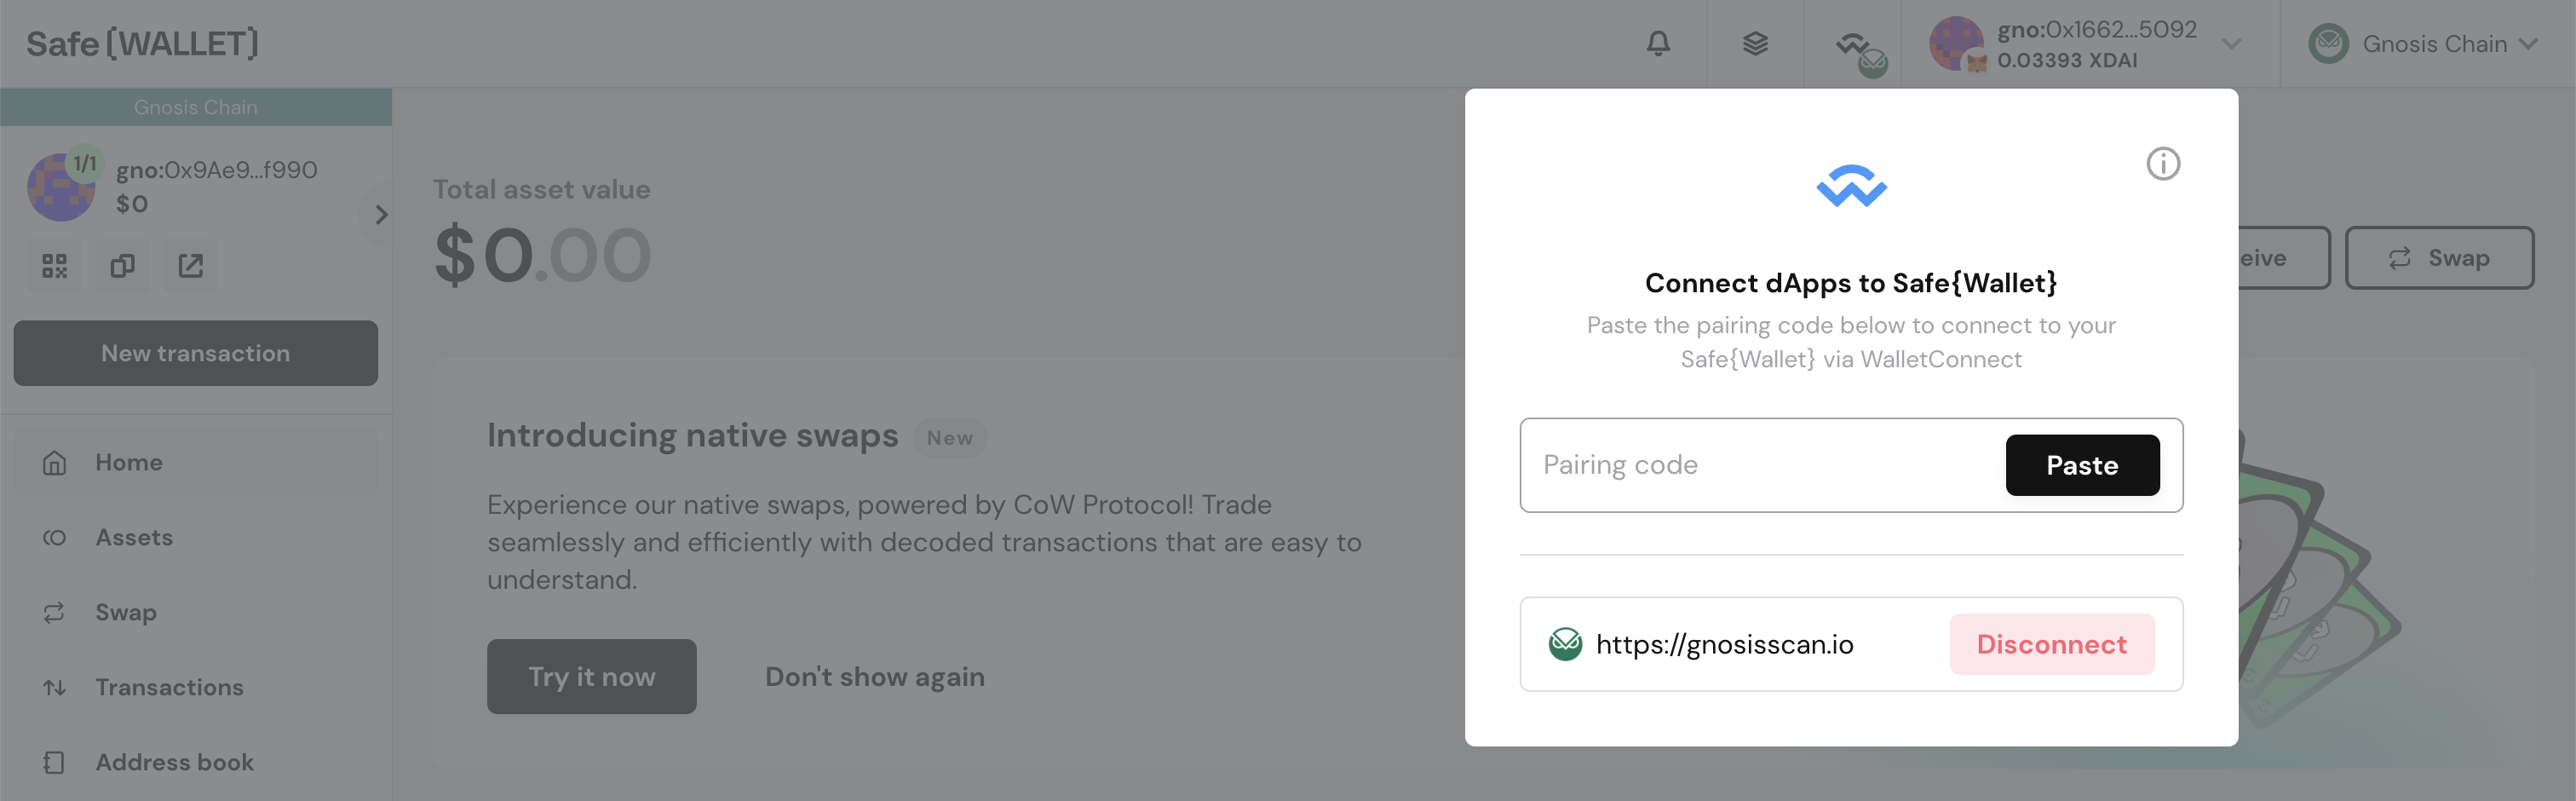
In the top right corner, just to the left of your connected wallet address, click the WalletConnect icon.
-
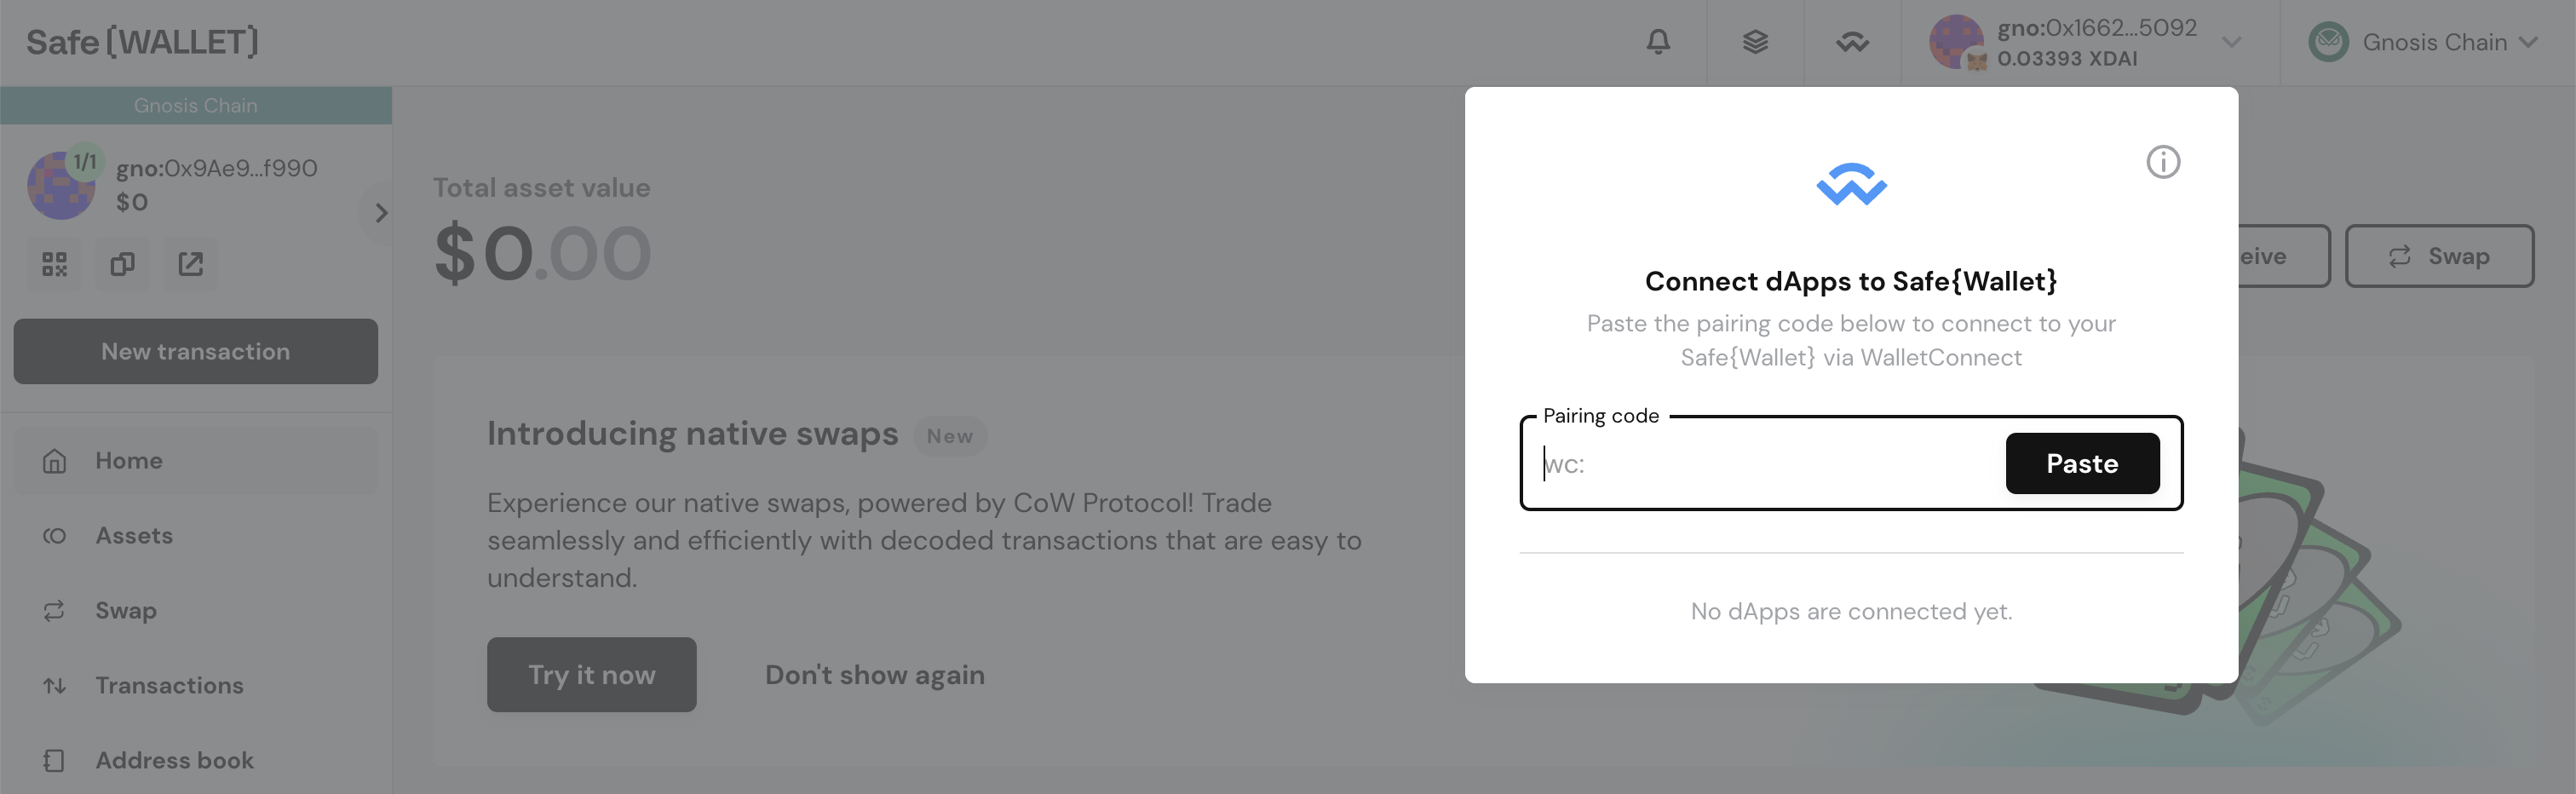
In the WalletConnect popup, paste the pairing code you previously copied from the Gnosis Scan website into the Pairing code field. If the connection is successful, you should see a screen similar to this:
-
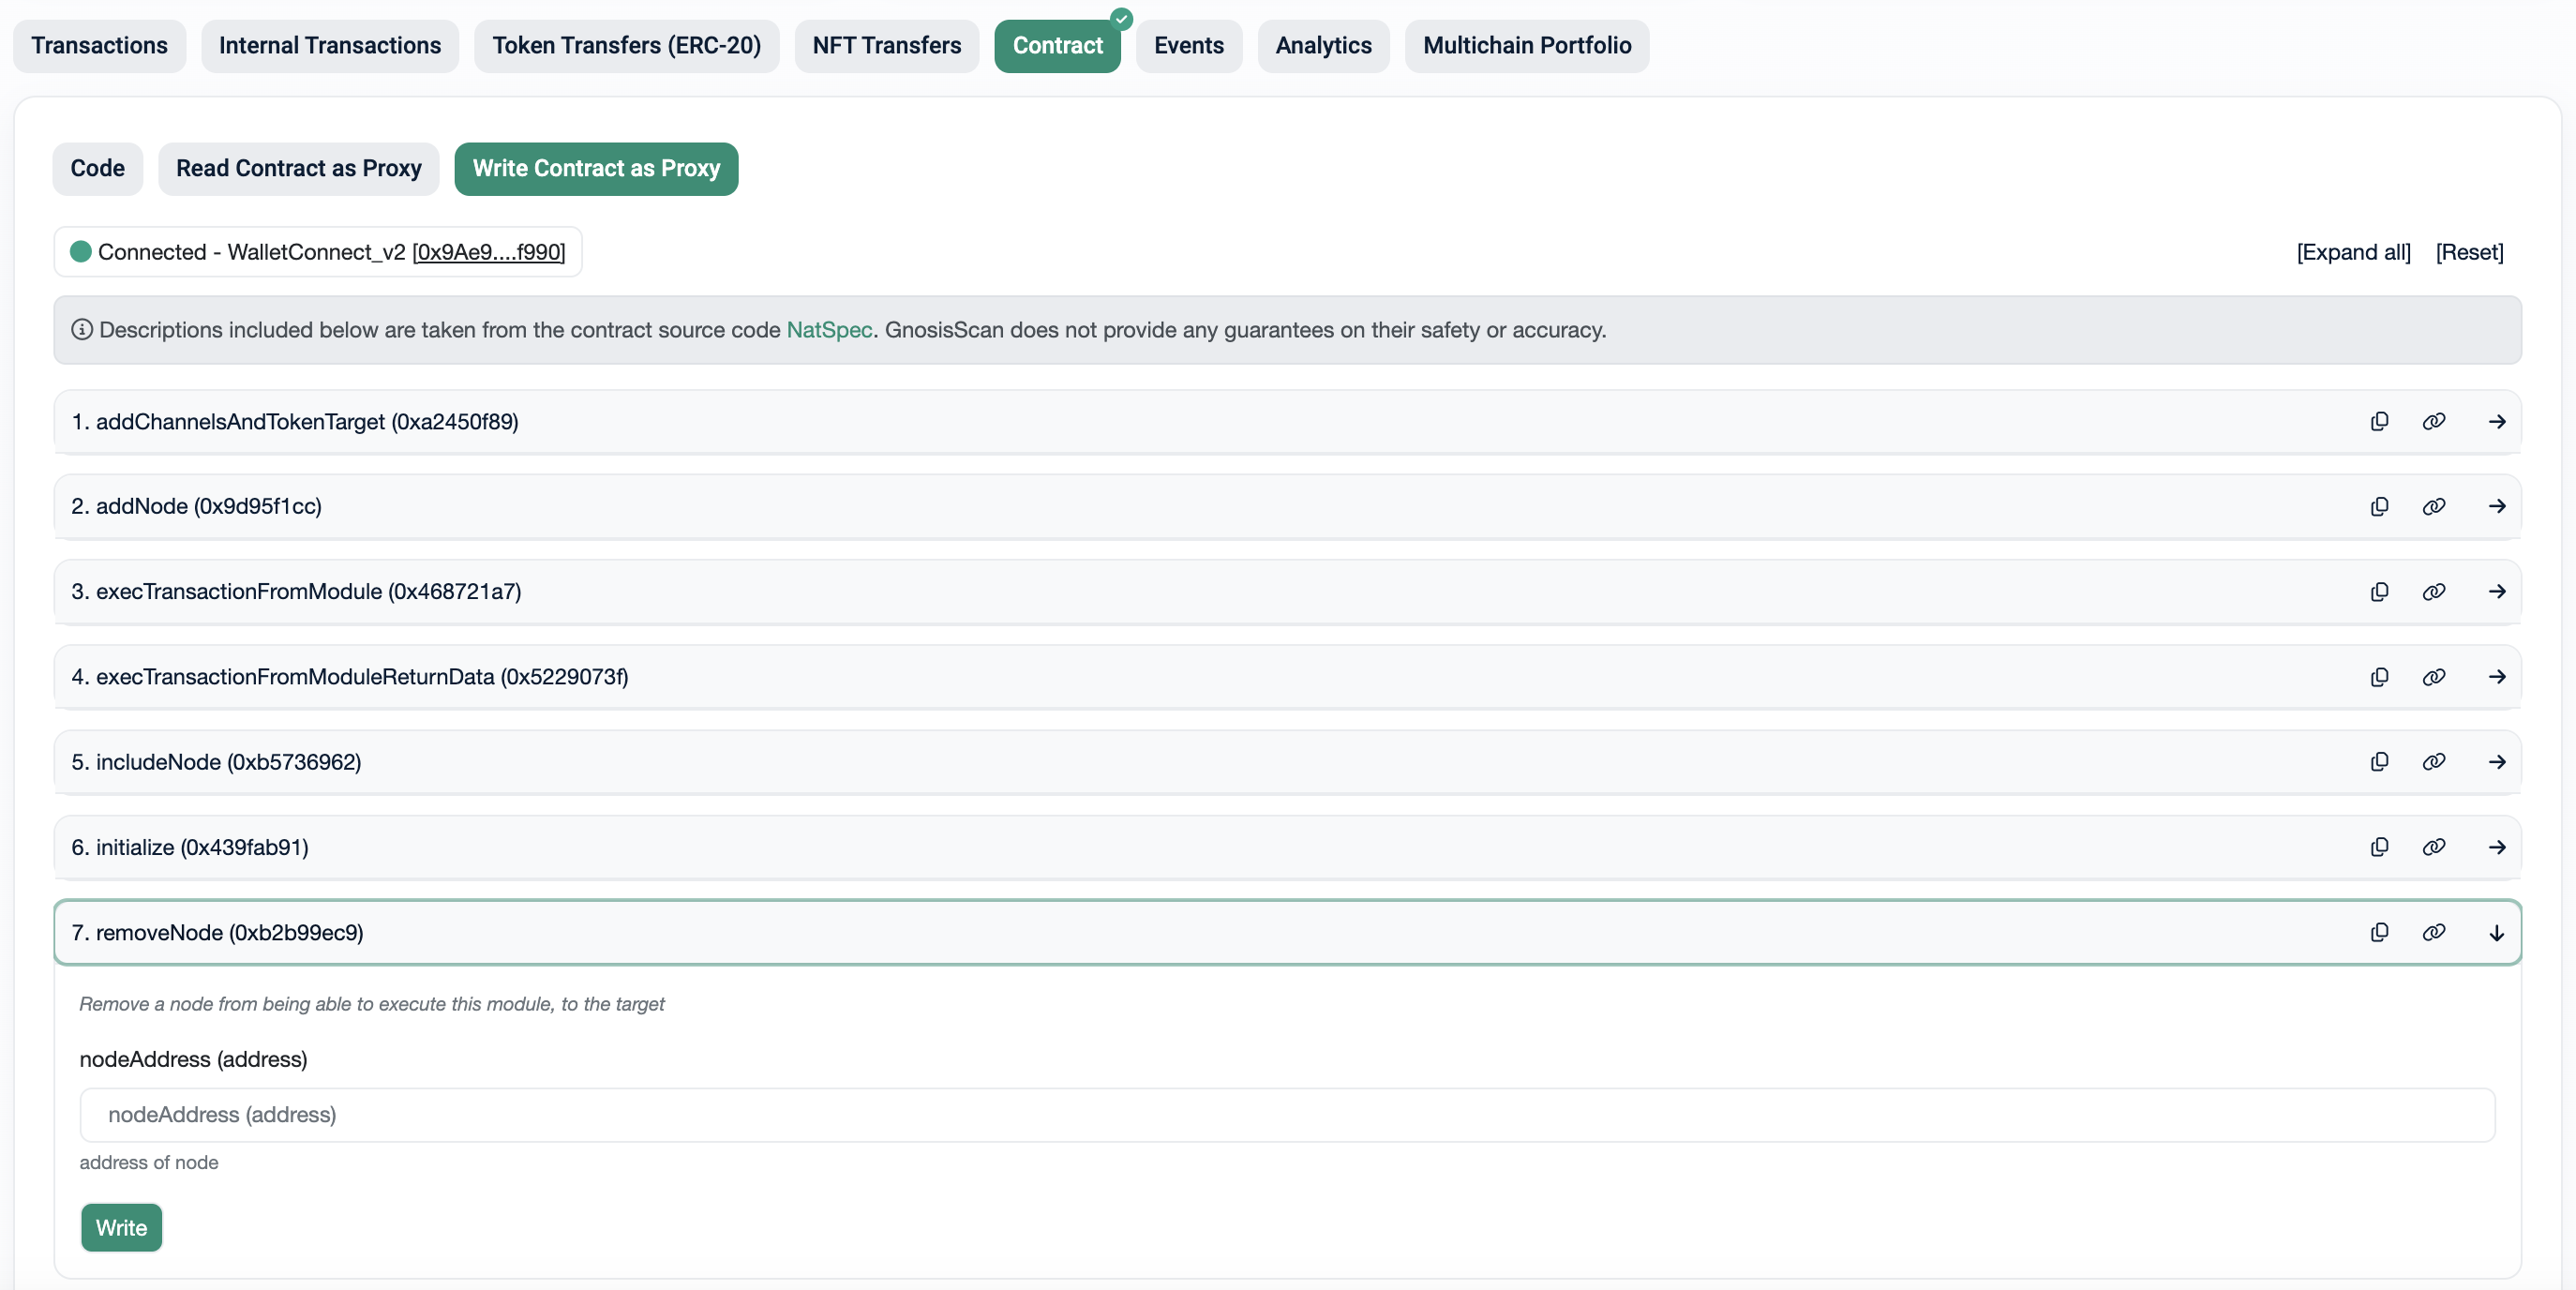
Now that your Safe wallet is connected to the Gnosis Scan website, return to the Gnosis Scan page. If the connection is successful, instead of Connect to Web3, you should see your Safe wallet address. It should be similar to this screenshot:

-
Scroll down to the bottom of the page until you find and click 7. removeNode (0xb2b99ec9). Enter your node address and click Write.
-
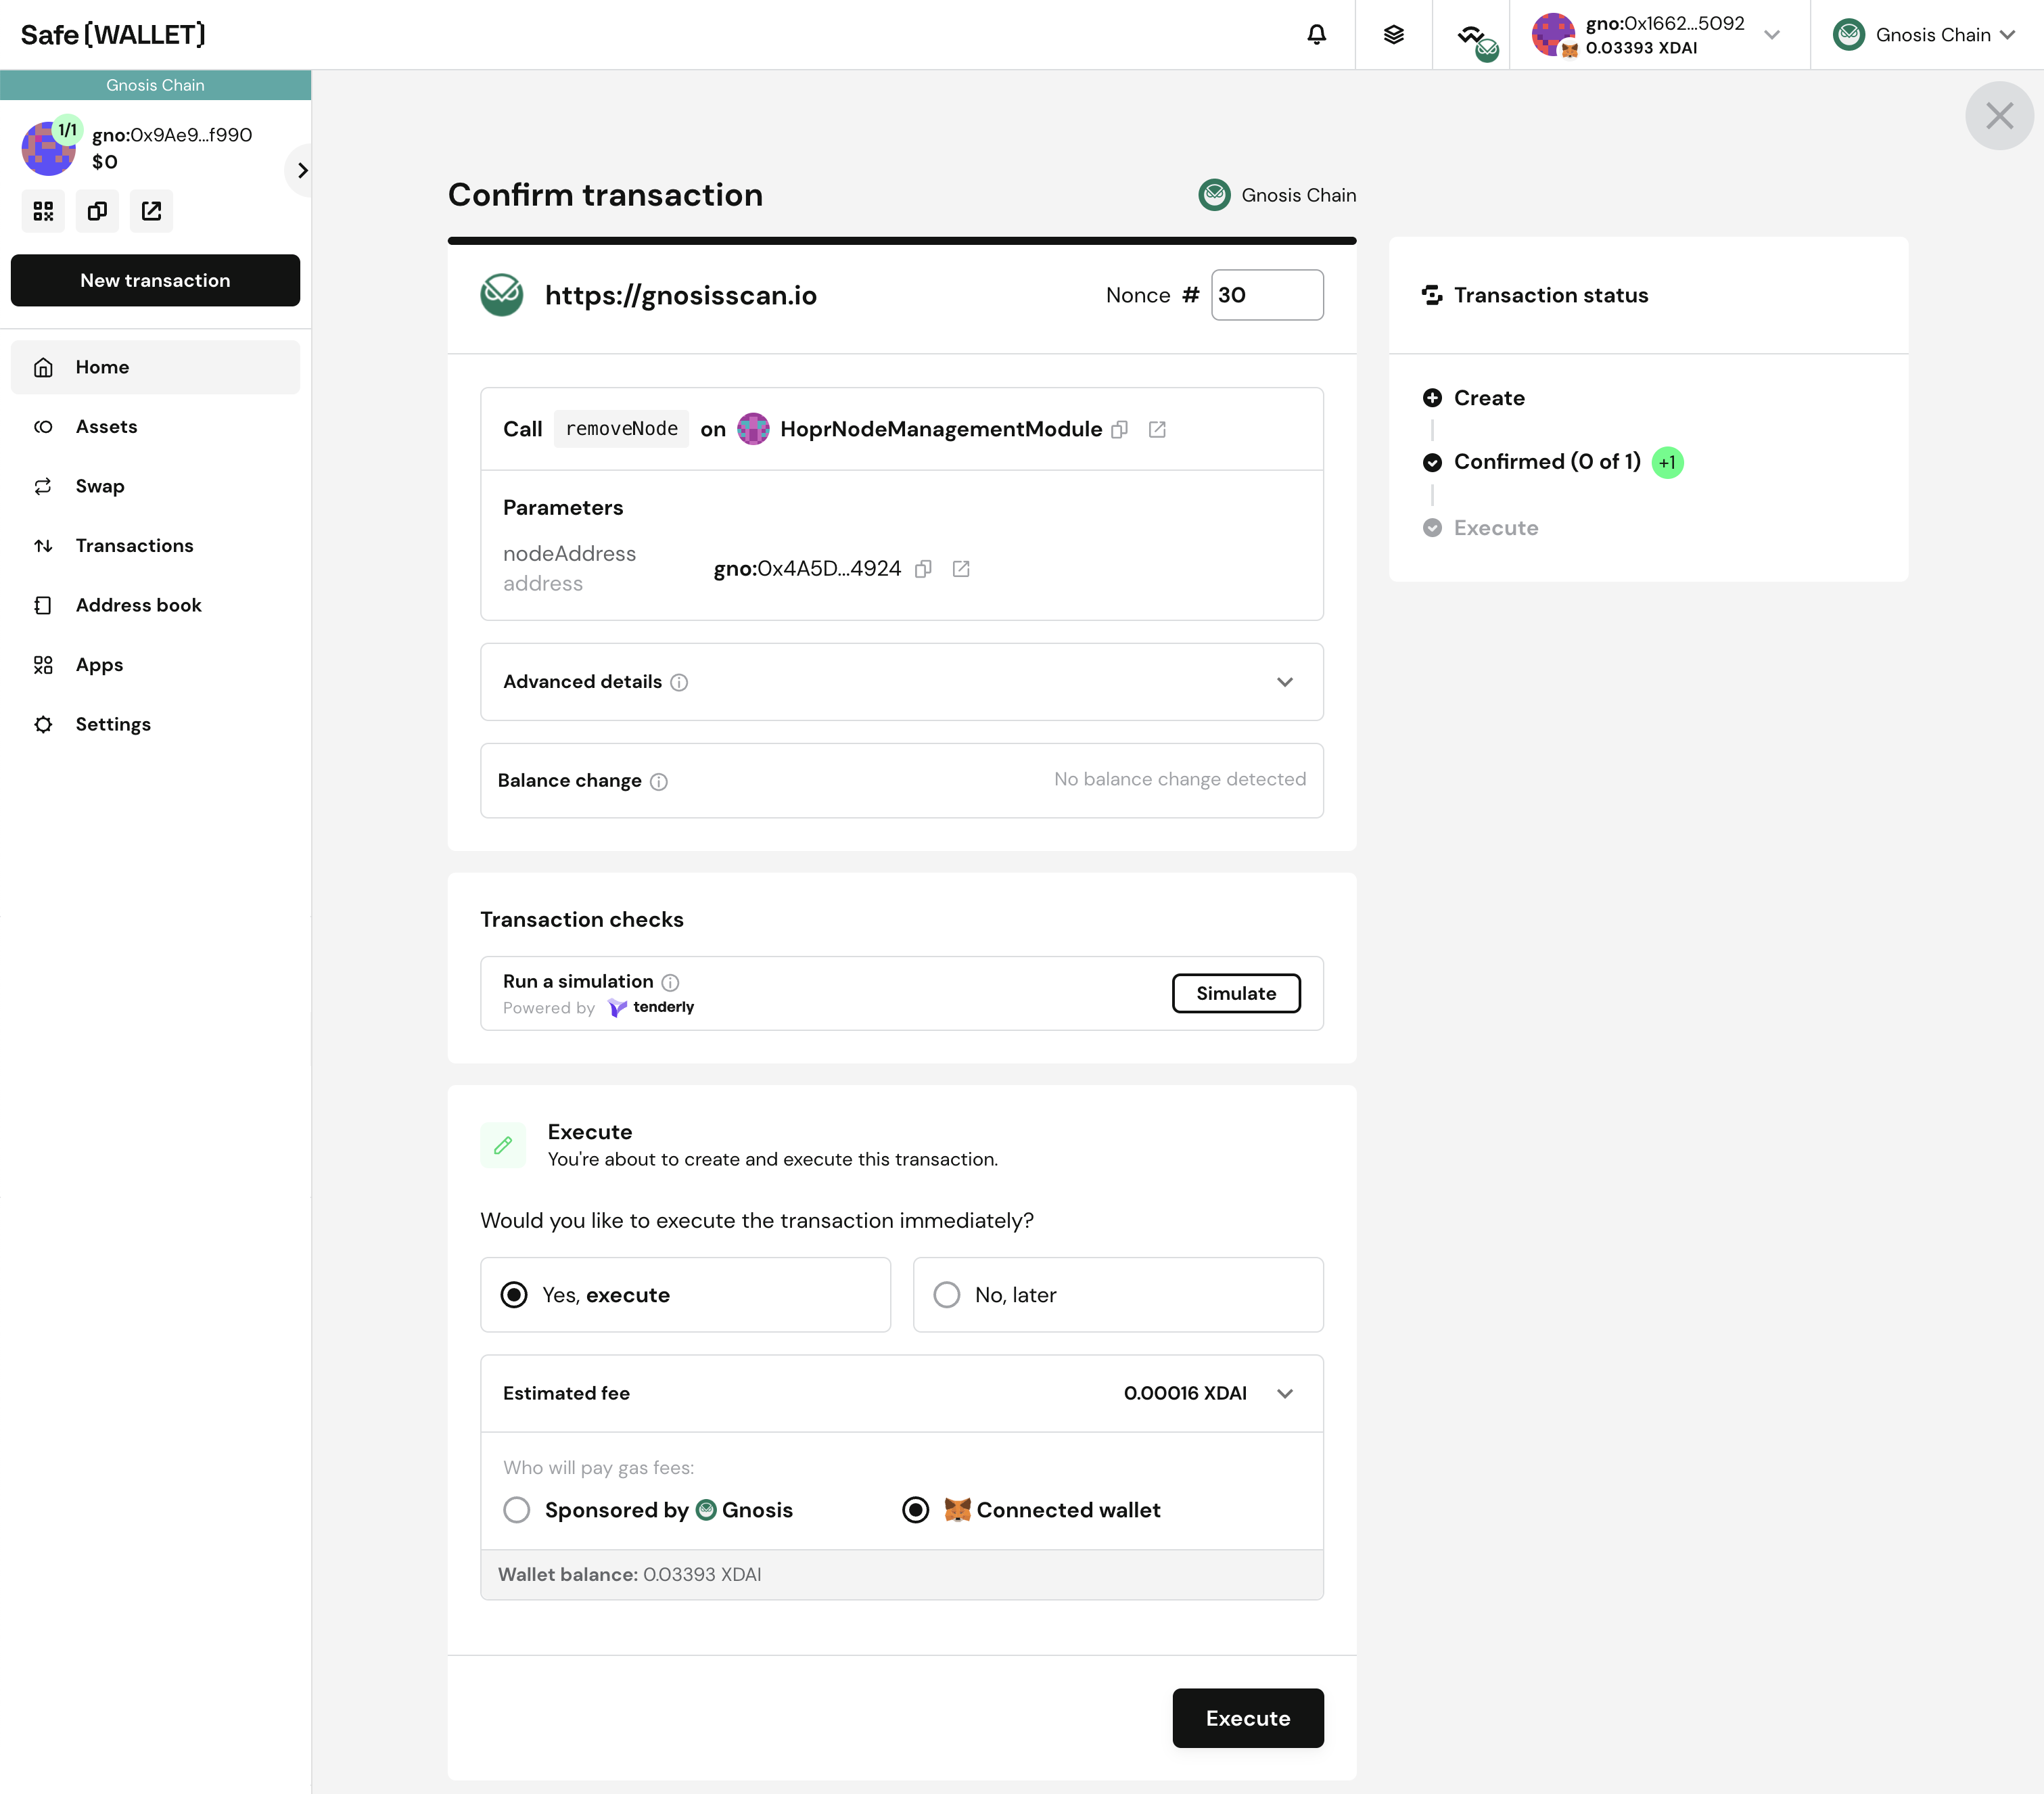
Return to the Safe.global website, where you should see the Confirm transaction screen. Scroll to the bottom and click Execute. Your wallet will prompt you to confirm the transaction.
Adding an additional owner to your HOPR Safe account
-
Connect to the HOPR Staking Hub.
-
On the left-hand side, click Dashboard, then select the SAFE tab. Next to Safe Owners:, click the Edit button.
-
In the field next to ADD OWNER, enter the wallet address of the additional owner (ensure that you have full control over this new owner's wallet). Then, click ADD. In the popup, if you agree to proceed, click ADD again and confirm the transaction through your wallet.
RecommendationTo enhance the security and recoverability of your Safe account, we recommend configuring it with a minimum of 3 owners, and requiring 2 confirmations to authorize transactions. This setup ensures that if one owner loses access, the remaining two can continue managing and executing transactions without disruption.
-
Once the transaction is complete, the new owner should be visible. While optional, we recommend increasing the Required confirmations from
1to2. This ensures that both owners must approve any on-chain actions, preventing unauthorized transactions if one wallet is compromised.To do this, change the Required confirmations from
1to2, click UPDATE, and confirm the transaction through your wallet.
Removing an additional owner from your HOPR Safe account
-
Connect to the HOPR Staking Hub.
-
On the left-hand side, click Dashboard, then select the SAFE tab. Before removing an owner, you first need to decrease the number of required confirmations.
Next to Required confirmations:, lower the number (for example, if you currently have 2/2 confirmations, reduce it to 1). Click UPDATE, and if you agree to proceed, click SIGN UPDATE in the popup.
-
From your second owner, connect to the HOPR Staking Hub. If your wallet manages multiple HOPR Safe wallets, select the specific Safe wallet you want to manage from the top right corner.
On the left-hand side, click Dashboard and then navigate to the TRANSACTIONS tab. Locate the pending transaction titled changeThreshold, click EXECUTE, and approve the transaction in your wallet.
-
Once the transaction is complete, click Dashboard on the left-hand side, then go to the SAFE tab. Click Edit.
-
Next to Safe Owners, select the owner you would like to remove, click the Trash icon, and approve the transaction in your wallet.