Dappnode
Please note that you must start the onboarding process before setting up your node. To start, visit the Overview page.
Install the HOPR Package
-
Connect to your Dappnode:
- Via your local network
- Remotely using Dappnode VPN.
You’ll need to port forward port
51820on your router to access your Dappnode from anywhere. For instructions, see our port forwarding guide.
-
Open the DAppStore from the sidebar.
-
Use the DAppStore search bar to find
HOPR.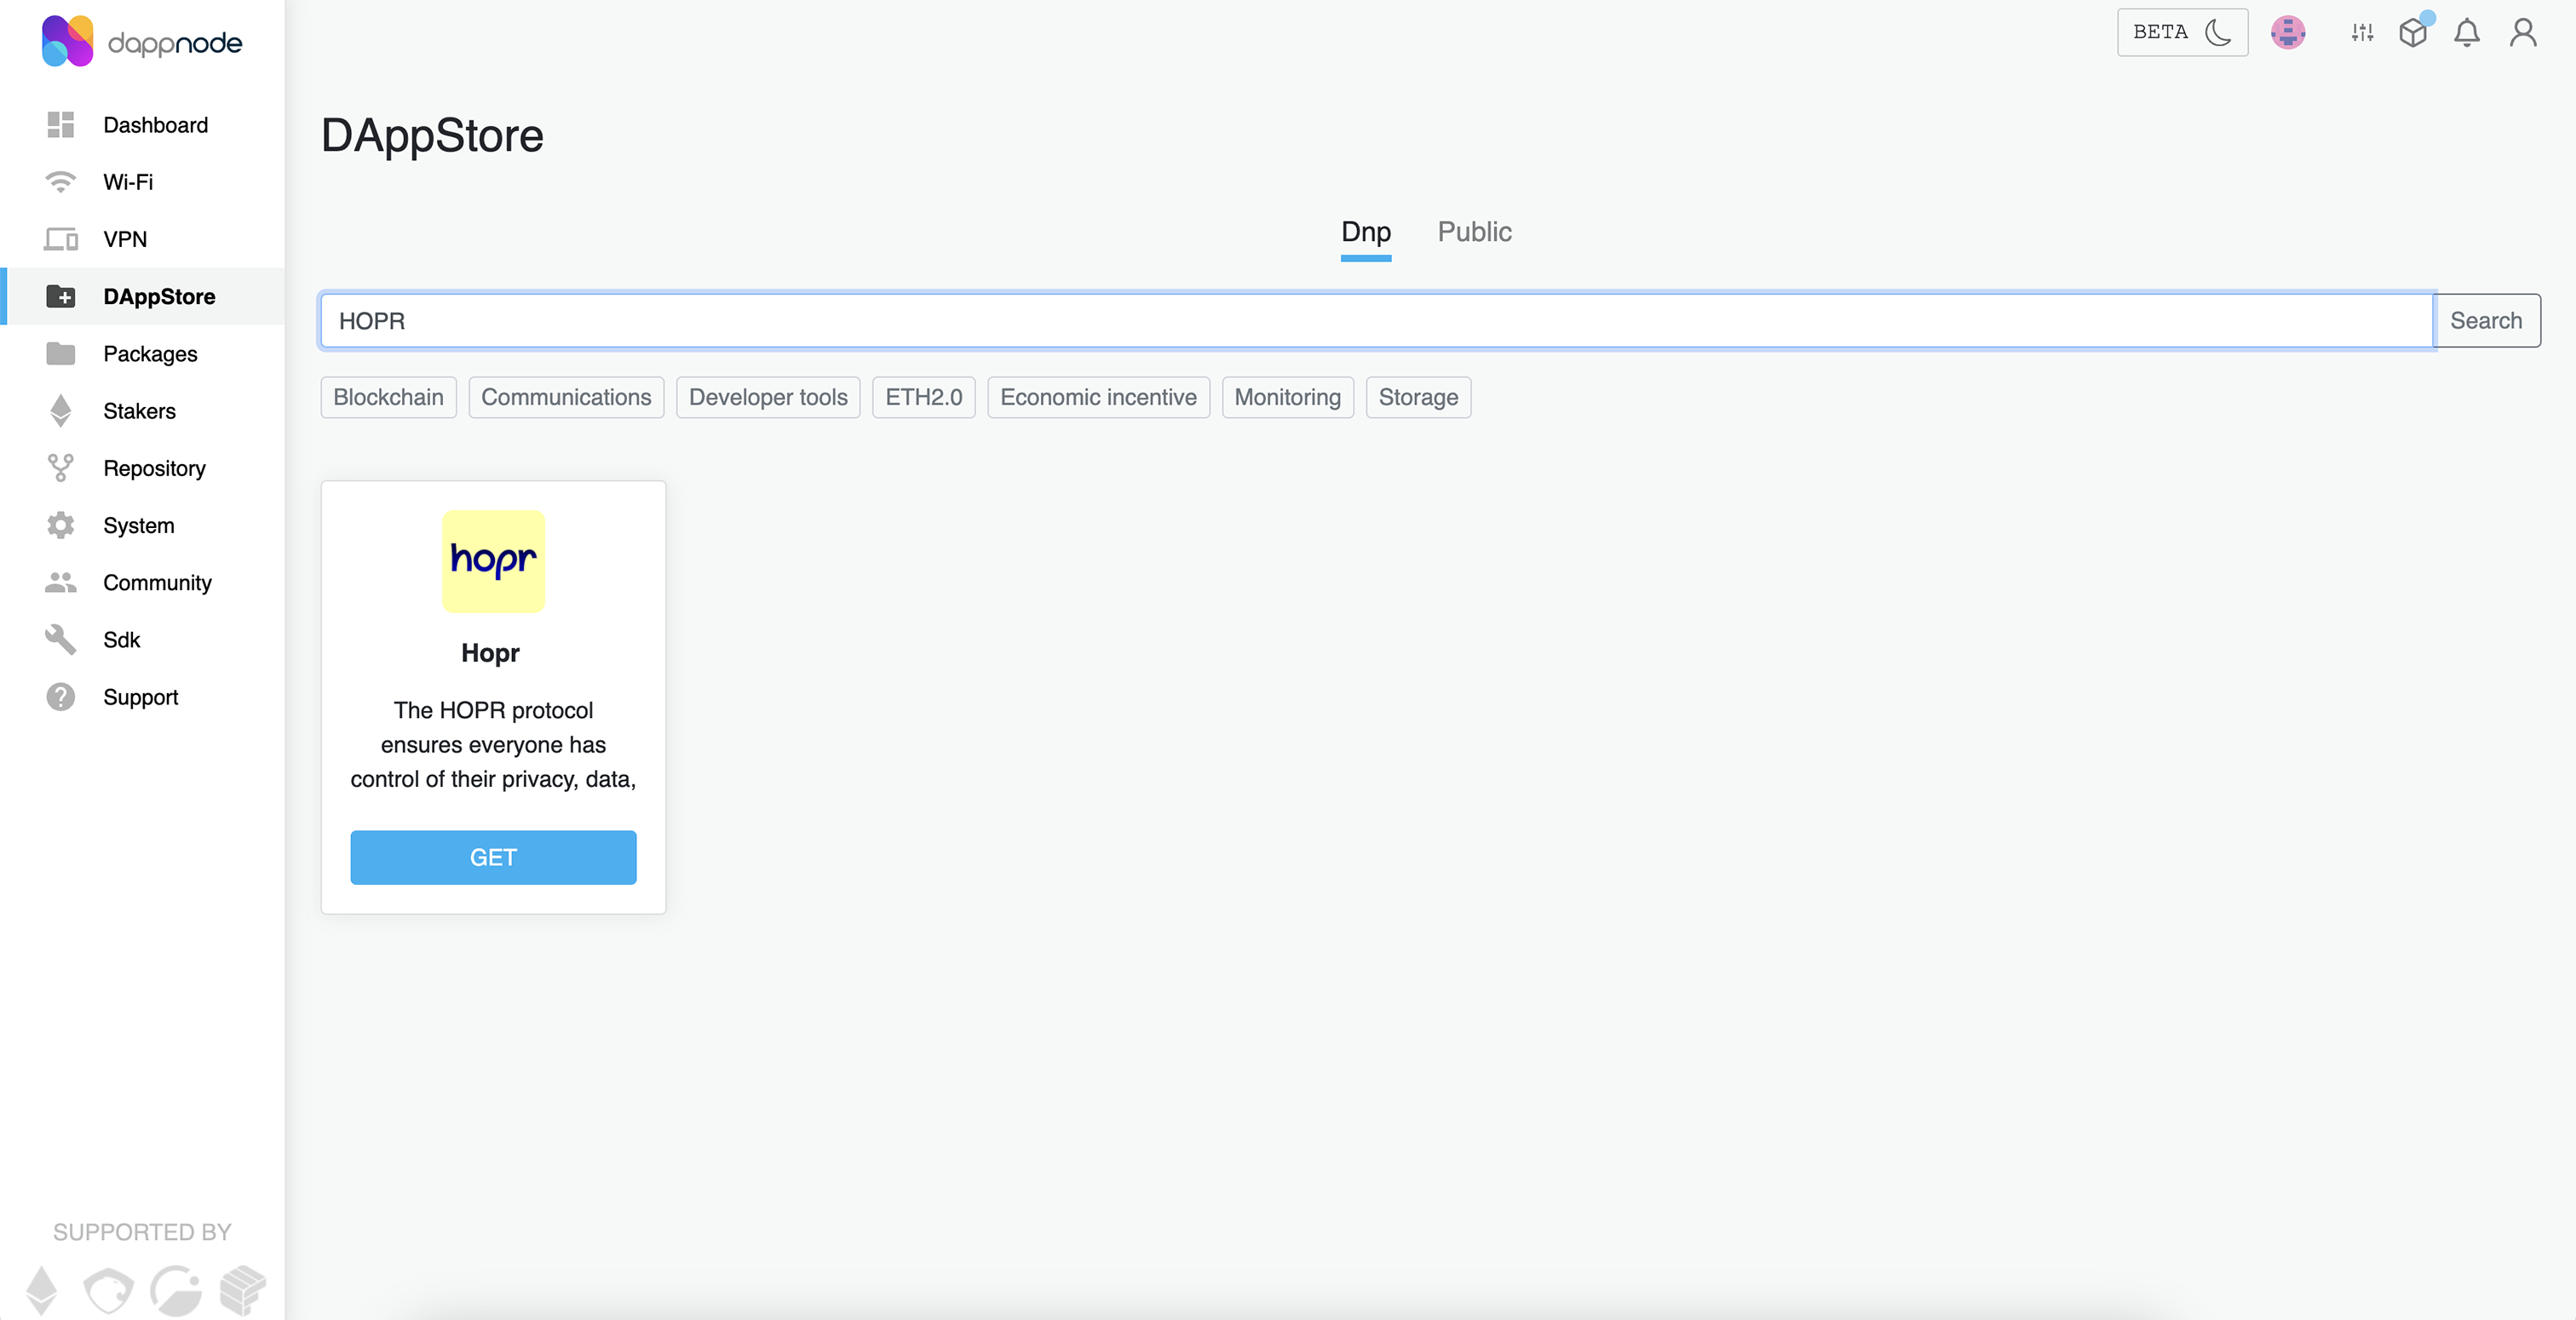
-
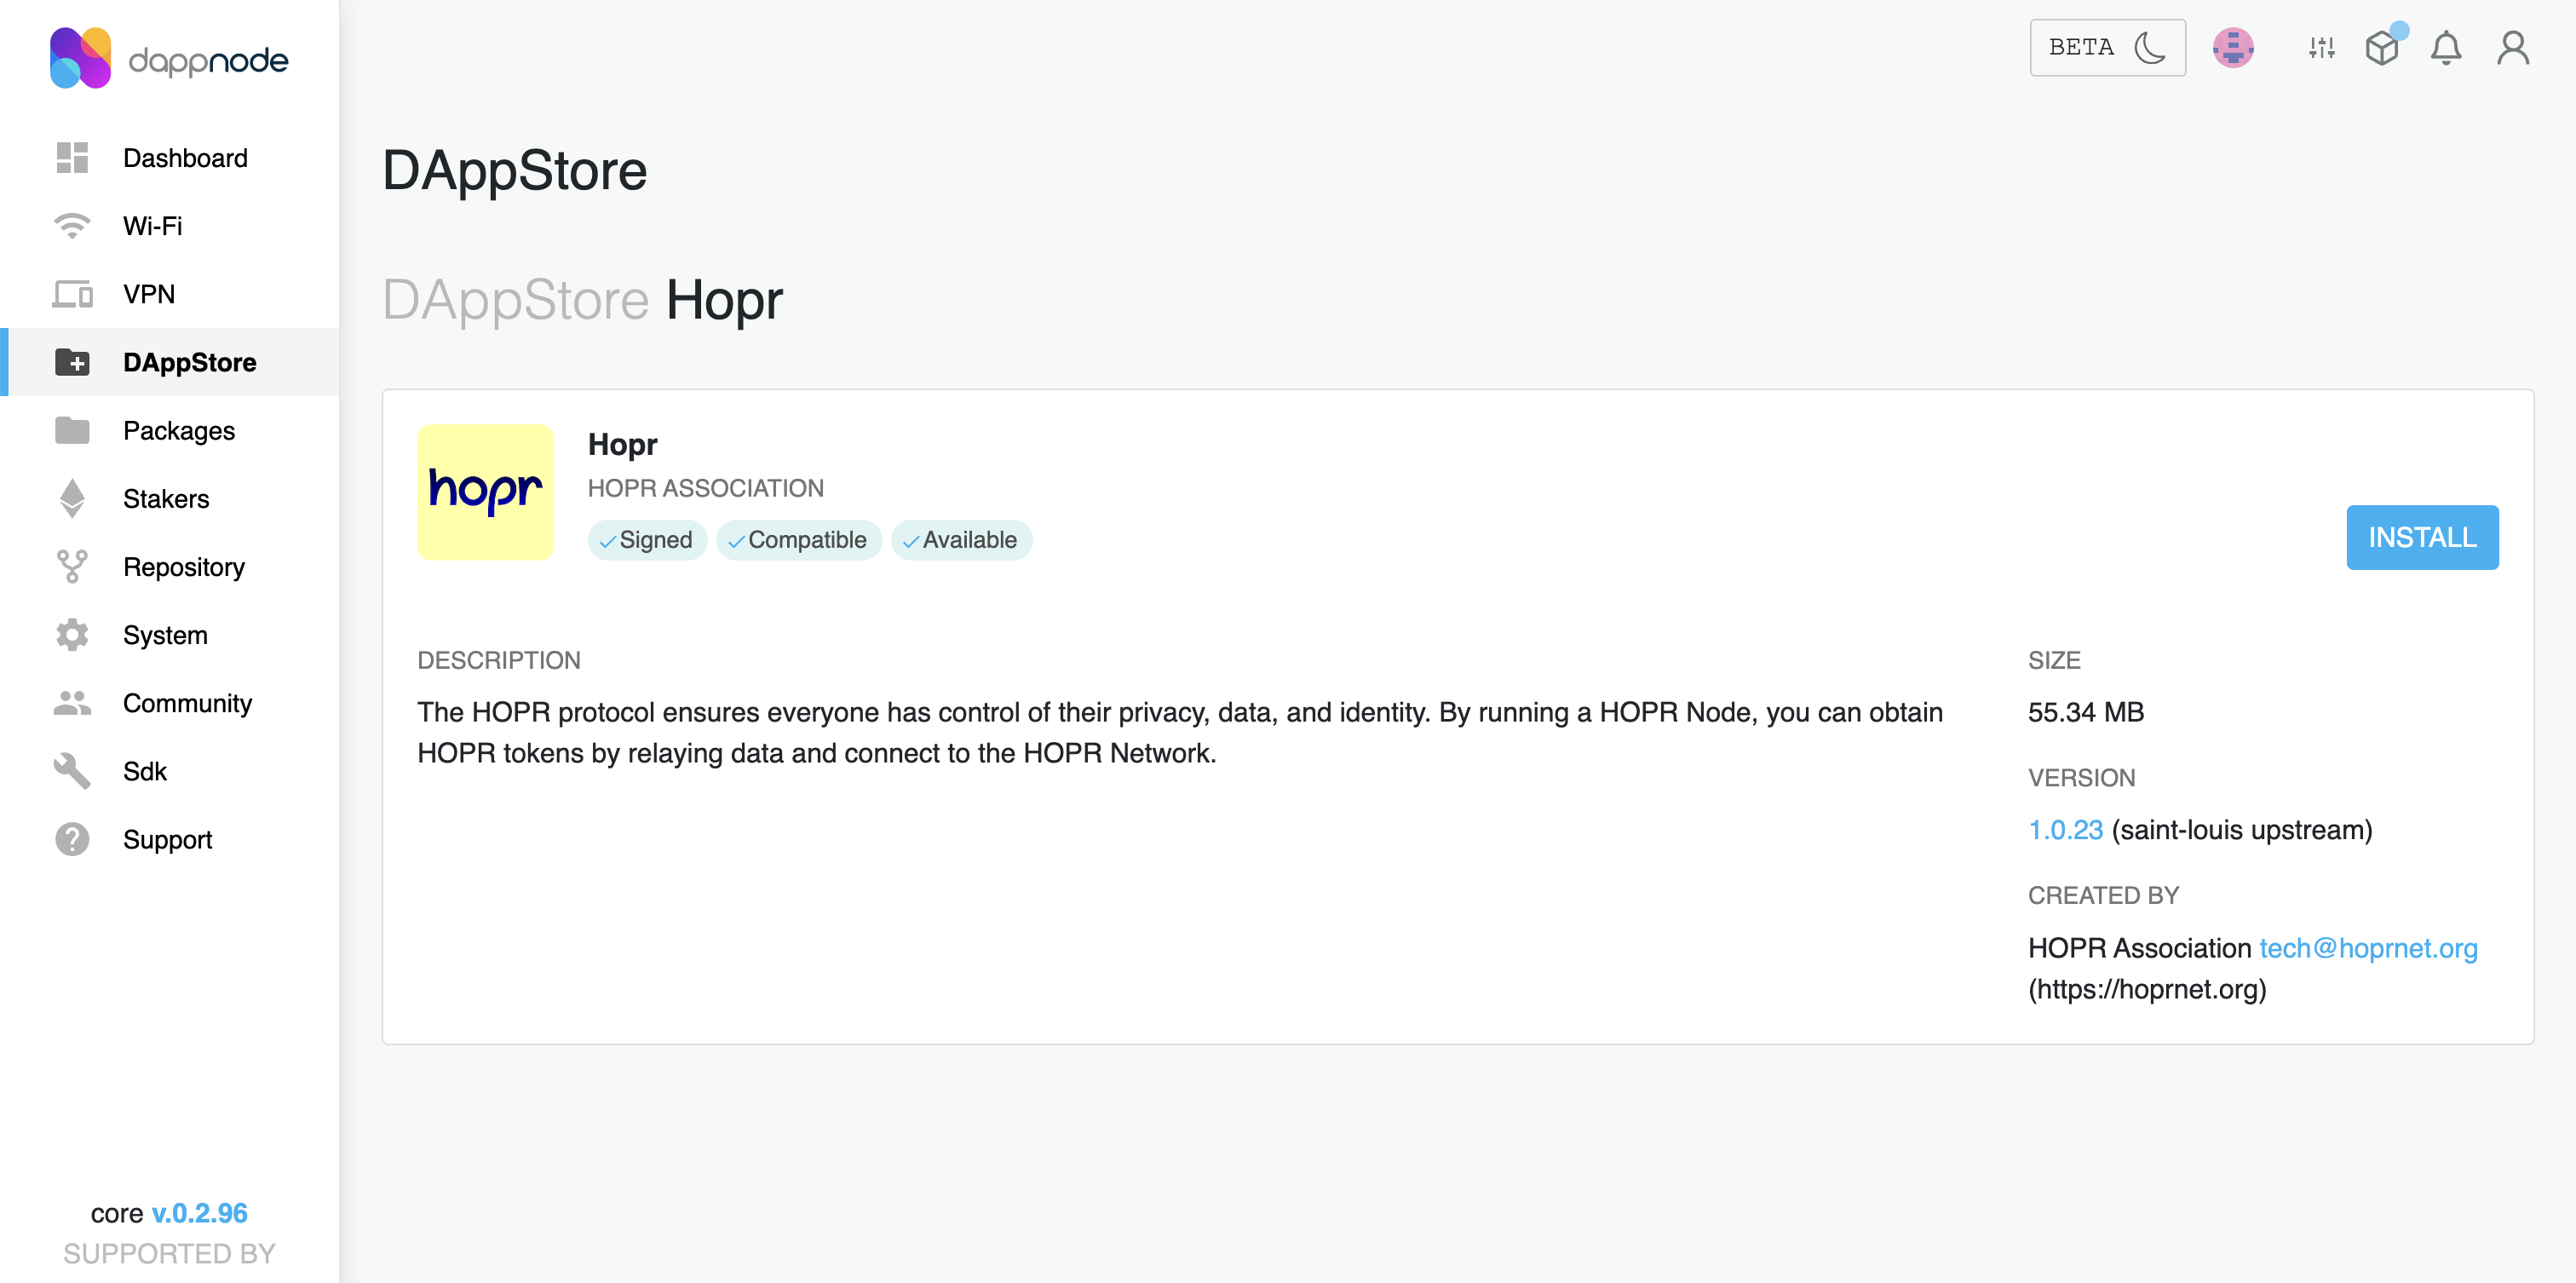
Click GET on the HOPR package to open the package details.
-
Click INSTALL to start the setup wizard.
 tip
tipAlready have HOPR installed? Click UPDATE instead.
Obtain Safe & Module addresses to complete node setup
-
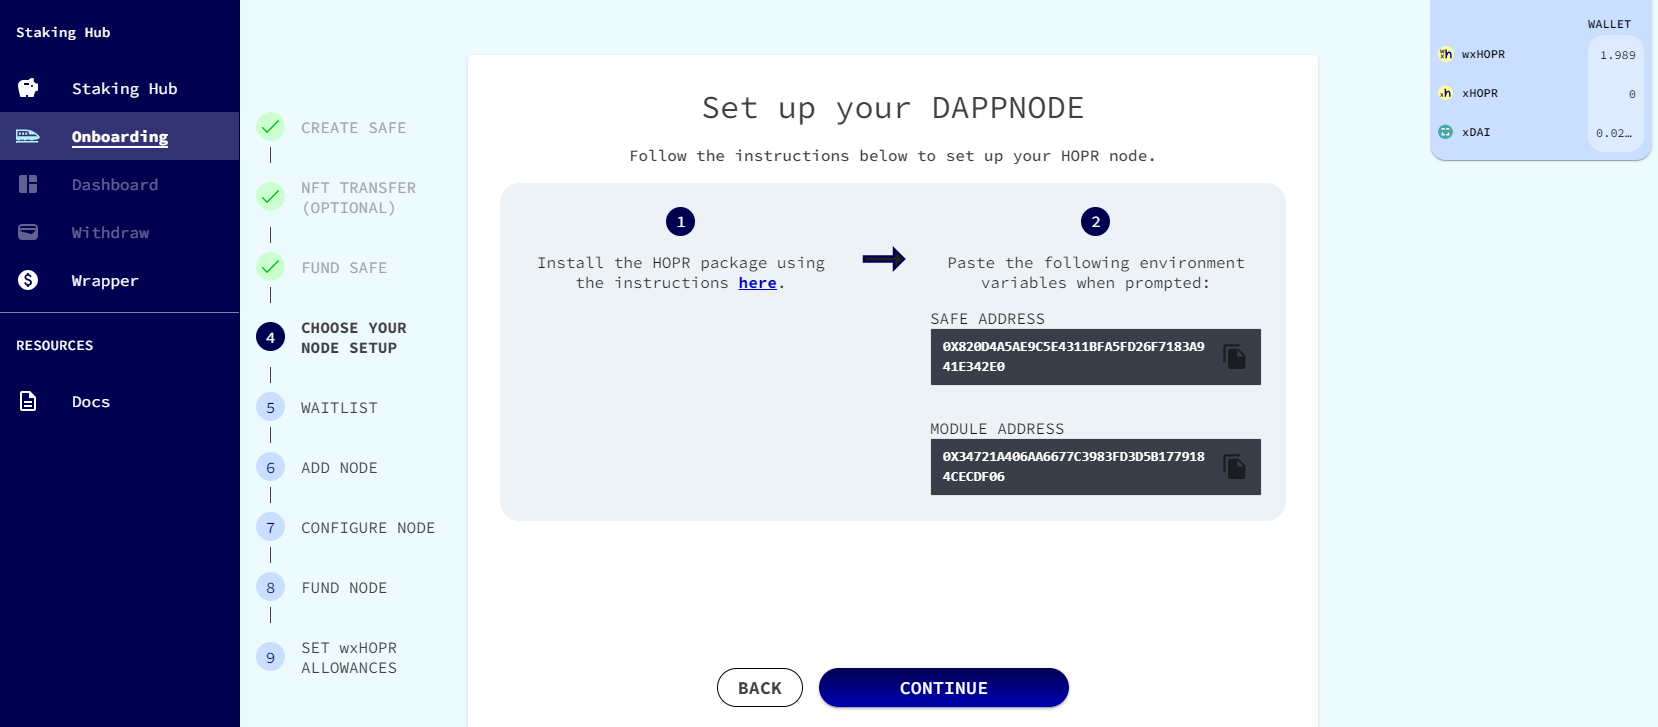
Copy Your Safe and Module Addresses
Go to the onboarding page and copy both your Safe address and Module address.
 tip
tipIf you're re-installing an existing node (not onboarding), you can find your addresses in the
Staking Dashboard, at the top of the staking section. -
Complete installing HOPR package
-
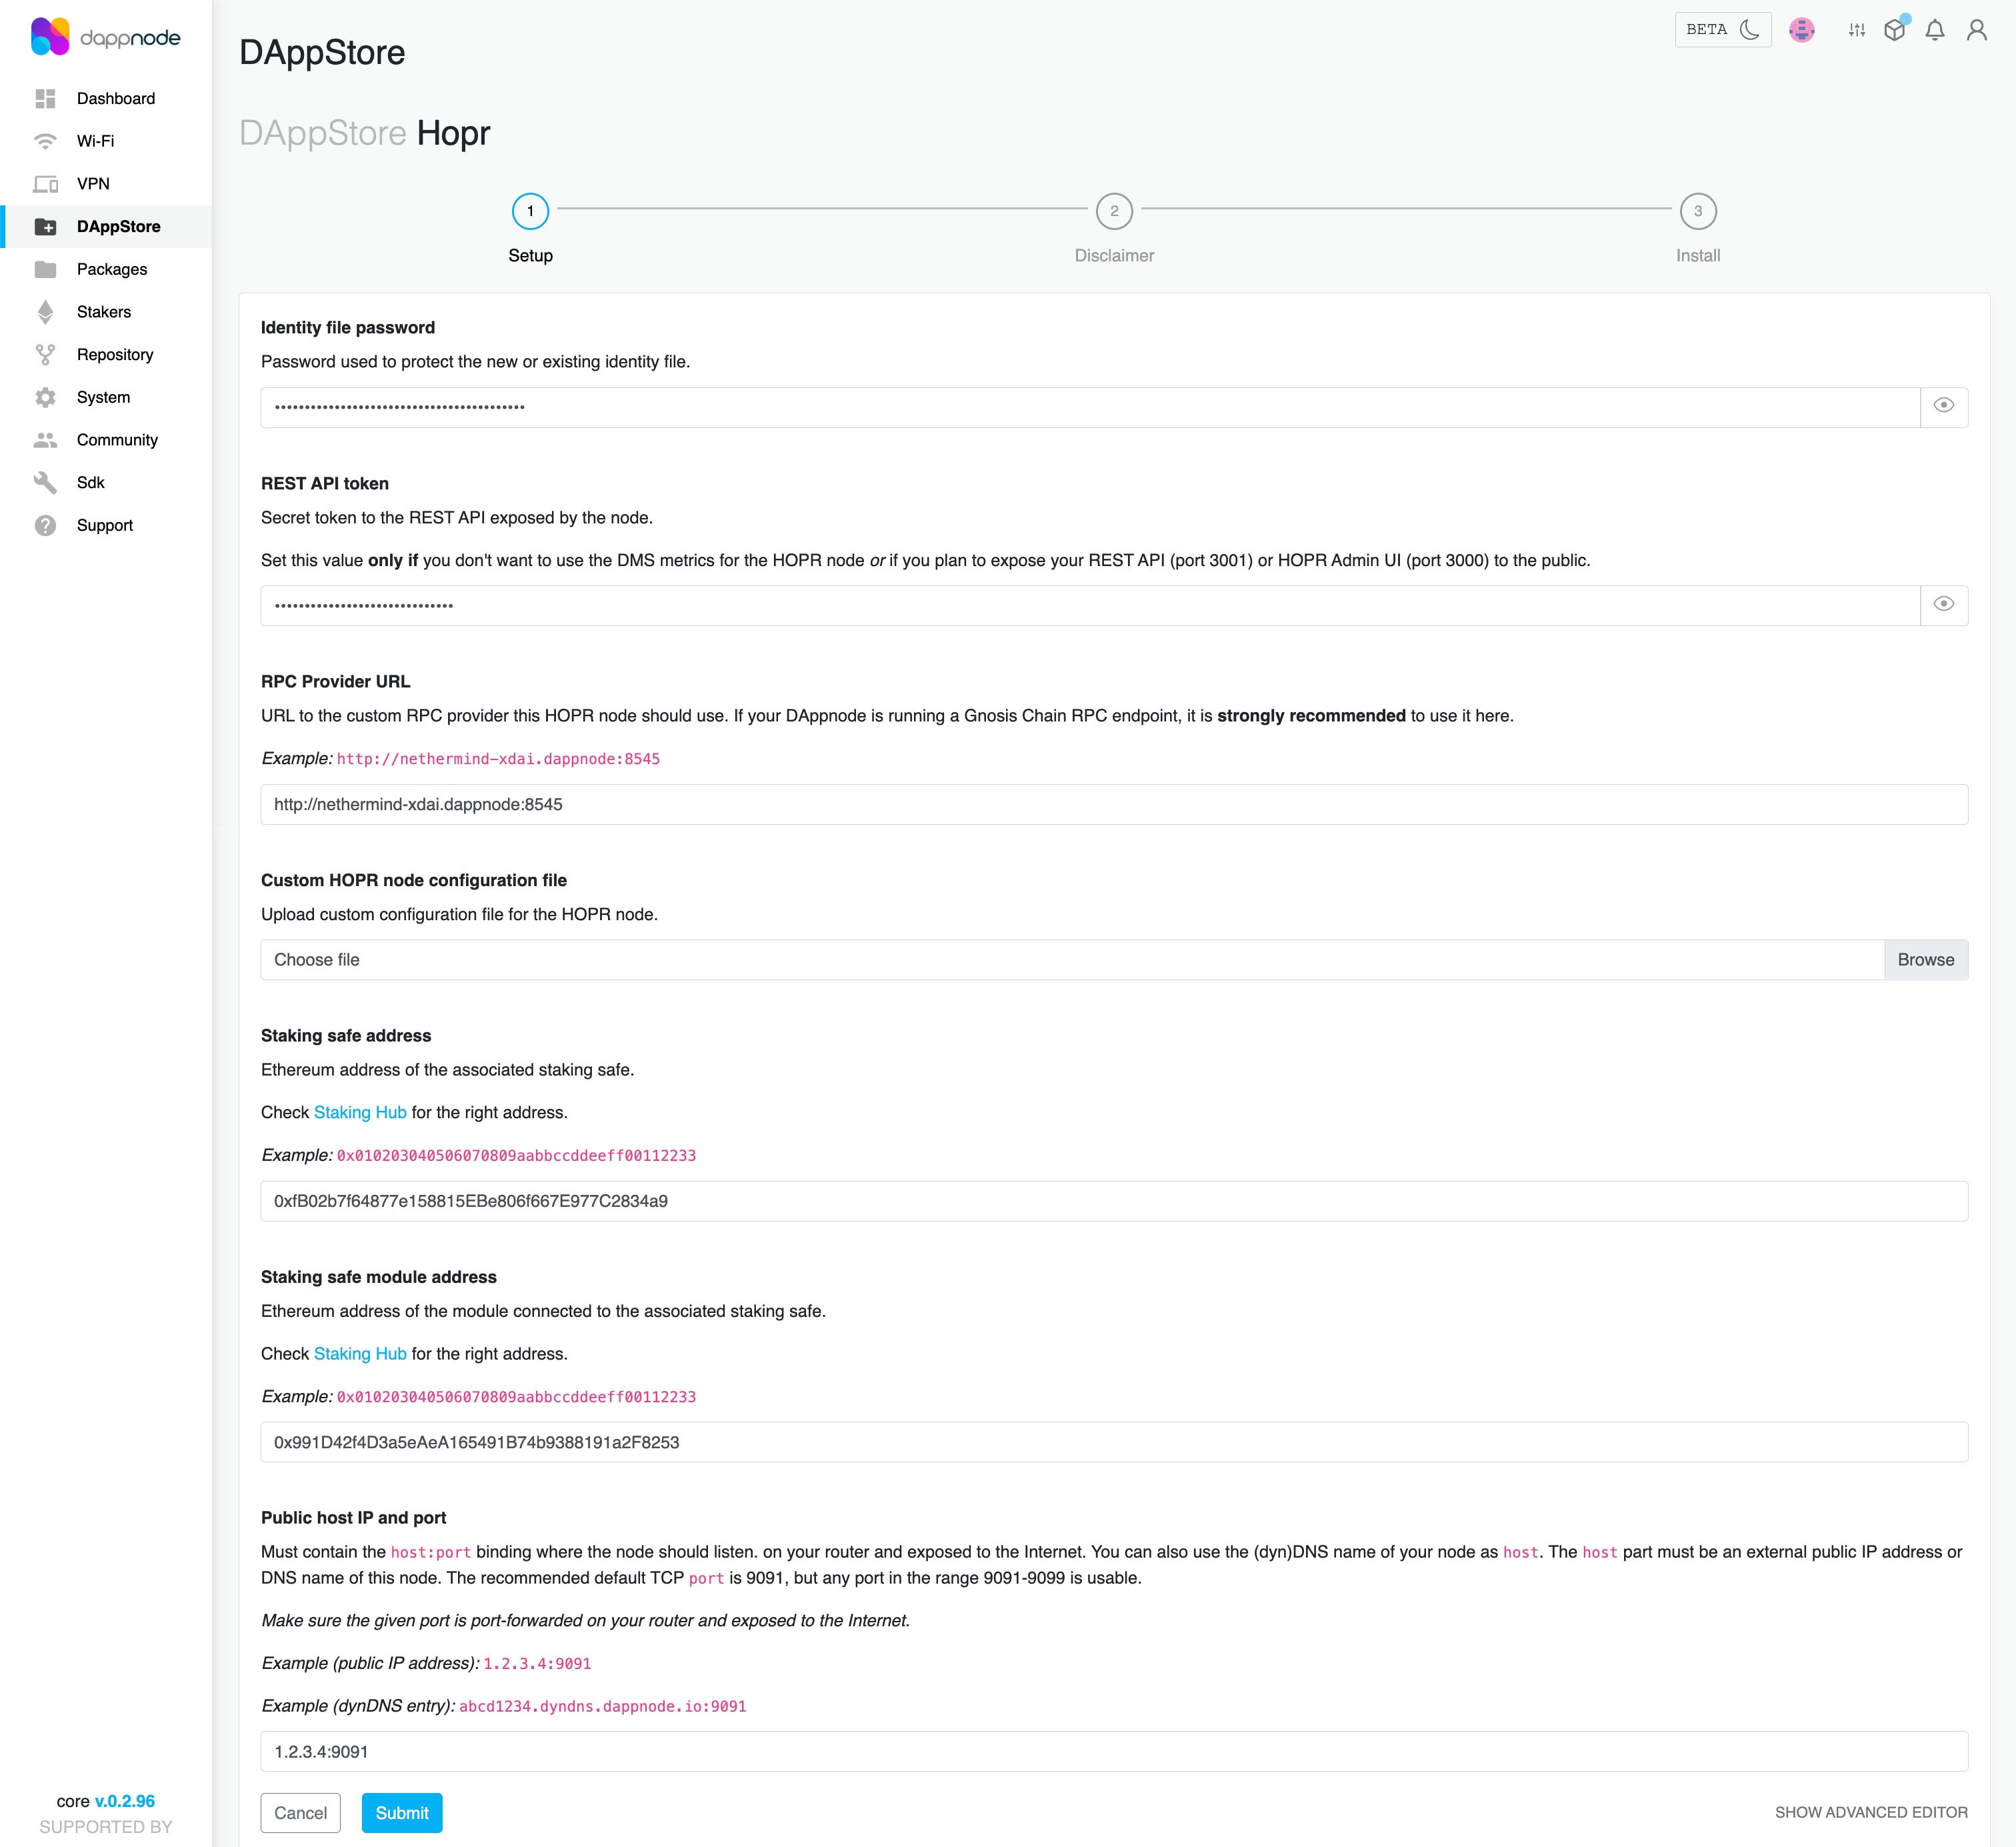
Identity file password
In the Identity file password field, enter the database password, which is required to encrypt your identity file.
Make sure to write down this password, as you will need it if you ever need to restore your node in the future.For guidance on creating a secure database password, please refer to this guide.
-
REST API Token
In the REST API Token field, enter the secret token, which will be used to securely connect to your node.
This ensures that unauthorized users on the same network cannot access your node.For guidance on creating a secret token, please refer to this guide.
-
RPC Provider URL
In the RPC Provider URL field, enter your custom RPC provider. There are several methods to get an RPC provider on the Gnosis chain, please follow this guideline.
If you're using a local RPC endpoint, ensure the URL includes the
http://prefix followed by the IP address orlocalhost. -
Staking Safe Address
In the Staking safe address field, enter the recently copied Safe address.
-
Staking Module Address
In the Staking safe module address field, enter the recently copied Module address.
-
Public Host IP and Port
In the Public host IP and port field, enter your public IP suffixed with the port
:9091.- Locate your external IP address by referring to our FAQ here.
- Refer to the FAQ guide to determine if your IP address meets the requirements.
- Expose port
9091to the public so that other nodes on the HOPR network can connect to your node. For instructions, see our port forwarding guide.
-
Submit to install package
Click Submit. On the next screen, accept the disclaimer, and your HOPR package should start installing immediately.
-
Link your node to your HOPR Safe wallet
-
Access the Admin UI
Once installed, go to Packages and click on HOPR. Inside the HOPR package, click Ui to open the HOPR Admin UI.
-
Connect to the Node
Click CONNECT TO NODE in the top-right corner. In the popup under Node credentials, do the following:
- In the API endpoint field, the default value should be:
http://node.hopr.public.dappnode:3001 - In the API token field, it will be empty by default. If you entered one during setup, enter it here.
- In the API endpoint field, the default value should be:
-
Copy Your Node Address
Click the Connect to the node button. A popup will appear showing your node address, which starts with
0x. Copy this address for the next step. -
Node Funding Note
You don’t need to manually fund your node with xDai tokens. Your node will be funded automatically through the HOPR Staking Hub during onboarding.
Visit the HOPR Staking Hub to register for the waitlist or complete your onboarding if already approved.
What's next?
Once you've completed the onboarding process, ensure your node is fully synced (100%) and that you've opened at least one outgoing payment channel with a random peer.
To start earning rewards through Cover Traffic, follow these steps to meet the necessary requirements:
-
Install the HOPR Admin UI
Install HOPR Admin UI and connect to your node via the HOPR Admin UI.
-
Check if the node is 100% synced
On the
INFOpage, under theNetworksection, confirm that theSync Processis at100%.
If it’s not fully synced yet, you’ll need to wait until the process is complete. -
Open outgoing channel and verify
-
Once synced, go to the
PEERSpage and select a random peer with a connection quality above90%.
Click theOPEN Outgoing Channelicon, enter1as the amount (or another value), and click Open Channel.
You’ll receive a notification once the channel has been opened. -
Navigate to the
CHANNELS: OUTpage to verify that the outgoing payment channel has been successfully opened.
-
Congratulations! Your node should now be fully operational and earning rewards. Be sure to periodically check that your node is performing properly.